SHIFT AND SELECT LEVER SHAFT REASSEMBLY

PROCEDURE
-
INSTALL CONTROL SHAFT COVER OIL SEAL
-
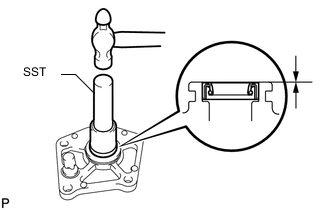
Using SST and a hammer, install a control shaft cover oil seal to the control shaft cover.
- SST
- 09307-12010
Drive in Depth 0 to 0.5 mm (0 to 0.0197 in.) -
Coat a new control shaft cover oil seal lip with MP grease.
-
-
INSTALL SHIFT LEVER DAMPER
-
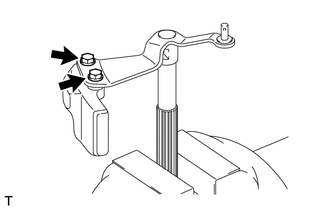
Coat the 2 bolts with sealant.
Sealant Toyota Genuine Adhesive 1344, Three Bond 1344 or equivalent -
Install the shift lever damper to the shift and select lever shaft with the 2 bolts.
- Torque:
- 18.6 N*m { 190 kgf*cm, 14 ft.*lbf }
-
-
INSTALL PIN
-
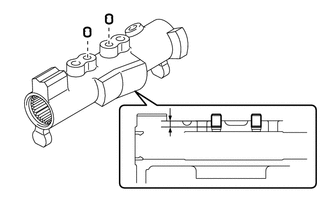
Install the 2 pins to the No. 1 shift lever inner.
Drive in Depth 3.5 to 4.5 mm (0.138 to 0.177 in.)
-
-
INSTALL SHIFT GATE PLATE
-
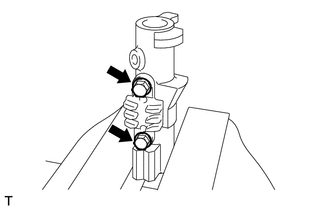
Install the shift gate plate to the No. 1 shift lever inner with the 2 bolts.
- Torque:
- 8.5 N*m { 87 kgf*cm, 75 in.*lbf }
-
-
INSTALL SHIFT AND SELECT LEVER SHAFT
-
Coat the shift and select lever boot lip and shift and select lever shaft with MP grease.
-
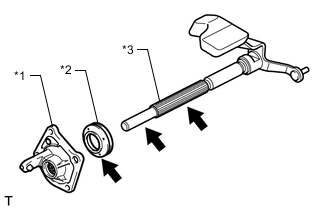
*1 Control Shaft Cover *2 Shift and Select Lever Boot *3 Shift and Select Lever Shaft Install the shift and select lever boot and control shaft cover to the shift and select lever shaft.
-
-
INSTALL NO. 1 SHIFT LEVER INNER
-
Coat the shift interlock plate with MP grease.
-

*1 Shift Interlock Plate *2 No. 1 Shift Lever Inner *3 Shift and Select Lever Shaft Install the No. 1 shift lever inner and shift interlock plate to the shift and select lever shaft.
-
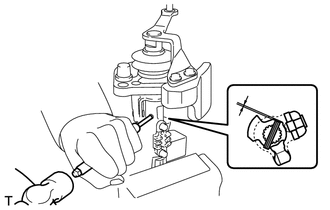
Using a pin punch and hammer, drive a new slotted spring pin to the No. 1 shift lever inner.
Drive in Depth 0.4 to 1.4 mm (0.0157 to 0.0551 in.)
-
-
INSTALL SHIFT AND SELECT LEVER ASSEMBLY
-
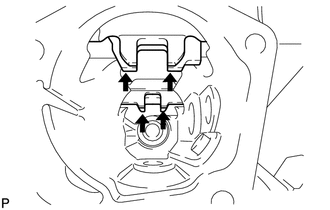
Align the 4 shift fork shafts as shown in the illustration.
-
Clean the seal packing attached on the manual transmission case and control shaft cover using a scraper and wire brush. Then remove the oil with non-residue solvent.
Note
Do not scratch the fitting surface.
-
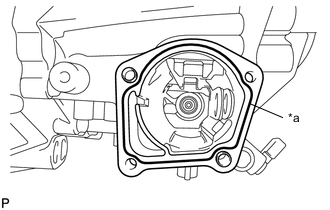
*a FIPG Apply FIPG to the manual transmission case as shown in the illustration.
FIPG Toyota Genuine Seal Packing 1281, Three Bond 1281 or equivalent Note
Install the parts within 10 minutes of application. Otherwise, the packing (FIPG) material must be removed and reapplied.
-
Coat the 4 bolts with sealant.
Sealant Toyota Genuine Adhesive 1344, Three Bond 1344 or equivalent -
Install the shift and select lever assembly to the manual transmission case with the 4 bolts.
- Torque:
- 18.6 N*m { 190 kgf*cm, 14 ft.*lbf }
-
-
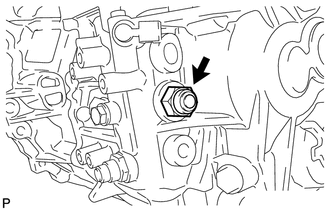
INSTALL SHIFT GATE PIN
-
Coat the shift gate pin with sealant.
Sealant Toyota Genuine Adhesive 1344, Three Bond 1344 or equivalent -
Install the shift gate pin to the manual transmission case.
- Torque:
- 30 N*m { 306 kgf*cm, 22 ft.*lbf }
-
-
INSTALL NO. 2 LOCK BALL ASSEMBLY
-
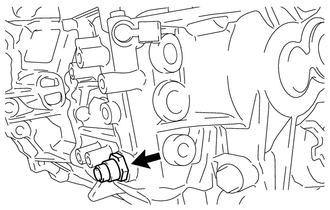
Coat the No. 2 lock ball assembly with sealant.
Sealant Toyota Genuine Adhesive 1344, Three Bond 1344 or equivalent -
Install the No. 2 lock ball assembly to the manual transmission case.
- Torque:
- 29.4 N*m { 300 kgf*cm, 22 ft.*lbf }
-
-
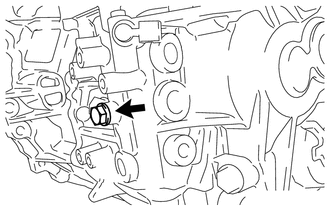
INSTALL NO. 1 LOCK BALL ASSEMBLY
-
Coat the No. 1 lock ball assembly with sealant.
Sealant Toyota Genuine Adhesive 1344, Three Bond 1344 or equivalent -
Install the No. 1 lock ball assembly to the manual transmission case.
- Torque:
- 39.2 N*m { 400 kgf*cm, 29 ft.*lbf }
-
-
INSTALL NEUTRAL POSITION SWITCH
-
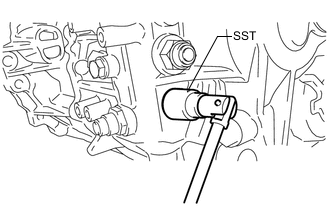
Using SST, install a new gasket and the neutral position switch to the manual transmission case.
- SST
- 09816-30010
- Torque:
- 40.2 N*m { 410 kgf*cm, 30 ft.*lbf }
-
-
INSTALL BACK-UP LIGHT SWITCH ASSEMBLY
-
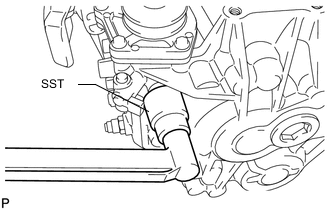
Using SST, install a new gasket and the back-up light switch assembly to the manual transmission case.
- SST
- 09816-30010
- Torque:
- 40.2 N*m { 410 kgf*cm, 30 ft.*lbf }
-
-
INSTALL NO. 1 SELECTING BELL CRANK DUST COVER
-
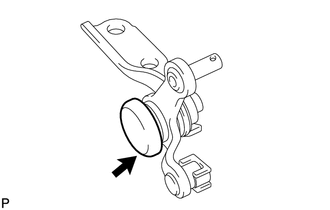
Install the No. 1 selecting bell crank dust cover to the selecting bell crank assembly.
-
-
INSTALL CONTROL SHIFT LEVER BUSHING
-
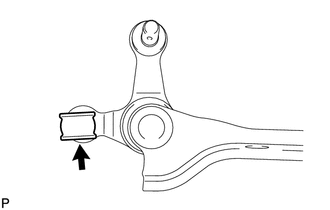
Install the control shift lever bushing to the selecting bell crank assembly.
-
-
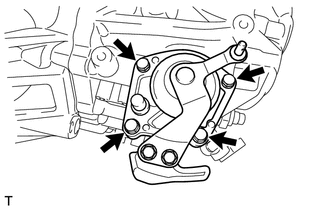
INSTALL SELECTING BELL CRANK ASSEMBLY
-
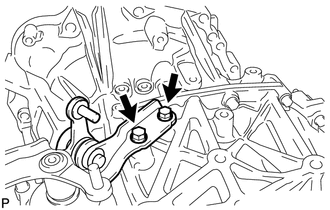
Coat the 2 bolts with sealant.
Sealant Toyota Genuine Adhesive 1344, Three Bond 1344 or equivalent -
Install the selecting bell crank assembly to the manual transmission case with the 2 bolts.
- Torque:
- 20 N*m { 204 kgf*cm, 15 ft.*lbf }
-