ROOF WINDOW FIX GLASS INSTALLATION
PROCEDURE
-
INSTALL NO. 6 SUNSHADE TRIM PROTECTOR
-
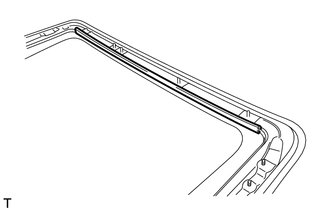
Install the sunshade trim protector.
-
-
INSTALL NO. 2 SLIDING ROOF SEAL
-
Clean the No. 1 roof window glass where the No. 2 sliding roof seal will be installed.
-
Apply Primer M to the No. 1 roof window glass where the No. 2 sliding roof seal will be installed.
Note
Do not apply too much primer.
-
Remove the peeling paper from a new No. 2 sliding roof seal.
-
Install the No. 2 sliding roof seal as shown in the illustration.
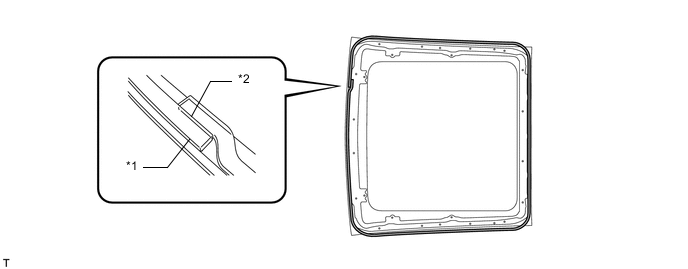
Text in Illustration *1 No. 2 Sliding Roof Seal *2 Make sure there is no gap Note
-
Wait until the primer is dry (approximately 3 minutes) before installing the No. 2 sliding roof seal.
-
Make sure the No. 2 sliding roof seal is securely installed to prevent water leakage.
-
-
-
INSTALL NO. 1 ROOF WINDOW GLASS SUB-ASSEMBLY
-
Set the No. 1 roof window glass on the vehicle while being careful of the guide pins and windshield outside moulding as shown in the illustration.
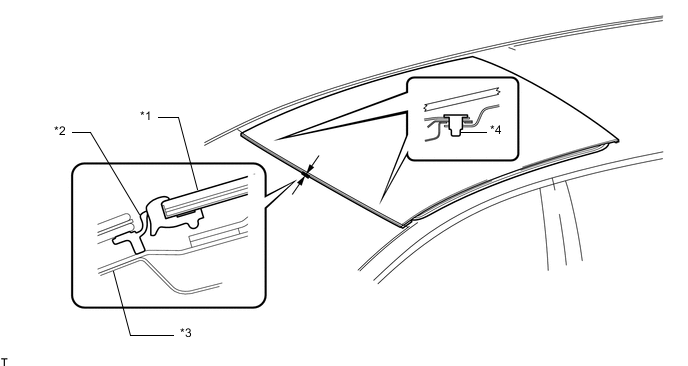
Text in Illustration *1 Roof Window Glass Sub-assembly RH *2 Windshield Outside Moulding *3 Body *4 Guide Pin Note
-
If the No. 1 roof window glass is not as shown in the illustration, remove it and set it on the vehicle again.
-
If shims are present, do not remove or adjust them.
-
-
Install the roof window glass with the 24 nuts.
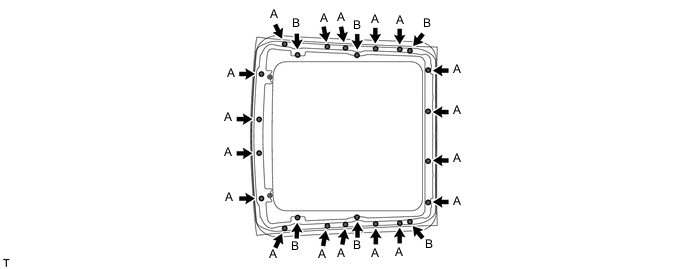
- Torque:
- for nut A
- 9.1 N*m { 93 kgf*cm, 81 in.*lbf }
- for nut B
- 4.0 N*m { 41 kgf*cm, 35 in.*lbf }
-
-
CHECK FOR LEAK
-
Adjust the roof window glass and check for water leaks.
If there are any leaks, readjust the roof window glass.
-
-
INSTALL ROOF HEADLINING ASSEMBLY
-
Install the roof headlining assembly Click here.
-