ROOF SUNSHADE INSTALLATION
PROCEDURE
-
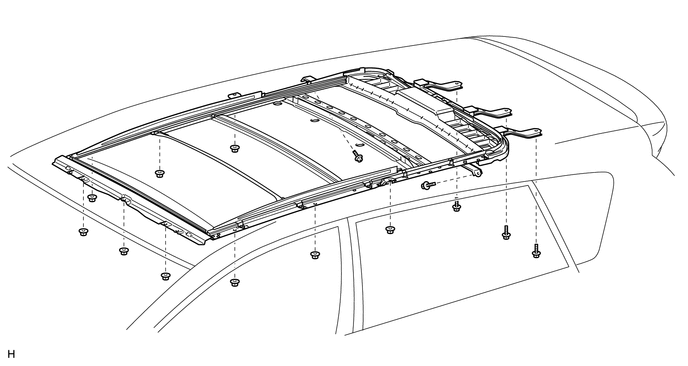
INSTALL SLIDING ROOF HOUSING SUB-ASSEMBLY
-
Temporarily install the sliding roof housing with the 9 nuts and 5 bolts.
-
Tighten the 3 nuts of the No. 2 sliding roof housing brackets.
- Torque:
- 4.0 N*m { 41 kgf*cm, 35 in.*lbf }
-
Tighten the 2 bolts of the No. 1 sliding roof housing brackets.
- Torque:
- 5.5 N*m { 56 kgf*cm, 49 in.*lbf }
-
Tighten the 9 nuts of the sliding roof housing.
- Torque:
- 4.0 N*m { 41 kgf*cm, 35 in.*lbf }
-
Tighten the 5 bolts of the sliding roof housing.
- Torque:
- 5.5 N*m { 56 kgf*cm, 49 in.*lbf }
-
-
INSTALL CONNECTOR WIRE
-
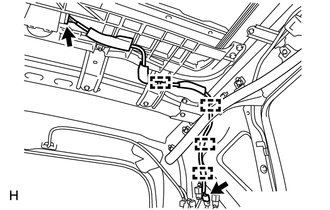
Connect the 2 connectors to install the connector wire.
Note
Be sure to pass the connector wire between the curtain shield airbag and body panel.
-
Attach the 4 connector wire clamps.
-
-
INSTALL WIRE HARNESS CLAMP
-
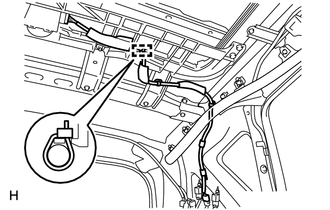
Install a new wire harness clamp.
-
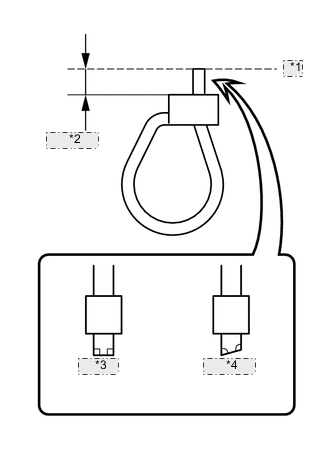
*1 Cut *2 2 to 8 mm *3 Correct *4 Incorrect Clamp the cord securely.
Tech Tips
After clamping the cord, cut off any extra cord so that there is only 2 to 8 mm (0.0788 to 0.315 in.) protruding.
-
-
INSTALL CURTAIN SHIELD AIRBAG ASSEMBLY LH
-
Install the curtain shield airbag assembly LH Click here.
-
-
INSTALL CURTAIN SHIELD AIRBAG ASSEMBLY RH
Tech Tips
Use the same procedure described for the LH side.
-
CONNECT CABLE TO NEGATIVE BATTERY TERMINAL
Note
When disconnecting the cable, some systems need to be initialized after the cable is reconnected Click here.
-
CHECK SRS WARNING LIGHT
-
Check the SRS warning light Click here.
-