HEATER ASSEMBLY(w/ Combustion Type Power Heater) INSTALLATION
PROCEDURE
-
INSTALL HEATER WITH EXHAUST PIPE ASSEMBLY
-
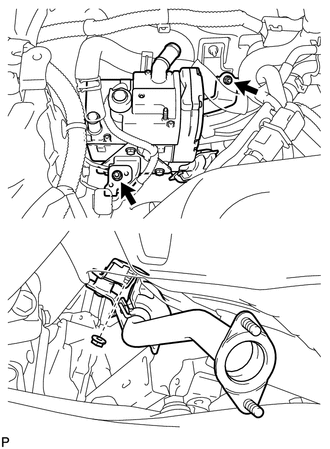
Install the heater with exhaust pipe assembly with the 3 nuts.
- Torque:
- 7.5 N*m { 77 kgf*cm, 66 in.*lbf }
-
Attach the clamp.
-
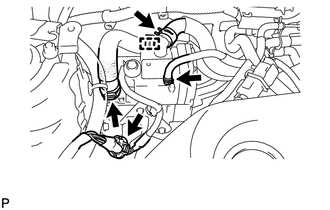
Connect the 3 hoses.
-
Using pliers, grip the claws of the clips and slide the 3 clips.
-
Connect the connector.
-
-
INSTALL NO. 1 EXHAUST PIPE SUB-ASSEMBLY
-
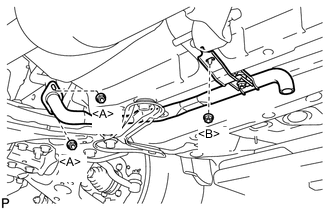
Install the No. 1 exhaust pipe sub-assembly with the 2 nuts labeled <A>.
- Torque:
- 7.5 N*m { 77 kgf*cm, 66 in.*lbf }
-
Install the nut labeled <B>.
- Torque:
- 7.5 N*m { 77 kgf*cm, 66 in.*lbf }
-
-
INSTALL AIR DUCT
-
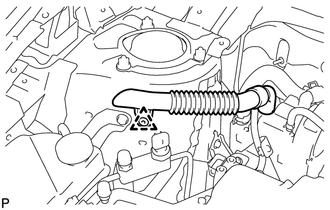
Install the air duct with the clip.
-
-
INSTALL OUTER COWL TOP PANEL
-
INSTALL DIFFERENTIAL PRESSURE SENSOR ASSEMBLY (for DPF)
-
INSTALL WINDSHIELD WIPER MOTOR AND LINK ASSEMBLY
-
INSTALL COWL TOP VENTILATOR LOUVER LH
-
INSTALL COWL TOP VENTILATOR LOUVER RH
-
INSTALL HOOD TO COWL TOP SEAL
-
INSTALL FRONT WIPER ARM AND BLADE ASSEMBLY LH
-
INSTALL FRONT WIPER ARM AND BLADE ASSEMBLY RH
-
INSTALL FRONT WIPER ARM HEAD CAP
-
INSTALL NO. 1 ENGINE COVER