REAR AXLE BEAM REMOVAL
PROCEDURE
-
REMOVE PARKING BRAKE ASSEMBLY
-
Remove the parking brake assembly Click here.
-
-
REMOVE REAR FLOOR SIDE MEMBER COVER LH
-
REMOVE REAR FLOOR SIDE MEMBER COVER RH
-
REMOVE REAR FLOOR SIDE MEMBER BRACE SUB-ASSEMBLY
-
REMOVE REAR HEIGHT CONTROL SENSOR SUB-ASSEMBLY RH (w/ HID Headlight)
-
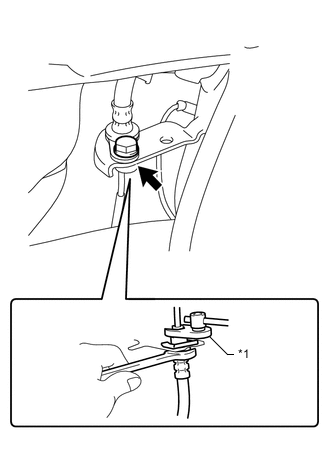
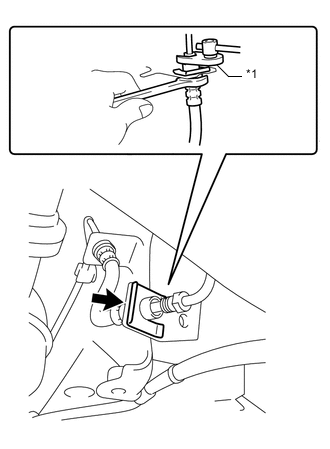
DISCONNECT SKID CONTROL SENSOR WIRE (for LH Side)
-
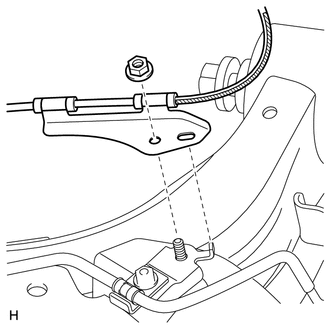
Remove the nut and sensor clamp.
-
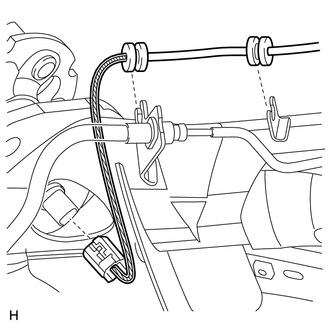
Detach the 2 grommets.
-
Disconnect the skid control sensor wire connector from the skid control sensor.
-
-
DISCONNECT SKID CONTROL SENSOR WIRE (for RH Side)
Tech Tips
Perform the same procedure as for the LH side.
-
DRAIN BRAKE FLUID
Note
Immediately wash off any brake fluid that comes into contact with any painted surfaces.
-
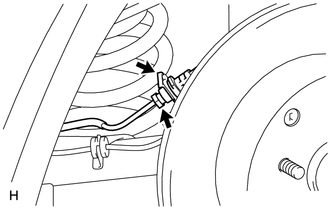
DISCONNECT REAR FLEXIBLE HOSE LH
-
*1 Union Nut Wrench Using a union nut wrench, disconnect the brake tube while holding the rear flexible hose LH with a wrench.
Note
-
Do not bend or damage the brake tube.
-
Do not allow any foreign matter such as dirt or dust to enter the brake tube from the connection points.
-
-
Remove the bolt and disconnect the rear flexible hose LH.
-
-
DISCONNECT REAR FLEXIBLE HOSE RH
-
*1 Union Nut Wrench Using a union nut wrench, disconnect the brake tube while holding the rear flexible hose RH with a wrench.
Note
-
Do not bend or damage the brake tube.
-
Do not allow any foreign matter such as dirt or dust to enter the brake tube from the connection points.
-
-
Remove the clip and disconnect the rear flexible hose RH.
-
-
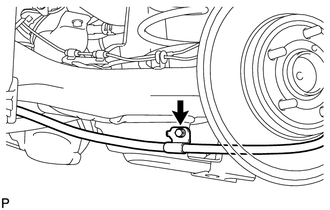
DISCONNECT REAR BRAKE FLEXIBLE HOSE (for LH Side)
-
Using a union nut wrench, disconnect the brake tube while holding the rear brake flexible hose with a wrench.
Note
-
Do not bend or damage the brake tube.
-
Do not allow any foreign matter such as dirt or dust to enter the brake tube from the connection points.
-
-
Remove the clip and disconnect the rear brake flexible hose.
-
-
DISCONNECT REAR BRAKE FLEXIBLE HOSE (for RH Side)
Tech Tips
Perform the same procedure as for the LH side.
-
REMOVE NO. 4 REAR BRAKE TUBE
-
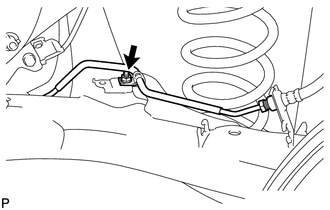
Remove the nut and No. 4 rear brake tube from the rear axle beam assembly.
-
-
REMOVE NO. 3 REAR BRAKE TUBE
Tech Tips
Perform the same procedure as for the No. 4 rear brake tube.
-
DISCONNECT NO. 3 PARKING BRAKE CABLE ASSEMBLY
-
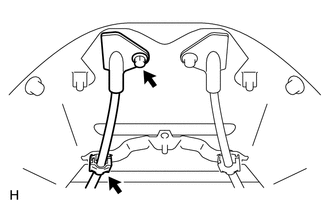
Remove the bolt and casing cap from the body.
-
Detach the clamp.
-
Remove the bolt and disconnect the parking brake cable.
-
-
DISCONNECT NO. 2 PARKING BRAKE CABLE ASSEMBLY
Tech Tips
Perform the same procedure as for the No. 3 parking brake cable assembly.
-
REMOVE REAR AXLE HUB AND BEARING ASSEMBLY LH
-
REMOVE REAR DISC BRAKE DUST COVER SUB-ASSEMBLY LH
-
REMOVE REAR AXLE HUB AND BEARING ASSEMBLY RH
Tech Tips
Perform the same procedure as for the LH side.
-
REMOVE REAR DISC BRAKE DUST COVER SUB-ASSEMBLY RH
-
LOOSEN REAR AXLE BEAM ASSEMBLY
-
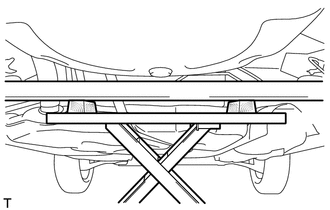
Support the rear axle beam assembly using an engine lift and 2 wooden blocks as shown in the illustration.
Tech Tips
Support the rear shock absorber assembly LH at a position where it compresses by approximately 20 to 30 mm (0.787 to 1.18 in.).
-
*1 for LH Side: *2 for RH Side: Loosen the 2 bolts of the rear axle beam assembly.
Note
Do not remove the bolts.
-
-
DISCONNECT REAR SHOCK ABSORBER ASSEMBLY LH
-

Remove the bolt while holding the nut and disconnect the rear shock absorber LH.
Note
Do not turn the nut.
-
-
DISCONNECT REAR SHOCK ABSORBER ASSEMBLY RH
Tech Tips
Perform the same procedure as for the LH side.
-
REMOVE REAR COIL SPRING LH
-
REMOVE REAR COIL SPRING UPPER INSULATOR LH
-
REMOVE REAR COIL SPRING LOWER INSULATOR LH
-
REMOVE REAR COIL SPRING RH
Tech Tips
Perform the same procedure as for the LH side.
-
REMOVE REAR COIL SPRING UPPER INSULATOR RH
-
REMOVE REAR COIL SPRING LOWER INSULATOR RH
-
REMOVE REAR AXLE BEAM ASSEMBLY
-
*1 for LH Side: *2 for RH Side: Remove the 2 bolts and the rear axle beam assembly.
-
-
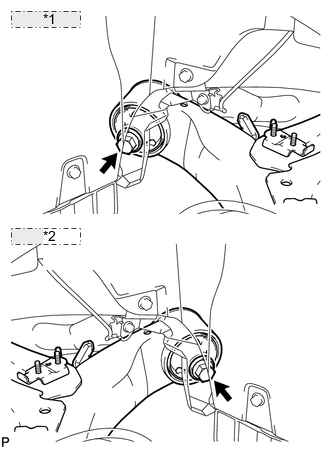
REMOVE REAR AXLE CARRIER BUSHING LH
-
Text in Illustration *1 Matchmark Put a matchmark on the rear axle beam assembly so that the mark aligns with the arrow mark on the rear axle carrier bushing LH.
-
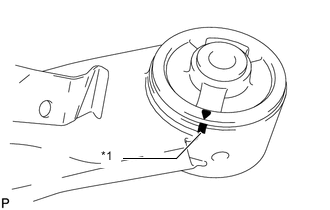
Using a chisel and hammer, bend the 2 ribs on the bushing.
Text in Illustration *1 Hold *2 Turn *3 Rib 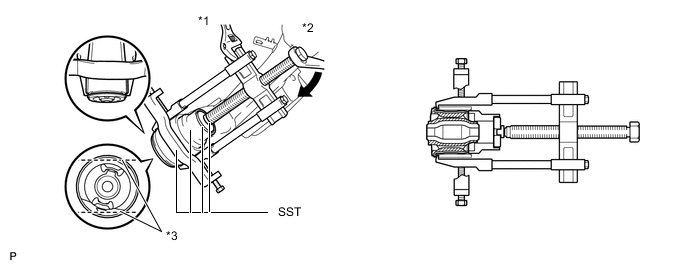
Note
When removing the bushing, do not erase the matchmark on the rear axle beam assembly.
-
Using SST, remove the bushing LH from the rear axle beam assembly.
- SST
- 09950-40011 ( 09951-04020, 09952-04010, 09953-04030, 09954-04020, 09955-04051, 09957-04010, 09958-04011 )
- 09710-26011 ( 09710-05061 )
- 09950-60010 ( 09951-00530 )
-
-
REMOVE REAR AXLE CARRIER BUSHING RH
Tech Tips
Perform the same procedure as for the LH side.