REAR COIL SPRING REMOVAL
PROCEDURE
-
REMOVE REAR WHEELS
-
REMOVE REAR HEIGHT CONTROL SENSOR SUB-ASSEMBLY RH (w/ HID Headlight)
-
REMOVE REAR FLOOR SIDE MEMBER COVER LH
-
REMOVE REAR FLOOR SIDE MEMBER COVER RH
-
REMOVE REAR FLOOR SIDE MEMBER BRACE SUB-ASSEMBLY
-
DISCONNECT SKID CONTROL SENSOR WIRE (for LH Side)
-
DISCONNECT SKID CONTROL SENSOR WIRE (for RH Side)
-
LOOSEN REAR AXLE BEAM ASSEMBLY
-
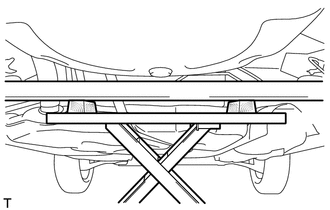
Support the rear axle beam assembly using an engine lift and 2 wooden blocks as shown in the illustration.
-
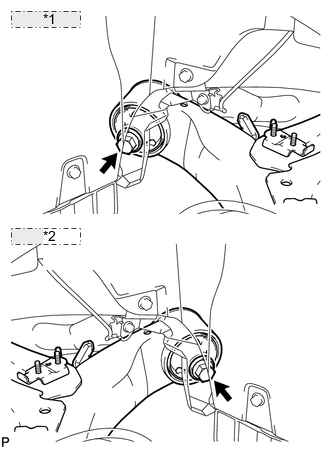
*1 for LH Side: *2 for RH Side: Loosen the 2 bolts.
Note
Do not remove the bolts.
-
-
DISCONNECT REAR SHOCK ABSORBER ASSEMBLY LH
-
DISCONNECT REAR SHOCK ABSORBER ASSEMBLY RH
-
REMOVE REAR COIL SPRING LH
-
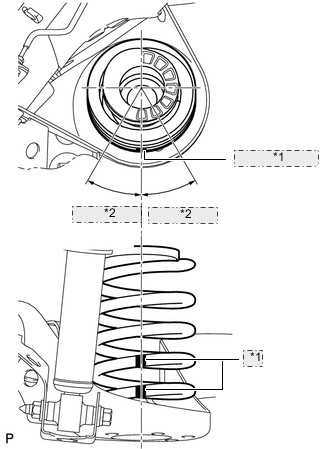
*1 Identification Mark *2 30° or less Slowly lower the engine lift and remove the rear coil spring.
Note
-
When reusing the rear coil spring, make sure that the identification marks are at the position shown in the illustration.
-
If the identification marks have come off, apply new paint at the positions shown in the illustration.
-
When moving the rear axle beam assembly beyond full rebound, make sure that the beam is not out of position for more than 10 minutes.
-
-
-
REMOVE REAR COIL SPRING UPPER INSULATOR LH
-
REMOVE REAR COIL SPRING LOWER INSULATOR LH
-
REMOVE REAR COIL SPRING RH
Tech Tips
Use the same procedure described for the LH side.
-
REMOVE REAR COIL SPRING UPPER INSULATOR RH
-
REMOVE REAR COIL SPRING LOWER INSULATOR RH