SHIFT AND SELECT LEVER SHAFT DISASSEMBLY
PROCEDURE
-
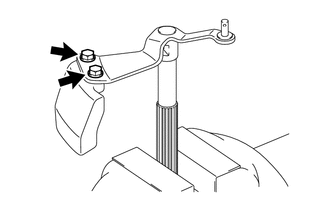
REMOVE SELECTING BELLCRANK ASSEMBLY
-
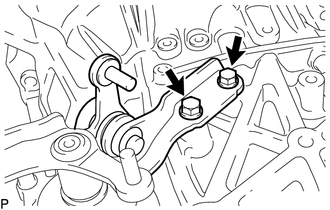
Remove the 2 bolts and selecting bellcrank from the manual transmission case.
-
-
REMOVE CONTROL SHIFT LEVER BUSHING
-

Remove the control shift lever bushing from the selecting bellcrank.
-
-
REMOVE NO. 1 SELECTING BELLCRANK DUST COVER
-

Remove the No. 1 selecting bellcrank dust cover from the selecting bellcrank.
-
-
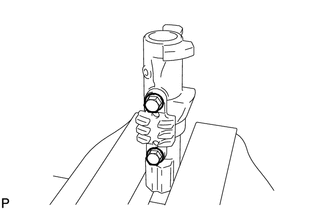
REMOVE BACK-UP LIGHT SWITCH ASSEMBLY
-
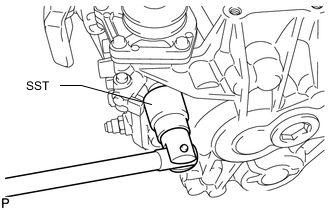
Using SST, remove the back-up light switch and gasket.
- SST
- 09816-30010
-
-
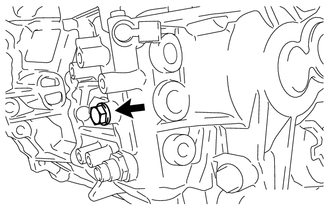
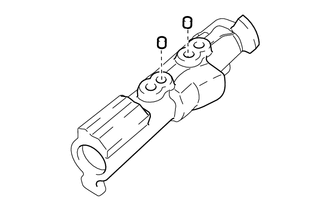
REMOVE NO. 1 LOCK BALL ASSEMBLY
-
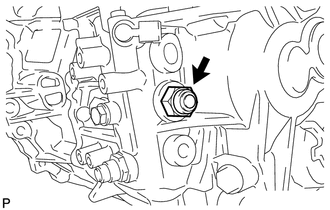
Remove the No. 1 lock ball from the manual transmission case.
-
-
REMOVE NEUTRAL POSITION SWITCH (w/ Stop And Start System)
-
REMOVE NO. 2 LOCK BALL ASSEMBLY
-
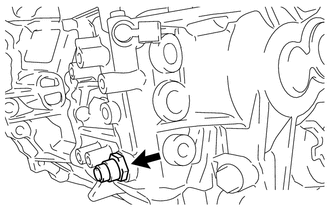
Remove the No. 2 lock ball from the manual transmission case.
-
-
REMOVE SHIFT GATE PIN
-
Remove the shift gate pin from the manual transmission case.
-
-
REMOVE SHIFT AND SELECT LEVER ASSEMBLY
-

Remove the 4 bolts and shift and select lever assembly from the manual transmission case.
-
-
REMOVE INNER NO. 1 SHIFT LEVER
-
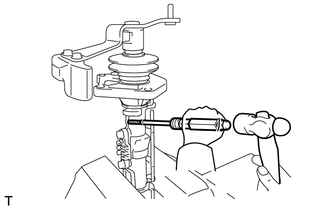
Using a 5 mm pin punch and hammer, remove the slotted spring pin from the inner No. 1 shift lever.
-
Remove the inner No. 1 shift lever and shift interlock plate from the shift and select lever shaft.
-
-
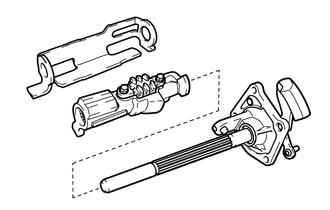
REMOVE SHIFT AND SELECT LEVER SHAFT
-
Remove the control shaft cover and shift and select lever boot from the shift and select lever shaft.
-
-
REMOVE SHIFT GATE PLATE
-
Remove the 2 bolts and shift gate plate from the inner No. 1 shift lever.
-
-
REMOVE PIN
-
Remove the 2 pins.
-
-
REMOVE SHIFT LEVER DAMPER
-
Remove the 2 bolts and shift lever damper from the shift and select lever shaft.
-
-
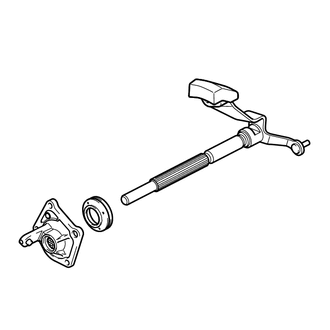
REMOVE CONTROL SHAFT COVER OIL SEAL
-

Using a screwdriver, remove the control shaft cover oil seal from the control shaft cover.
-