OIL PAN REMOVAL
PROCEDURE
-
REMOVE NO. 1 ENGINE UNDER COVER
-
REMOVE REAR ENGINE UNDER COVER LH
-
REMOVE TRANSAXLE OIL (CVT) PAN SUB-ASSEMBLY
-
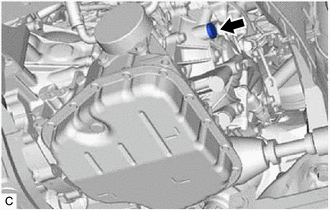
Remove the refill plug and gasket from the continuously variable transaxle assembly.
-
Using a 6 mm hexagon socket wrench, remove the overflow plug and gasket from the continuously variable transaxle assembly.
-
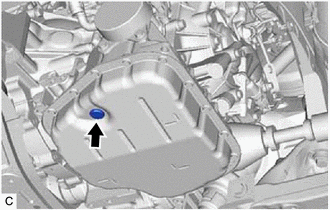
Text in Illustration *1 No. 1 Transmission Oil Filler Tube Using a 6 mm hexagon socket wrench, remove the No. 1 transmission oil filler tube from the transaxle oil (CVT) pan sub-assembly.
Tech Tips
Removing the No. 1 transmission oil filler tube will drain all oil in the transaxle oil (CVT) pan sub-assembly.
-
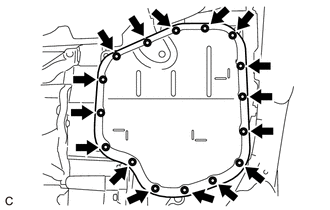
Remove the 16 bolts, transaxle oil (CVT) pan sub-assembly and transaxle oil pan (CVT) gasket from the continuously variable transaxle assembly.
Note
Some fluid will remain in the transaxle oil (CVT) pan sub-assembly. Remove all the bolts, and carefully remove the transaxle oil (CVT) pan sub-assembly.
-
Temporarily install the refill plug and gasket to the continuously variable transaxle assembly.
Tech Tips
Reuse the old gasket as the refill plug will be removed again to adjust the fluid level.
-
-
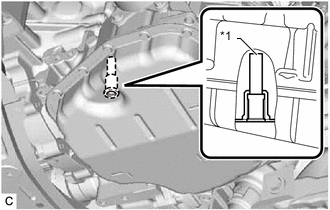
REMOVE OIL CLEANER (CVT) MAGNET
-
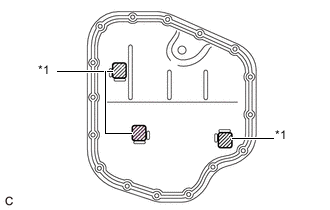
Text in Illustration *1 Oil Cleaner (CVT) Magnet Remove the 3 oil cleaner (CVT) magnets from the transaxle oil (CVT) pan sub-assembly.
-
Clean off any metal particles adhered to the 3 oil cleaner (CVT) magnets.
-
Clean the transaxle oil (CVT) pan sub-assembly and remove any metal particles, sludge, etc.
-