TAIL GATE DISASSEMBLY
PROCEDURE
-
REMOVE REAR FLOOR MAT REAR SUPPORT PLATE
-
REMOVE BACK DOOR TRIM COVER LH
-
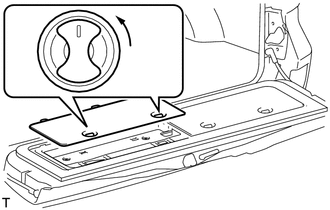
Remove the back door trim cover LH as shown in the illustration.
-
-
REMOVE BACK DOOR TRIM COVER RH
-
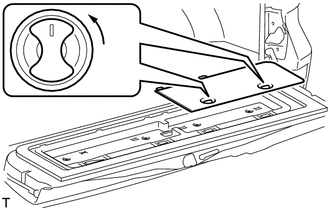
Remove the back door trim cover RH as shown in the illustration.
-
-
REMOVE BACK DOOR TRIM PANEL ASSEMBLY
-
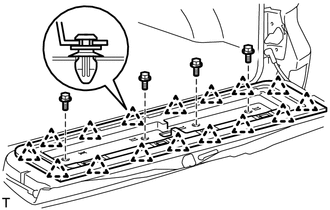
Remove the 4 bolts.
-
Detach the 16 clips and remove the back door trim panel.
-
-
REMOVE REAR BUMPER COVER
-
for Standard: Click here
-
w/ Towing Hitch: Click here
-
w/ Pintle Hook: Click here
-
-
REMOVE SPARE TIRE
-
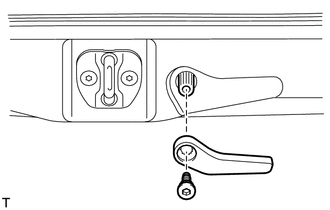
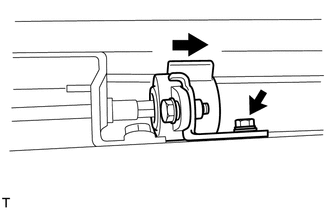
REMOVE LOWER BACK DOOR TORSION BAR ASSEMBLY
-
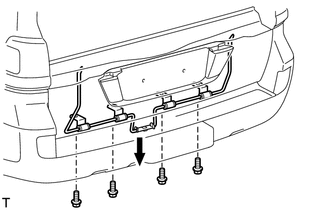
Remove the 4 bolts and lower back door torsion bar.
-
-
REMOVE BACK DOOR TORSION BAR GUIDE
-
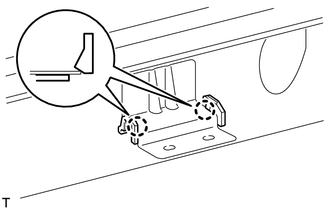
Detach the 2 claws and remove the back door torsion bar guide.
-
-
REMOVE BACK DOOR INSIDE HANDLE ASSEMBLY
-
Remove the screw and back door inside handle.
-
-
REMOVE BACK DOOR GARNISH
-
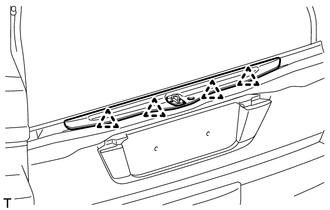
Detach the 4 clips and remove the back door garnish.
-
-
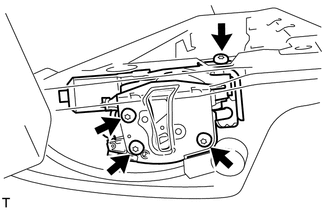
REMOVE LOWER TAIL GATE LOCK ASSEMBLY RH
-
Disconnect the connector.
-

Using a T30 "TORX" wrench, remove the 4 screws and lower tail gate lock.
-
-
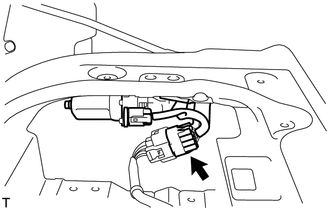
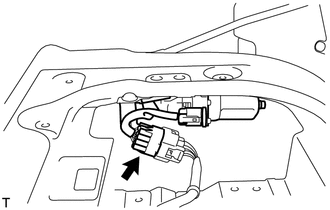
REMOVE BACK DOOR REMOTE CONTROL ASSEMBLY
-
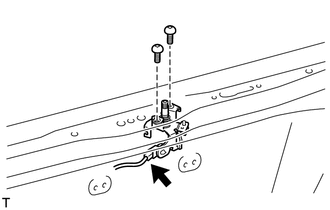
Disconnect the connector.
-
Remove the 2 screws and back door remote control.
-
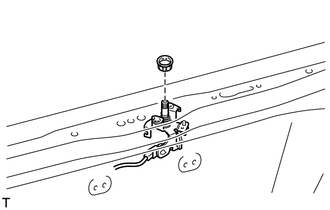
Remove the back door handle grommet.
-
-
REMOVE LOWER TAIL GATE LOCK ASSEMBLY LH
-
Disconnect the connector.
-
Using a T30 "TORX" wrench, remove the 4 screws and lower tail gate lock.
-
-
REMOVE NO. 2 BACK DOOR OUTSIDE GARNISH SUB-ASSEMBLY
-
REMOVE TAIL GATE STAY SUB-ASSEMBLY LH
-
Using a T40 "TORX" socket, remove the 2 screws and tail gate stay.
-
-
REMOVE TAIL GATE STAY SUB-ASSEMBLY RH
Tech Tips
Use the same procedure described for the LH side.
-
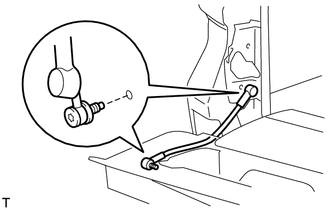
REMOVE BACK DOOR DAMPER ASSEMBLY
-
Remove the bolt and back door damper.
-