POWER BACK DOOR DRIVE UNIT REMOVAL
PROCEDURE
-
REMOVE REAR NO. 2 SEAT ASSEMBLY (w/ Rear No. 2 Seat)
Tech Tips
Use the same procedure described for the LH side.
-
REMOVE REAR STEP COVER
-
REMOVE REAR DOOR SCUFF PLATE RH
-
REMOVE REAR FLOOR MAT REAR SUPPORT PLATE
-
REMOVE FRONT QUARTER TRIM PANEL ASSEMBLY RH
-
REMOVE CENTER BACK DOOR GARNISH
-
REMOVE BACK DOOR SIDE GARNISH RH
-
DISCONNECT POWER BACK DOOR ROD
-
REMOVE UPPER REAR PILLAR GARNISH RH
-
REMOVE POWER BACK DOOR UNIT ASSEMBLY
-
Disconnect the connector
-

Remove the 4 bolts.
Text in Illustration 
Bolt 
Connector -
Detach the 2 guide and remove the power back door unit assembly.
-
-
REMOVE POWER BACK DOOR ROD
-
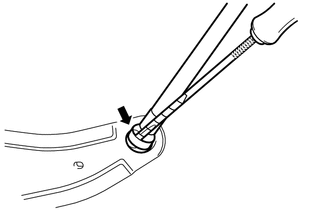
Using a thin-bladed screwdriver with its tip wrapper in protective tape, remove the stop ring along their grooves.
Text in Illustration 
Protective Tape -
Detach the ball joint and remove the power back door rod.
-