HOOD SUPPORT INSTALLATION
CAUTION / NOTICE / HINT
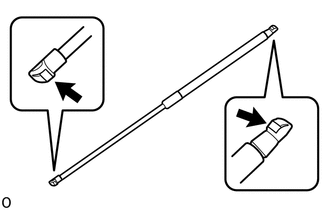
Note
-
As much as possible, avoid touching the stroke portions of the rod to prevent foreign matter from attaching to them. Be sure to hold the cylinders while servicing.
-
Do not wear cotton gloves or other similar materials when handling the rod. Fibers may attach to the rod and result in gas leaks.
-
Do not apply any load to the cylinders in the horizontal direction in order to prevent the rod from being deformed.
Tech Tips
-
Use the same procedure for the RH and LH side.
-
The procedure listed below is for the LH side.
PROCEDURE
-
INSTALL HOOD STAY BOLT
-
Clean the threaded surface on the vehicle body with a non-residue solvent.
-
When reusing the hood stay bolt:
-
Clean the threaded surface on the bolt with a non-residue solvent.
-
Apply adhesive to the threads of the hood stay bolt.
Adhesive Toyota Genuine Adhesive 1324, Three Bond 1324 or equivalent -
Install the hood stay bolt.
- Torque:
- 18 N*m { 184 kgf*cm, 13 ft.*lbf }
-
-
-
INSTALL HOOD STAY BRACKET LH
-
Attach the guide to install the hood stay bracket LH with the bolt.
- Torque:
- 18 N*m { 184 kgf*cm, 13 ft.*lbf }
-
-
INSTALL HOOD SUPPORT ASSEMBLY LH
Note
-
As much as possible, avoid touching the stroke portions of the rod to prevent foreign matter from attaching to them. Be sure to hold the cylinders while servicing.
-
Do not wear cotton gloves or other similar materials when handling the rod. Fibers may attach to the rod and result in gas leaks.
-
Do not apply any load to the cylinders in the horizontal direction in order to prevent the rod from being deformed.
-
When Reusing the hood support assembly LH:
-
Install the hood support assembly LH with the 2 stop rings.
-
Attach the 2 ball joints to install the hood support assembly LH.
Note
-
Install the hood support assembly LH while supporting the hood by hand.
-
Check that the hood support assembly LH is attached to the ball joint and cannot be pulled out.
-
-
-