FRONT CONSOLE BOX(w/o Cool Box) DISASSEMBLY
CAUTION / NOTICE / HINT
Tech Tips
-
Use the same procedure for RHD and LHD vehicles.
-
The procedure listed below is for LHD vehicles.
PROCEDURE
-
REMOVE CONSOLE BOX POCKET
-
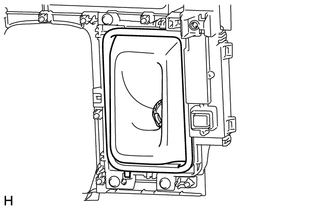
Remove the console box pocket.
-
-
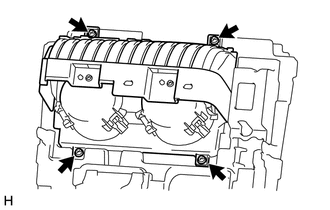
REMOVE REAR CONSOLE BOX MOUNTING BRACKET

-
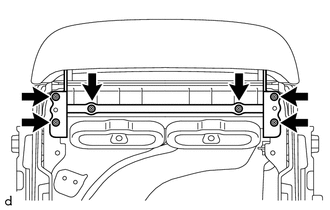
Remove the 4 bolts and rear console box mounting bracket.
-
-
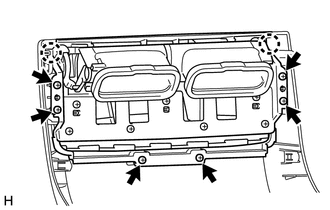
REMOVE CONSOLE COMPARTMENT DOOR SUB-ASSEMBLY
-
Remove the 6 screws and console compartment door sub-assembly.
-
-
REMOVE CONSOLE COMPARTMENT DOOR HINGE SUB-ASSEMBLY
-
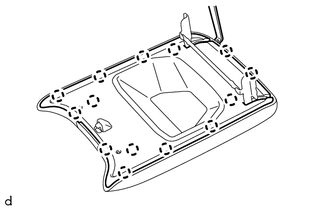
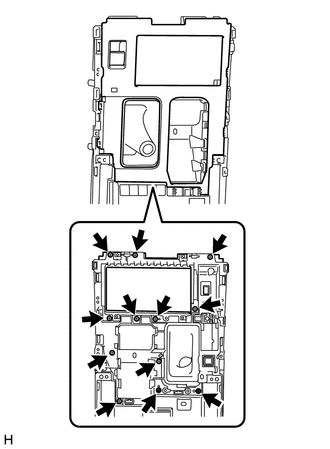
Using a moulding remover A, detach the 14 claws and remove the inner console door.
-
Remove the 6 screws and console compartment door hinge sub-assembly.
-
-
REMOVE CONSOLE COMPARTMENT DOOR LOCK SUB-ASSEMBLY
-
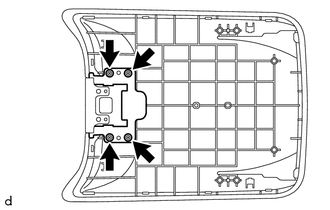
Remove the 4 screws and console compartment door lock sub-assembly.
-
-
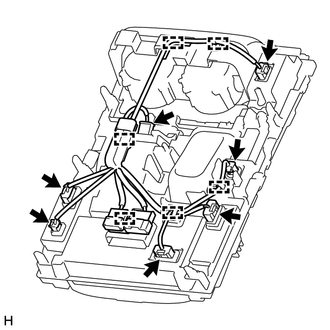
REMOVE SWITCH WIRE
-
Disconnect the connector.
-
Detach the clamps and remove the switch wire.
-
-
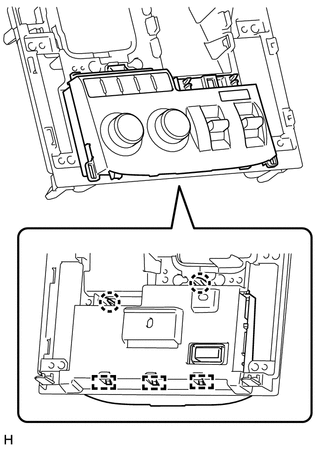
REMOVE CONSOLE CUP HOLDER BOX SUB-ASSEMBLY
-
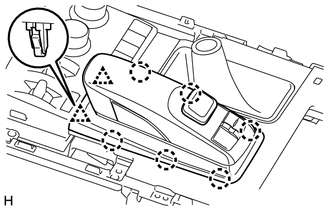
Remove the 4 screws and console cup holder box sub-assembly.
-
-
REMOVE REFRESHING SEAT SWITCH
-
for LH Side:
-
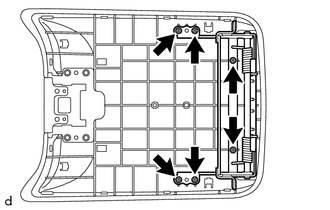
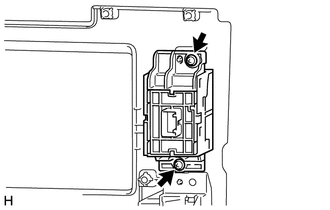
Remove the 2 screws and remove the refreshing seat switch.
-
-
for RH Side:
-
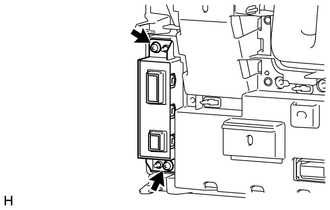
Remove the 2 screws and remove the refreshing seat switch.
-
-
-
REMOVE UPPER NO. 2 CONSOLE PANEL POWER SEAT SWITCH BASE
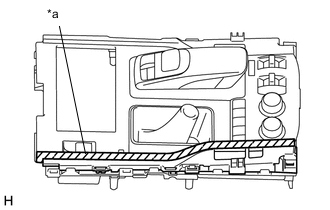
Text in Illustration *a Protective Tape
-
Put protective tape around the upper No. 2 console panel power seat switch base.
-
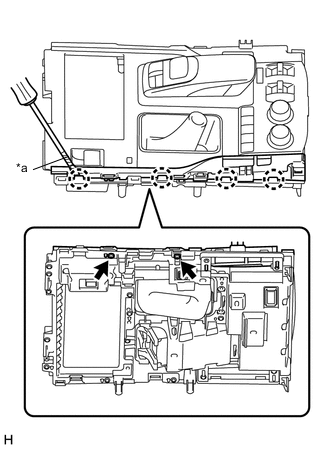
Text in Illustration *a Protective Tape Remove the 2 screws.
-
Using a screwdriver, detach the 4 claws and remove the upper No. 2 console panel power seat switch base.
Tech Tips
Tape the screwdriver tip before use.
-
-
REMOVE UPPER NO. 1 CONSOLE PANEL POWER SEAT SWITCH BASE
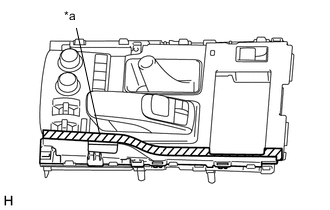
Text in Illustration *a Protective Tape
-
Put protective tape around the upper No. 1 console panel power seat switch base.
-
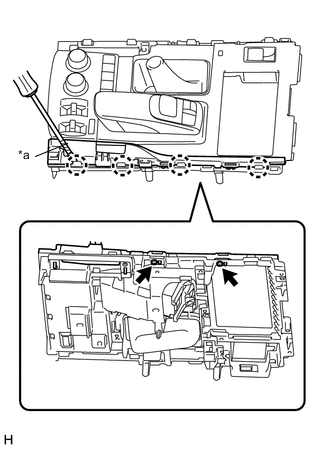
Text in Illustration *a Protective Tape Remove the 2 screws.
-
Using a screwdriver, detach the 4 claws and remove the upper No. 1 console panel power seat switch base.
Tech Tips
Tape the screwdriver tip before use.
-
-
REMOVE REMOTE TOUCH ASSEMBLY
-
Detach the 6 claws and 2 clips and remove the remote touch assembly.
-
-
REMOVE UPPER CONSOLE PANEL
-
Remove the 12 screws and upper console panel.
-
-
REMOVE SHIFTING HOLE COVER SUB-ASSEMBLY
-
Remove the shifting hole cover sub-assembly.
-
-
REMOVE SHIFT POSITION INDICATOR

-
Remove the 4 screws and shift position indicator.
-
-
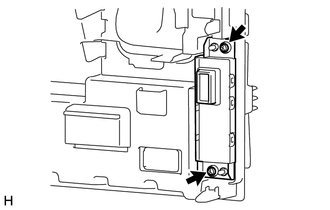
REMOVE ELECTRIC PARKING BRAKE SWITCH ASSEMBLY
-
Remove the 2 screws and electric parking brake switch assembly.
-
-
REMOVE INTEGRATION CONTROL AND PANEL ASSEMBLY
-
Detach the 2 claws and 3 guides and remove the integration control and panel assembly.
-
-
REMOVE REAR CONSOLE END PANEL GARNISH
-
Remove the 6 screws.
-
Detach the 2 claws and remove the rear console end panel garnish.
-
-
REMOVE REMOTE CONTROL ADAPTOR ASSEMBLY (w/ Rear Seat Entertainment System)
-
REMOVE NO. 2 POWER OUTLET SOCKET ASSEMBLY
-
REMOVE CENTER POWER OUTLET SOCKET COVER
-
REMOVE CONSOLE BOX RETAINER

Text in Illustration *a Protective Tape
-
Using a screwdriver, detach the claw and remove the console box retainer.
Tech Tips
Tape the screwdriver tip before use.
-