ION GENERATOR INSTALLATION
CAUTION / NOTICE / HINT
Tech Tips
-
Use the same procedures for LHD and RHD vehicles.
-
The procedures listed below are for LHD vehicles.
PROCEDURE
-
INSTALL AIR DUCT SUB-ASSEMBLY
Note
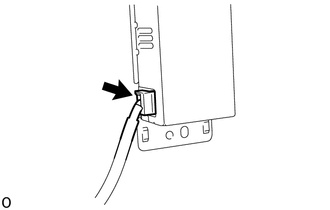
Check that a "click" sound can be heard.
-
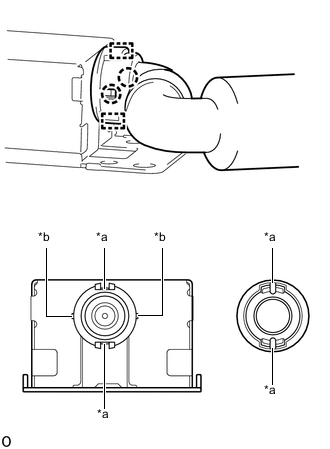
*a Guide *b Claw Align the guide, attach the claw and install the air duct sub-assembly as shown in the illustration.
-
-
INSTALL NO. 1 ION GENERATOR SUB-ASSEMBLY
Note
-
Dropped No. 1 ion generator sub-assembly cannot be used.
-
Do not subject the No. 1 ion generator sub-assembly to strong impacts, as its case is easily dented and scratched.
-
Connect the connector.
-
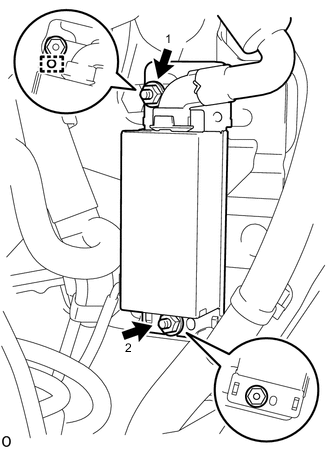
Attach the guide and temporarily install the No. 1 ion generator sub-assembly with the 2 nuts.
-
Tighten the 2 nuts in the order shown in the illustration.
- Torque:
- 4.5 N*m { 46 kgf*cm, 40 in.*lbf }
-
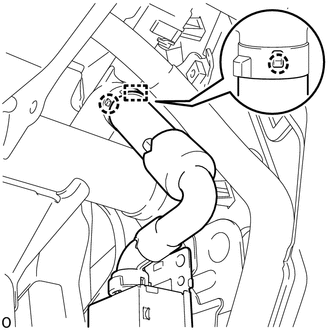
Attach the claw and guide to install the No. 1 ion generator sub-assembly with air duct sub-assembly.
-
-
INSTALL LOWER NO. 2 INSTRUMENT PANEL FINISH PANEL
-
INSTALL INSTRUMENT PANEL BOX DOOR KNOB
-
INSTALL INSTRUMENT SIDE PANEL RH
-
INSTALL FRONT PASSENGER SIDE KNEE AIRBAG ASSEMBLY
-
CONNECT CABLE TO NEGATIVE BATTERY TERMINAL
Note
When disconnecting the cable, some systems need to be initialized after the cable is reconnected.
-
INSTALL UPPER RADIATOR SUPPORT SEAL
-
CHECK SRS WARNING LIGHT