REAR AIR CONDITIONING PANEL REMOVAL
CAUTION / NOTICE / HINT
Tech Tips
-
Use the same procedures for LHD and RHD vehicles.
-
The procedures listed below are for LHD vehicles.
PROCEDURE
-
REMOVE COOLER CONTROL SWITCH ASSEMBLY
-

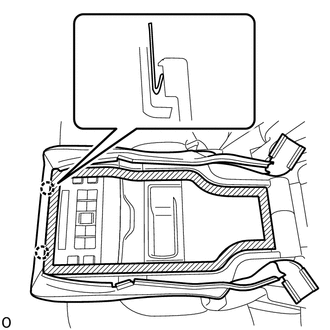
*a Protective Tape Apply protective tape at the position shown in the illustration.
-
Using moulding remover D, detach the 6 claws in the order shown in the illustration and fold back the rear seat center armrest cover sub-assembly.
Note
Do not pull on the rear seat center armrest cover sub-assembly.
-
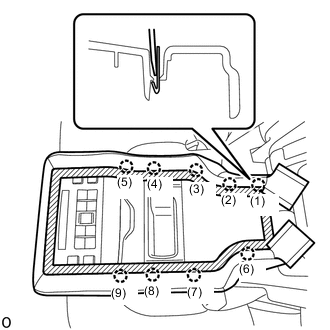
Using moulding remover D, detach the 9 claws in the order shown in the illustration and fold back the rear seat center armrest cover sub-assembly.
Note
Do not pull on the rear seat center armrest cover sub-assembly.
-
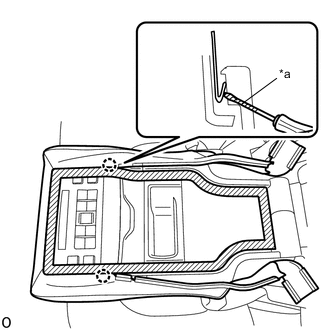
*a Protective Tape Using a screwdriver, detach the 2 claws and fold back the rear seat center armrest cover sub-assembly.
Note
Do not pull on the rear seat center armrest cover sub-assembly.
Tech Tips
Tape the screwdriver tip before use.
-
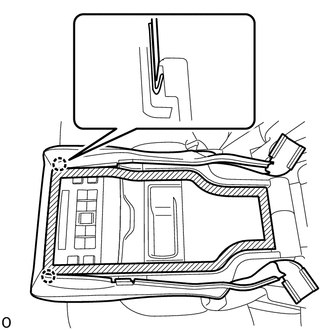
Using moulding remover D, detach the 2 claws and fold back the rear seat center armrest cover sub-assembly.
Note
Do not pull on the rear seat center armrest cover sub-assembly.
-
Using moulding remover D, detach the 2 claws and fold back the rear seat center armrest cover sub-assembly.
Note
Do not pull on the rear seat center armrest cover sub-assembly.
-
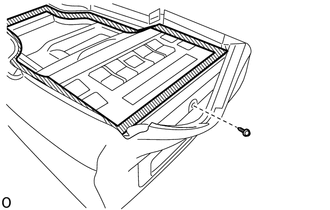
Fold back the rear seat center armrest cover sub-assembly and remove the screw.
-

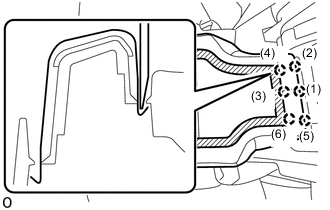
Using moulding remover B, detach the 6 claws while pushing in the direction of the arrow.
Note
Detach each claw individually.
-
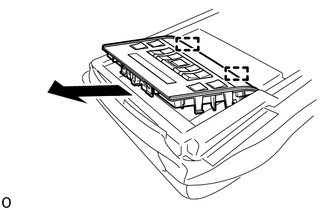
While pulling in the removal direction shown in the illustration, detach the 2 guides.
Note
Do not pull excessively on the cooler control switch assembly as the connected wire harness is short.
-
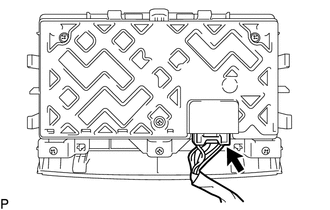
Disconnect the connector and remove the cooler control switch assembly.
-