REAR SEAT ENTERTAINMENT ECU INSTALLATION
CAUTION / NOTICE / HINT
Tech Tips
A bolt without a torque specification is shown in the standard bolt chart Click here.
PROCEDURE
-
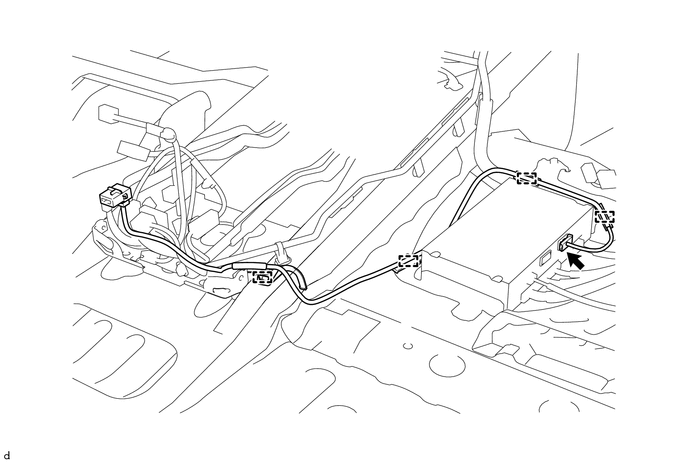
INSTALL NO. 1 NAVIGATION WIRE
-
Attach the 3 clamps to install the No. 1 navi9gation wire.
-
Connect the connector.
-
-
INSTALL FRONT CONSOLE BOX
-
w/o Cool Box
Install the front console box Click here.
-
w/ Cool Box
Install the front console box Click here.
-
-
INSTALL NO. 2 MULTI-DISPLAY CONTROLLER BRACKET
-
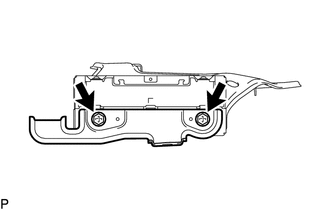
Install the No. 2 multi-display controller bracket with the 2 bolts.
-
-
INSTALL NO. 3 MULTI-DISPLAY CONTROLLER BRACKET
-

Install the No. 3 multi-display controller bracket bracket with the 2 bolts.
-
-
INSTALL MULTI-DISPLAY CONTROLLER SUB-ASSEMBLY WITH BRACKET
-
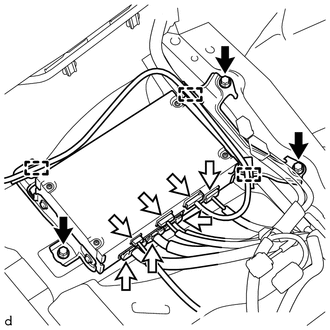
Install the multi-display controller sub-assembly with bracket with the 3 bolts.
- Torque:
- 8.5 N*m { 87 kgf*cm, 75 in.*lbf }
-
Attach the 3 clamps and connect the connectors.
-
-
INSTALL FRONT FLOOR CARPET ASSEMBLY
-
Install the carpet that was pulled back to remove the selector. For further details, refer to the installation procedure Click here.
-
-
INSTALL FRONT DOOR SCUFF PLATE RH
-
INSTALL COWL SIDE TRIM BOARD RH
-
INSTALL INSTRUMENT SIDE PANEL RH
-
INSTALL FRONT SEAT ASSEMBLY RH
-
Install the front seat assembly RH Click here.
-
-
CONNECT CABLE TO NEGATIVE BATTERY TERMINAL
Note
When disconnecting the cable, some systems need to be initialized after the cable is reconnected Click here.
-
INSTALL UPPER RADIATOR SUPPORT SEAL
-
CHECK SRS WARNING LIGHT
-
Check the SRS warning light Click here.
-