VANE PUMP(for 3UR-FE) DISASSEMBLY

PROCEDURE
-
FIX VANE PUMP ASSEMBLY
-
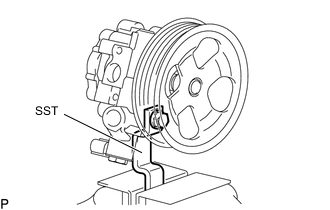
Using SST, fix the vane pump in a vise.
- SST
- 09630-00014 ( 09631-00132 )
-
-
REMOVE VANE PUMP REAR HOUSING
-
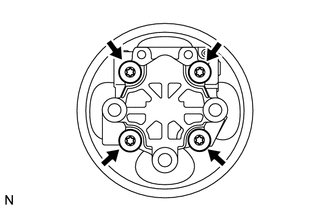
Remove the 4 "TORX" bolts and rear housing from the front housing.
-
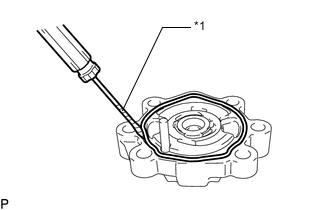
*1 Protective Tape Using a screwdriver, remove the O-ring from the rear housing.
Tech Tips
Tape the screwdriver tip before use.
-
-
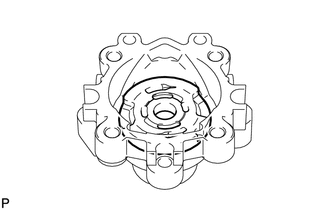
REMOVE VANE PUMP SHAFT WITH VANE PUMP PULLEY
-
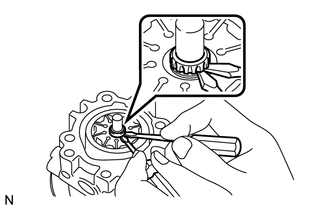
Using 2 screwdrivers, remove the snap ring from the vane pump shaft.
-
Remove the vane pump shaft with vane pump pulley.
Note
Be careful not to drop or damage the vane pump shaft with vane pump pulley. If it is damaged, replace the vane pump assembly.
-
-
REMOVE VANE PUMP ROTOR
-
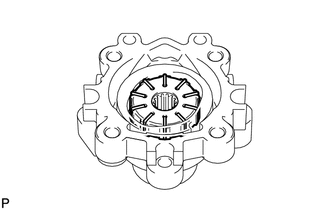
Remove the 10 vane pump plates.
Note
Take care not to drop the vane pump plate.
-
Remove the vane pump rotor.
-
-
REMOVE VANE PUMP CAM RING
-
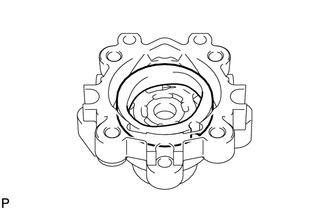
Remove the cam ring from the front housing.
-
-
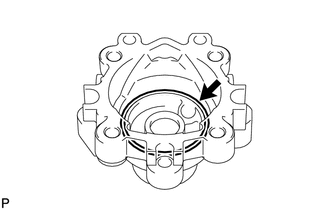
REMOVE VANE PUMP FRONT SIDE PLATE
-
Remove the front side plate from the front housing.
-
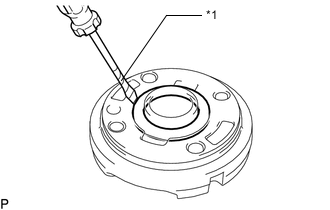
*1 Protective Tape Using a screwdriver, remove the O-ring from the front side plate.
Tech Tips
Tape the screwdriver tip before use.
-
Remove the O-ring from the front housing.
-
-
REMOVE VANE PUMP HOUSING OIL SEAL
-

*1 Cloth Using a screwdriver and piece of cloth, pry out the oil seal.
Note
Be careful not to damage the front housing.
-