FUEL FILTER REPLACEMENT
CAUTION / NOTICE / HINT
Tech Tips
When replacing the filter, use TOYOTA genuine parts or equivalent parts.
PROCEDURE
-
DRAIN FUEL FROM FUEL FILTER
-
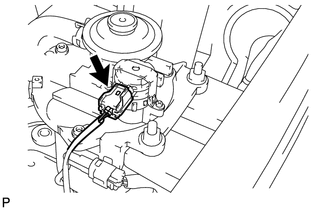
Detach the fuel hose clamp.
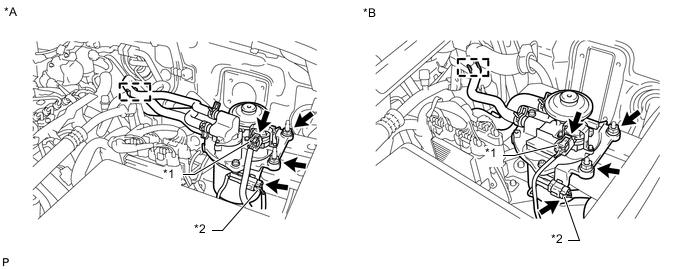
Text in Illustration *A w/ Fuel Heater *B w/o Fuel Heater *1 Clogging Switch Connector *2 Level Warning Switch Connector -
Disconnect the clogging switch connector and level warning switch connector.
-
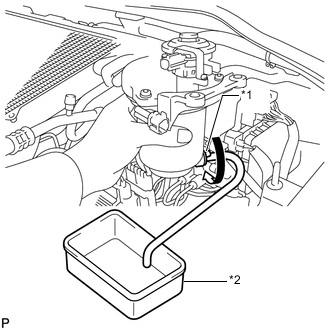
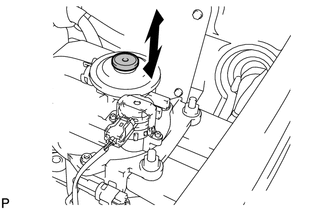
Text in Illustration *1 Drain Cock *2 Container Remove the 2 nuts and lift up the fuel filter assembly.
-
Connect a hose to the drain cock. Place the other end of the hose into a container under the drain cock.
-
Loosen the drain cock to drain fuel.
-
Tighten the drain cock by hand.
Note
Do not use any tools in this procedure.
-
Install the fuel filter assembly with the 2 nuts.
- Torque:
- 20 N*m { 199 kgf*cm, 14 ft.*lbf }
-
Connect the clogging switch connector and level warning switch connector.
-
Attach the fuel hose clamp.
-
-
REMOVE FUEL FILTER ELEMENT ASSEMBLY
-
Disconnect the level warning switch connector, and detach the level warning switch connector clamp.
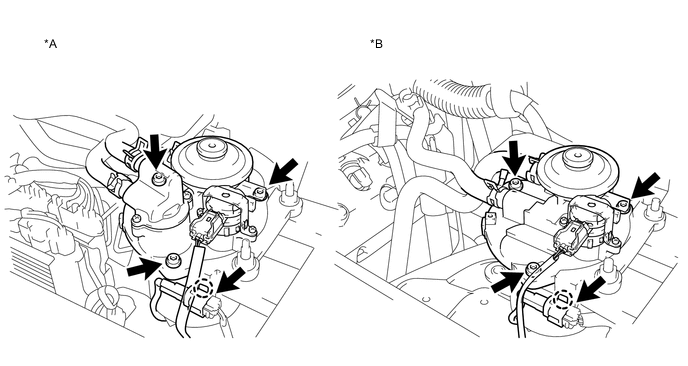
Text in Illustration *A w/ Fuel Heater *B w/o Fuel Heater -
Using a 5 mm hexagon socket wrench, remove the 3 bolts and disconnect the fuel filter cap.
-
Remove the fuel filter case and element assembly.
-
Remove the O-ring and retainer.
-
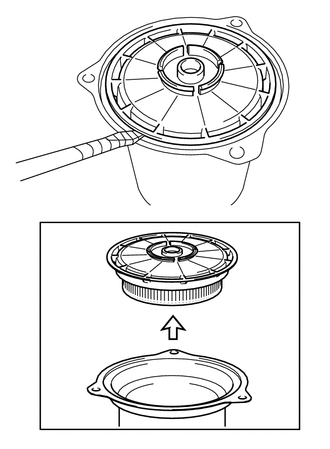
Using a screwdriver, remove the fuel filter element from the case.
Note
Do not damage the fuel filter element and case.
Tech Tips
Tape the screwdriver tip before use.
-
-
INSTALL FUEL FILTER ELEMENT ASSEMBLY
-
Clean the fuel filter case.
Note
When replacing the fuel filter, clean the fuel filter case and remove dirt completely.
-
Install the fuel filter element to the case.
Note
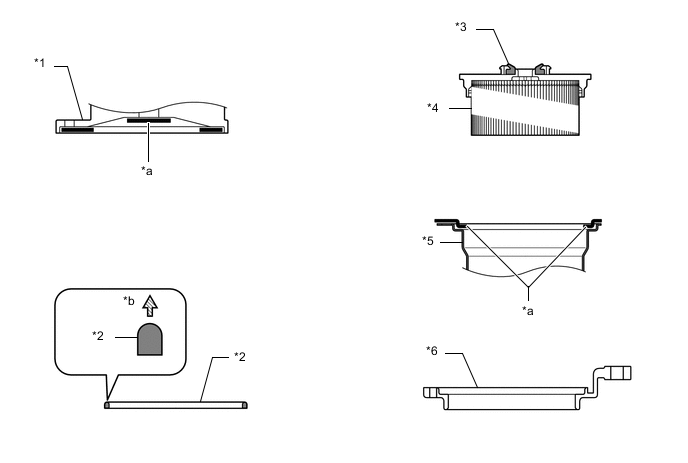
Make sure that there is no foreign matter on the areas of the case shown in the illustration.
Text in Illustration *1 Cap *2 O-ring *3 Retainer *4 Element *5 Case *6 Bracket *a No Foreign Matter *b Upper Side -
Install the retainer.
-
Install a new O-ring.
Note
Make sure the rounded side of the O-ring faces upward as shown in the illustration.
-
Install the fuel filter case and element assembly to the bracket.
-
Set the fuel filter cap on the case.
Note
-
Make sure that there is no foreign matter on the areas of the cap shown in the illustration.
-
Do not turn the cap as the O-ring will be damaged.
-
-
Using a 5 mm hexagon socket wrench, install the fuel filter cap with the 3 bolts.
- Torque:
- 4.5 N*m { 46 kgf*cm, 40 in.*lbf }
-
Further tighten the first bolt tightened above so that its torque value is slightly more than the torque specification.
-
Attach the level warning switch connector clamp and connect the level warning switch connector.
-
-
RESET FUEL SYSTEM WARNING LIGHT
-
Disconnect the clogging switch connector.
-
Turn the engine switch to ON.
-
After turning the engine switch to ON, connect the clogging switch connector within 3 to 60 seconds.
-
Check that the fuel system warning on the multi-information display turns off.
-
-
BLEED AIR FROM FUEL SYSTEM
-
Using the hand pump, bleed air from the fuel system until pumping becomes difficult.
-
-
INSPECT FOR FUEL LEAK
-
Start the engine. Check that leaking sounds, sucking sounds or other unusual sounds cannot be heard.
-