FUEL SENDER GAUGE ASSEMBLY(for Fuel Sub Tank) REMOVAL
PROCEDURE
-
PRECAUTION
Note
After turning the engine switch off, waiting time may be required before disconnecting the cable from the battery terminal. Therefore, make sure to read the disconnecting the cable from the battery terminal notice before proceeding with work Click here.
-
DISCONNECT CABLE FROM NEGATIVE BATTERY TERMINAL
Note
When disconnecting the cable, some systems need to be initialized after the cable is reconnected Click here.
-
REMOVE REAR SEAT ASSEMBLY
-
REMOVE REAR FLOOR MAT ASSEMBLY

-
Detach the 5 clips and fold back the floor mat toward the front of the vehicle.
Tech Tips
Fold back the floor mat so that the rear No. 7 air duct can be removed.
-
-
REMOVE REAR NO. 7 AIR DUCT
-
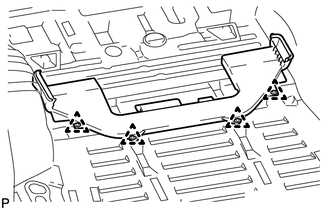
Detach the 4 clips and remove the No. 7 air duct.
-
-
REMOVE REAR FLOOR SERVICE HOLE COVER

-
REMOVE FUEL SENDER GAUGE ASSEMBLY
-
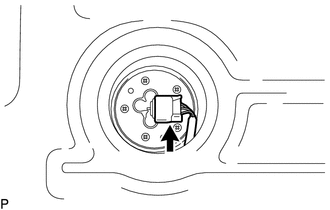
Disconnect the sender gauge connector.
-
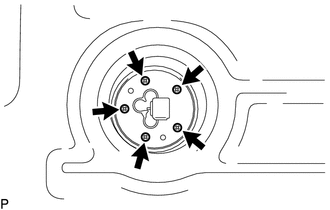
Remove the 5 screws and fuel sender gauge assembly.
Note
Be careful not to bend the arm of the fuel sender gauge assembly.
-
Remove the gasket from the fuel sender gauge assembly.
-