CYLINDER BLOCK REPLACEMENT

PROCEDURE
-
REPLACE STUD BOLT
Tech Tips
If a stud bolt is deformed or the threads are damaged, replace it.
-
Using an E7 "TORX" wrench, replace the stud bolts labeled A shown in the illustration below.
- Torque:
- 10 N*m { 102 kgf*cm, 7 ft.*lbf }
-
Using an E8 "TORX" wrench, replace the stud bolts labeled B shown in the illustration below.
- Torque:
- 10 N*m { 102 kgf*cm, 7 ft.*lbf }
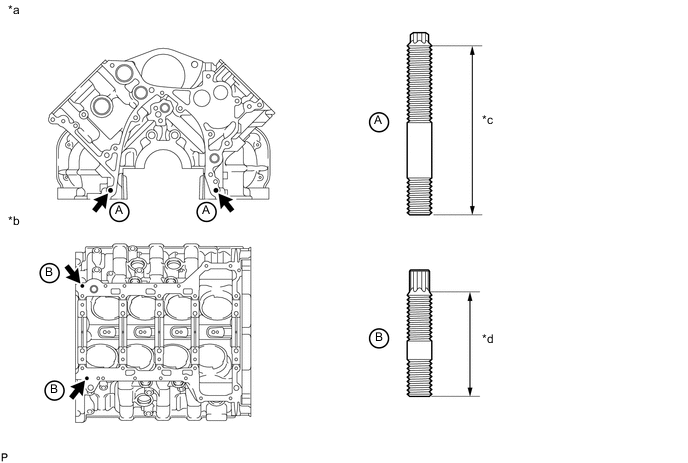
Text in Illustration *a Front Side *b Lower Side *c 55 mm (2.17 in.) *d 34 mm (1.34 in.)
-
-
REPLACE STRAIGHT PIN
Note
It is not necessary to remove the straight pin unless it is being replaced.
-
Remove the straight pins.
-
Using a plastic-faced hammer, tap in new straight pins to the cylinder block sub-assembly.
Standard Protrusion Item Specified Condition Pin "A" and "B" 5.0 to 7.5 mm (0.197 to 0.295 in.) Pin "C" 10.5 to 11.5 mm (0.413 to 0.453 in.) Pin "D" and "F" 3.5 to 6.0 mm (0.138 to 0.236 in.) Pin "E" 4.5 to 7.0 mm (0.177 to 0.276 in.) 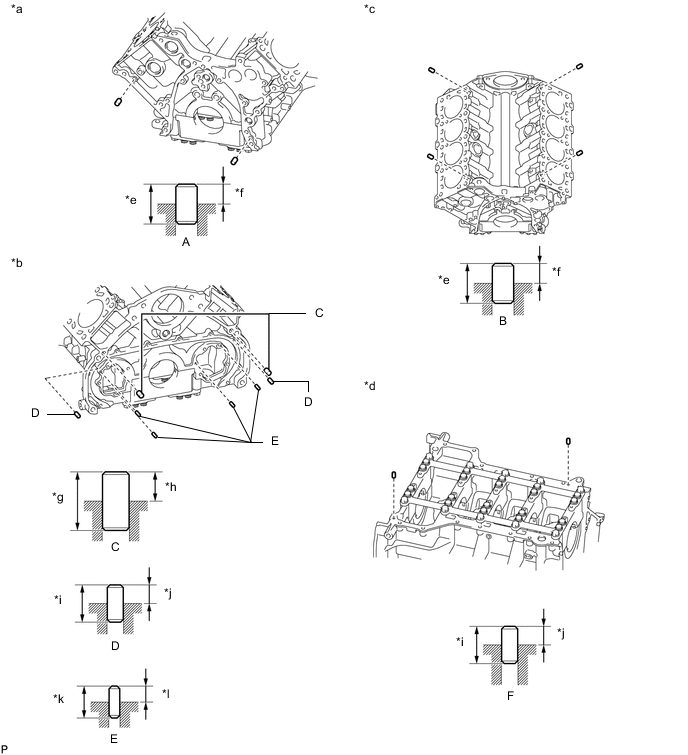
Text in Illustration *a Front Side *b Rear Side *c Upper Side *d Lower Side *e 15 mm (0.591 in.) *f 5.0 to 7.5 mm (0.197 to 0.295 in.) *g 22 mm (0.866 in.) *h 10.5 to 11.5 mm (0.413 to 0.453 in.) *i 16 mm (0.630 in.) *j 3.5 to 6.0 mm (0.138 to 0.236 in.) *k 12 mm (0.472 in.) *l 4.5 to 7.0 mm (0.177 to 0.276 in.)
-
-
REPLACE CYLINDER BLOCK TIGHT PLUG
Note
If water leaks from the cylinder block tight plug or the cylinder block tight plug corrodes, replace it.
-
Remove the cylinder block tight plugs.
-
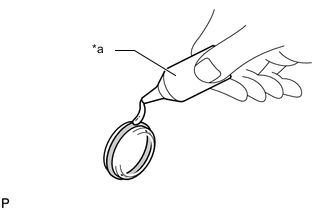
Text in Illustration *a Adhesive Apply adhesive around new cylinder block tight plugs.
Adhesive Toyota Genuine Adhesive 1324, Three Bond 1324 or equivalent -
Using SST and a hammer, tap in the cylinder block tight plugs to the specified depth.
- SST
- 09950-60010 ( 09951-00180, 09951-00250, 09951-00350 )
- 09950-70010 ( 09951-07150 )
Standard depth 1.7 to 2.7 mm (0.0669 to 0.106 in.) 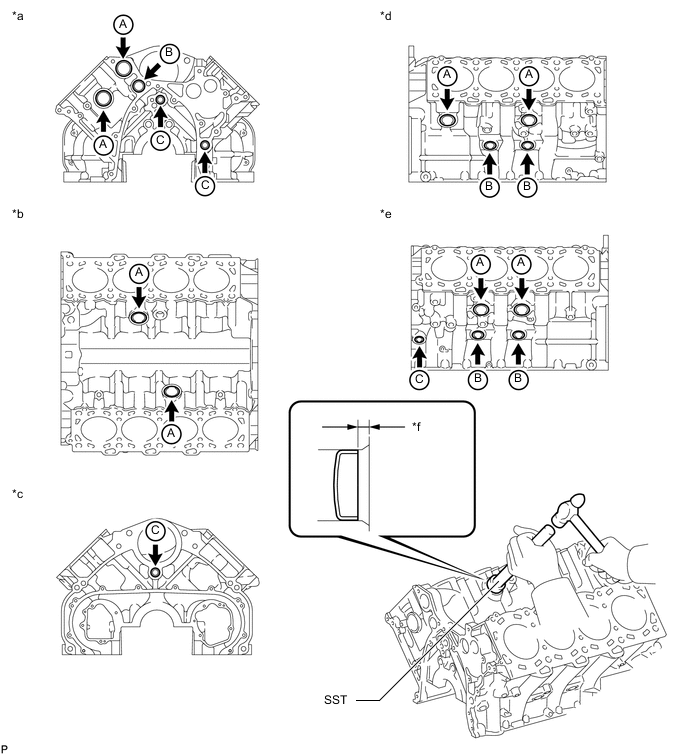
Text in Illustration *a Front Side *b Upper Side *c Rear Side *d RH Side *e LH Side *f Depth
-
-
REPLACE CRANKSHAFT STRAIGHT PIN
Note
It is not necessary to remove the crankshaft straight pin unless it is being replaced.
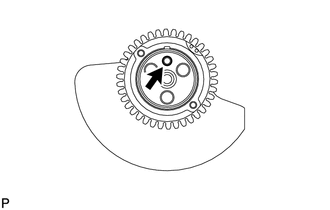
-
Replace the crankshaft straight pin.
-