LUGGAGE COMPARTMENT DOOR OUTSIDE GARNISH REMOVAL
PROCEDURE
-
REMOVE LUGGAGE LOCK CONTROL CABLE PLATE (w/ Handle)
-
REMOVE LUGGAGE COMPARTMENT DOOR INSIDE HANDLE (w/ Handle)
-
REMOVE LUGGAGE COMPARTMENT DOOR ASSIST GRIP
-
REMOVE SWITCH BEZEL (w/ Power Trunk Lid System)
-
REMOVE LUGGAGE COMPARTMENT DOOR COVER
-
REMOVE REAR LIGHT ASSEMBLY LH
-
REMOVE REAR LIGHT ASSEMBLY RH
Tech Tips
Use the same procedure described for the LH side.
-
REMOVE NO. 3 LUGGAGE COMPARTMENT DOOR OUTSIDE GARNISH
-
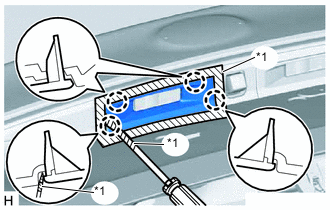
Text in Illustration *1 Protective Tape Put protective tape around the No. 3 luggage compartment door outside garnish.
-
Using a screwdriver, detach the 4 claws and remove the No. 3 luggage compartment door outside garnish.
Tech Tips
Tape the screwdriver tip before use.
-
-
REMOVE NO. 2 LUGGAGE COMPARTMENT DOOR OUTSIDE GARNISH
Tech Tips
Use the same procedure described for the No. 3 luggage compartment door outside garnish.
-
REMOVE LUGGAGE COMPARTMENT DOOR OUTSIDE GARNISH SUB-ASSEMBLY
-
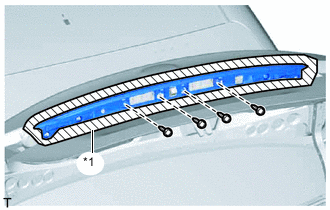
Text in Illustration *1 Protective Tape Put protective tape around the luggage compartment door outside garnish.
-
Remove the 4 screws.
-
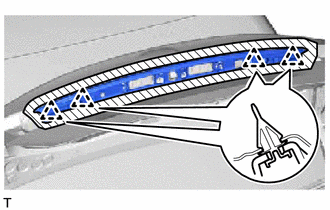
Detach the 4 clips and remove the luggage compartment door outside garnish.
-