INTEGRATION RELAY REMOVAL
PROCEDURE
-
PRECAUTION
Note
After turning the power switch off, waiting time may be required before disconnecting the cable from the auxiliary battery terminal. Therefore, make sure to read the disconnecting the cable from the auxiliary battery terminal notice before proceeding with work Click here.
-
REMOVE LUGGAGE COMPARTMENT FLOOR MAT
-
REMOVE LUGGAGE COMPARTMENT TRIM COVER LH
-
DISCONNECT CABLE FROM NEGATIVE AUXILIARY BATTERY TERMINAL
CAUTION:
Wait at least 90 seconds after disconnecting the cable from the auxiliary battery negative (-) terminal to disable the SRS system.
Note
When disconnecting the cable, some systems need to be initialized after the cable is reconnected Click here.
-
REMOVE ENGINE ROOM SIDE COVER
-
REMOVE COOL AIR INTAKE DUCT SEAL
-
REMOVE NO. 1 RELAY BLOCK COVER
-
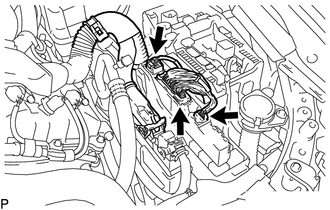
Detach the claw closer to the front of the vehicle and pull the No. 1 relay block cover in the direction shown by the arrow in the illustration to remove it.
-
-
REMOVE NO. 2 INTEGRATION RELAY
-
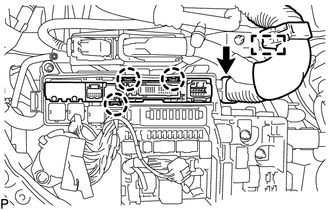
Disconnect the 3 connectors from the No. 2 connector holder.
-
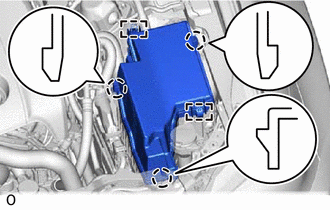
Detach the clamp, 3 claws and remove the No. 2 connector holder.
-
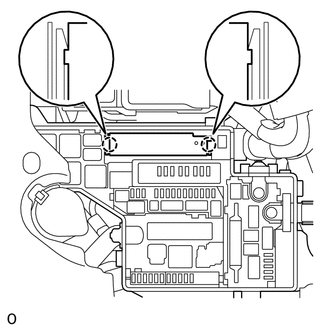
Detach the 2 claws and pull out the No. 2 integration relay.
-
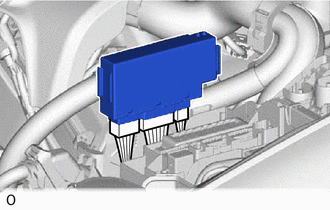
Disconnect the 3 connectors and remove the No. 2 integration relay.
Note
-
Do not drop or allow any impact on parts.
-
Do not touch the connector.
-
-