BRAKE MASTER CYLINDER DISASSEMBLY
CAUTION / NOTICE / HINT
Tech Tips
-
Use the same procedure for the RHD and LHD vehicles.
-
The procedure listed below is for the LHD vehicles.
PROCEDURE
-
REMOVE MASTER CYLINDER PUSH ROD CLEVIS
-
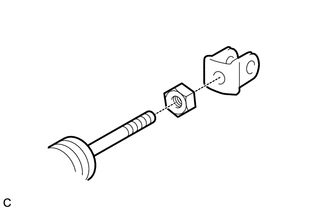
Loosen the lock nut, and remove the master cylinder push rod clevis and lock nut.
Tech Tips
If the protrusion of the push rod in relation to the push rod clevis is measured beforehand, it is easier to perform the brake pedal height adjustment after the brake master cylinder sub-assembly is installed.
-
-
REMOVE BRAKE MASTER CYLINDER RESERVOIR ASSEMBLY
-
Mount the brake master cylinder sub-assembly in a vise.
Note
Place aluminum plates on the vise to prevent damage to the brake master cylinder sub-assembly.
-
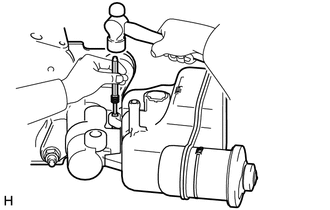
Using a pin punch and hammer, remove the pin from the brake master cylinder reservoir assembly.
-
Remove the brake master cylinder reservoir assembly from the brake master cylinder sub-assembly.
-
-
REMOVE MASTER CYLINDER RESERVOIR GROMMET
-
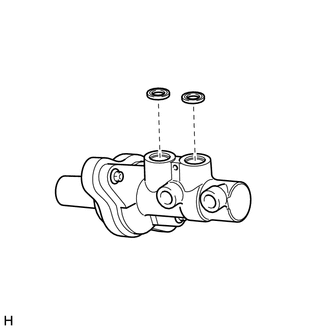
Remove the 2 master cylinder reservoir grommets from the brake master cylinder sub-assembly.
-
-
REMOVE BRAKE FLUID INFORMATION LABEL
-
REMOVE BRAKE MASTER CYLINDER RESERVOIR FILLER CAP ASSEMBLY
-
Remove the brake master cylinder reservoir filler cap assembly from the brake master cylinder reservoir assembly.
-
-
REMOVE BRAKE MASTER CYLINDER RESERVOIR STRAINER
-
Remove the brake master cylinder reservoir strainer from the brake master cylinder reservoir assembly.
-