FRONT LOWER SUSPENSION ARM REMOVAL

PROCEDURE
-
REMOVE FRONT WHEEL
-
SEPARATE SKID CONTROL SENSOR WIRE
-
SEPARATE FRONT SUSPENSION UPPER ARM ASSEMBLY
-
REMOVE UPPER SHOCK ABSORBER CAP
-
REMOVE ABSORBER CONTROL ACTUATOR
-
REMOVE FRONT SHOCK ABSORBER WITH COIL SPRING
-
SEPARATE TIE ROD ASSEMBLY
-
REMOVE FRONT STABILIZER LINK ASSEMBLY
-
REMOVE ENGINE UNDER COVER
-
REMOVE FRONT SUSPENSION MEMBER BRACE
-
REMOVE NO. 2 ENGINE UNDER COVER
-
REMOVE FRONT SUSPENSION LOWER ARM ASSEMBLY
-
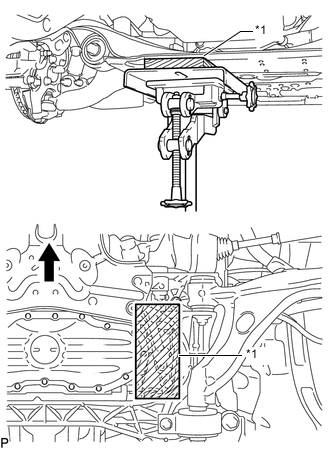
Text in Illustration *1 Wooden Block 
Front of the Vehicle Support the front suspension crossmember with a transmission jack.
Note
Be sure to place a wooden block between the front suspension crossmember and transmission jack.
-
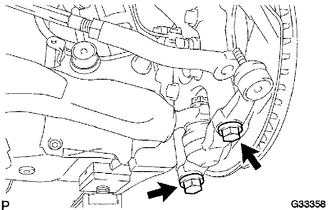
Remove the 2 bolts from the front lower ball joint.
-
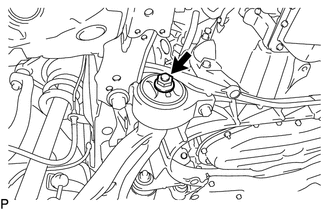
Loosen the installation nut of the lower arm No. 2 bracket sub-assembly.
Note
Do not remove the nut.
-
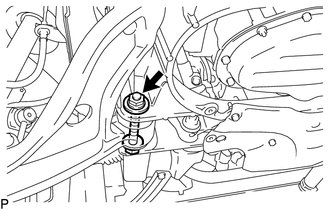
Remove the bolt, washer and nut on the front of the front suspension lower arm.
-
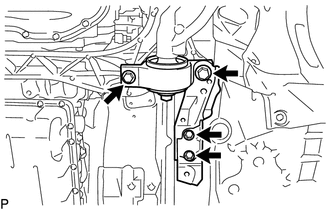
Remove the 4 bolts, side rail plate and front suspension lower arm with the lower arm No. 2 bracket sub-assembly.
-
-
REMOVE FRONT LOWER BALL JOINT
-
Secure the front suspension lower arm assembly in a vise using aluminum plates.
-
Remove the clip and castle nut.
-
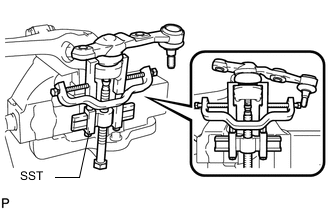
Using SST, remove the front lower ball joint from the front suspension lower arm assembly.
- SST
- 09950-40011 ( 09951-04010, 09952-04010, 09953-04020, 09954-04010, 09955-04051, 09957-04010, 09958-04011 )
Note
-
Do not damage the front suspension lower arm assembly.
-
Do not damage the lower ball joint dust boot.
-
-
REMOVE LOWER ARM NO. 2 BRACKET SUB-ASSEMBLY
-
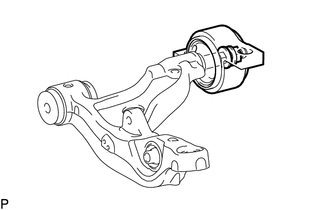
Remove the nut, washer and lower arm No. 2 bracket sub-assembly from the front suspension lower arm.
-