PTC HEATER ASSEMBLY INSTALLATION
CAUTION / NOTICE / HINT
Tech Tips
-
Use the same procedure for RHD and LHD vehicles.
-
The procedure listed below is for LHD vehicles.
PROCEDURE
-
INSTALL QUICK HEATER ASSEMBLY
-
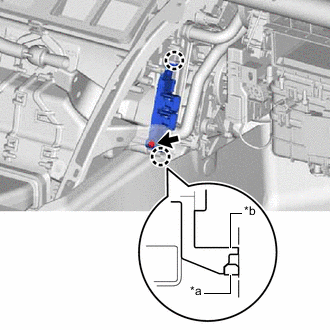
*a Heater Case Fitting Surface *b Quick Heater Claw Attach the 2 claws to install the quick heater assembly.
Note
-
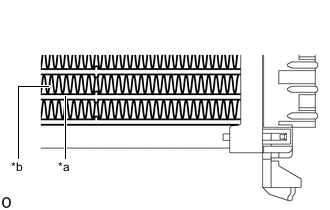
*a Element *b Fin Do not hold the quick heater assembly by the element or fin. Also, do not damage the quick heater assembly.
-
Foul odors may occur due to oil adhering to the quick heater assembly.
-
Firmly push in until a "click" sound is heard.
-
Check that the heights of the claw fitting surface on the heater case and the claw of the quick heater assembly are aligned.
-
-
Install the screw.
Note
If the claws of the quick heater assembly are damaged, install the quick heater assembly with screw (90159-60431).
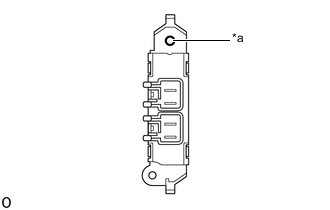
*a Screw Insertion Hole
-
-
INSTALL NO. 2 AIR DUCT SUB-ASSEMBLY (for LHD)
-
INSTALL NO. 1 AIR DUCT SUB-ASSEMBLY (for RHD)
-
Install the No. 1 air duct sub-assembly with new clip.
-
-
INSTALL INSTRUMENT PANEL SAFETY PAD SUB-ASSEMBLY