ROOF DRIP SIDE FINISH MOULDING REMOVAL
CAUTION / NOTICE / HINT
Tech Tips
-
Use the same procedure for the RH side and LH side.
-
The procedure listed below is for the LH side.
-
When replacing the No. 1 roof drip side finish moulding clip, heat the vehicle body and clip using a heat light.
| Standard Heating Temperature | ||||||
|---|---|---|---|---|---|---|
|
Note
Do not heat the vehicle body and clip excessively.
PROCEDURE
-
REMOVE FRONT FENDER TO COWL SIDE SEAL LH
-
REMOVE CENTER ROOF DRIP SIDE FINISH MOULDING LH
-
Put protective tape around the center roof drip side finish moulding.
-
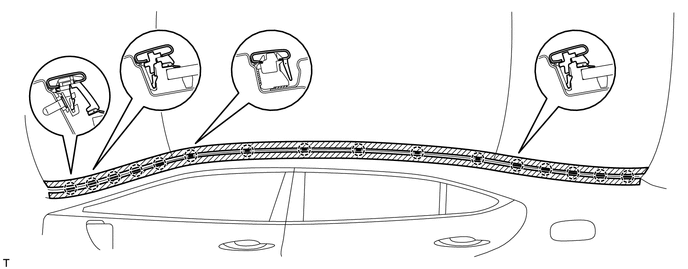
for Standard Body:
Using a moulding remover, detach the 16 clips and remove the center roof drip side finish moulding LH.
-
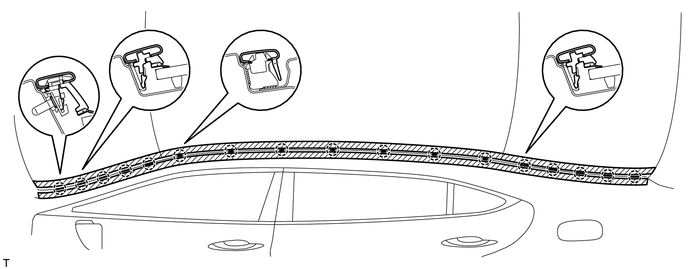
for Long Body:
Using a moulding remover, detach the 17 clips and remove the center roof drip side finish moulding.
Note
-
Do not remove the clips from the vehicle body.
-
If the clips are damaged or removed accidentally, replace them.
-
-
-
REMOVE NO. 2 WINDSHIELD OUTSIDE MOULDING CLIP
Tech Tips
Perform the following procedure if replacing the No. 2 outside windshield moulding clip.
-
Remove the No. 2 outside windshield moulding clip.
-
Remove the No. 2 moulding clip.
-
-
REMOVE NO. 2 ROOF DRIP SIDE FINISH MOULDING CLIP
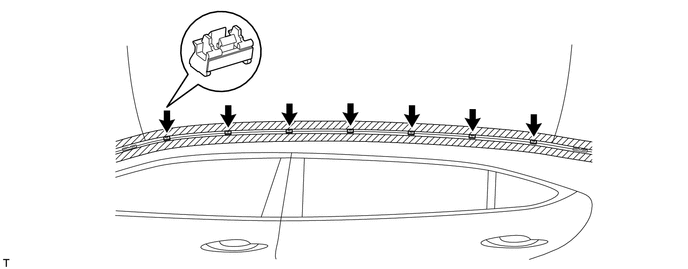
Tech Tips
Perform the following procedure if replacing the No. 2 roof drip side finish moulding clips.
-
Remove the 9 No. 2 roof drip side finish moulding clips.
-
-
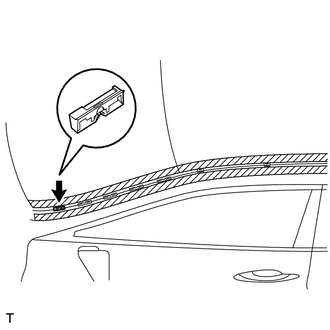
REMOVE NO. 3 WINDSHIELD OUTSIDE MOULDING CLIP
Tech Tips
Perform the following procedure if replacing the No. 3 outside windshield moulding clip.
-
Put a 4 mm (0.16 in.) drill bit into a drill.
-
Wind tape around the drill bit approximately 5 mm (0.20 in.) from the tip of the drill.
Tech Tips
Tape the 4 mm (0.16 in.) drill bit to prevent the drill bit from going too deep.
-
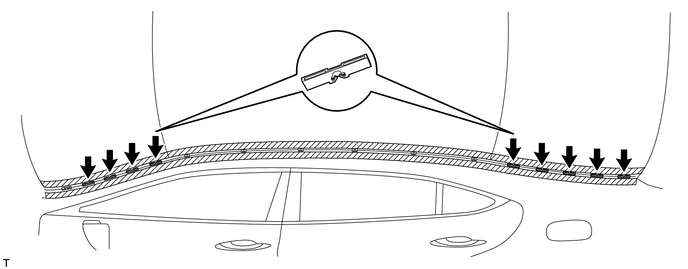
Lightly press the drill against the rivets, drill off the flanges of the rivets, and remove the 10 rivets.
Note
-
Pressing the drill too firmly will cause the rivet to turn and result in the rivet not being drilled through.
-
Do not pry the rivets with the drill, because this may cause damage to the installation holes of the rivets or the drill bit.
-
Be careful of the drilled rivets as they may become hot.
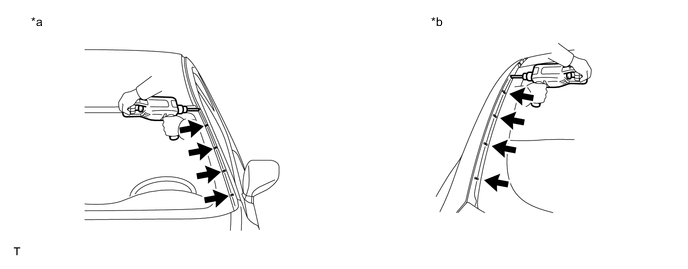
Text in Illustration *a Front Side *b Rear Side -
-
Using a vacuum cleaner, remove the rivet fragments and shavings from the drilled areas.
-
-
REMOVE NO. 1 ROOF DRIP SIDE FINISH MOULDING CLIP
Tech Tips
Perform the following procedure if replacing the No. 1 roof drip side finish moulding clips.
-
for Standard Body:
Remove the 6 No. 1 roof drip side finish moulding clips.
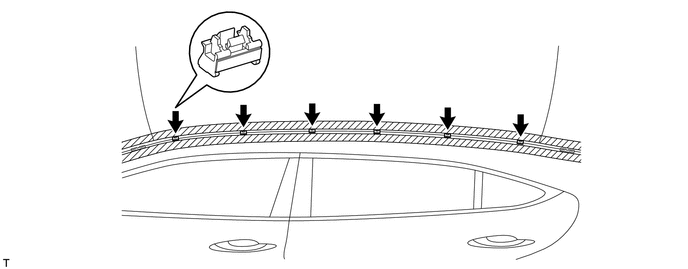
-
for Long Body:
Remove the 7 No. 1 roof drip side finish moulding clips.
-