LUGGAGE COMPARTMENT DOOR GARNISH REMOVAL
PROCEDURE
-
REMOVE LUGGAGE COMPARTMENT DOOR ASSIST GRIP
-
REMOVE SWITCH BEZEL
-
REMOVE NO. 2 COURTESY LIGHT ASSEMBLY
-
REMOVE REAR COMBINATION LIGHT SERVICE COVER LH
-
REMOVE REAR COMBINATION LIGHT SERVICE COVER RH
-
REMOVE LUGGAGE COMPARTMENT DOOR HINGE COVER LH
-
REMOVE LUGGAGE COMPARTMENT DOOR HINGE COVER RH
-
REMOVE BACK DOOR TRIM COVER
-
REMOVE REAR LIGHT ASSEMBLY LH
-
REMOVE REAR LIGHT ASSEMBLY RH
Tech Tips
Use the same procedure described for the LH side.
-
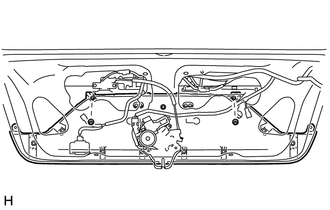
REMOVE NO. 3 LUGGAGE COMPARTMENT DOOR OUTSIDE GARNISH
-
Detach the 4 claws and remove the No. 3 luggage compartment door outside garnish.
-
-
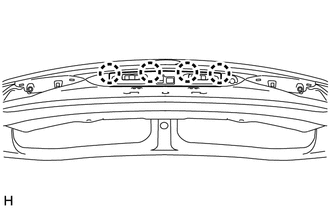
REMOVE LUGGAGE COMPARTMENT DOOR OUTSIDE GARNISH
Text in Illustration *1 Protective Tape
-
Remove the 6 screws.
-
Put protective tape around the luggage compartment door outside garnish.
-
Detach the 4 clips and remove the luggage compartment door outside garnish.
-
-
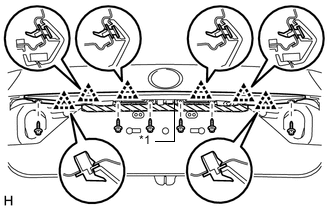
REMOVE NO. 2 LUGGAGE COMPARTMENT DOOR OUTSIDE GARNISH
-
Remove the 2 nuts.
-
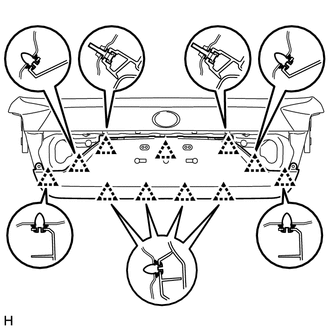
Detach the 11 clips and remove the No. 2 luggage compartment door outside garnish.
-