INSTRUMENT PANEL SPEAKER REMOVAL
CAUTION / NOTICE / HINT
Tech Tips
-
Use the same procedure for the RH and LH sides.
-
The procedure listed below is for the LH side.
PROCEDURE
-
REMOVE NO. 1 SPEAKER HOLE COVER
-
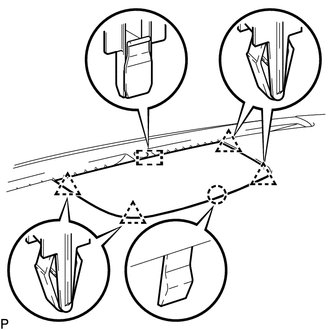
Detach the 4 clips, claw and clamp and remove the No. 1 speaker hole cover.
-
-
REMOVE FRONT NO. 3 SPEAKER ASSEMBLY
Note
Do not touch the cone of the speaker.
-
Remove the 2 bolts.
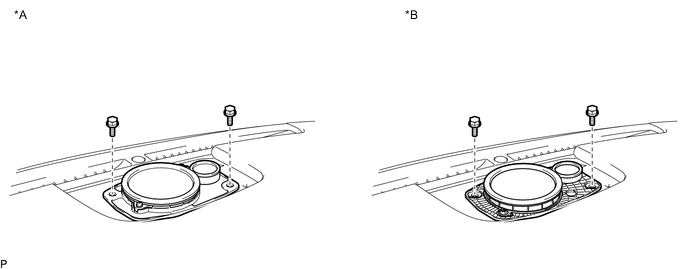
Text in Illustration *A for Standard *B for 19 Speaker -
Disconnect the connector and remove the front No. 3 speaker assembly.
-
-
REMOVE FRONT PILLAR GARNISH LH
-
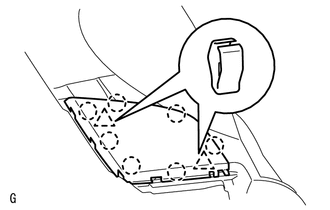
REMOVE NO. 1 INSTRUMENT PANEL SPEAKER PANEL SUB-ASSEMBLY
-
Detach the 2 clips and 7 claws.
-
Remove the No. 1 instrument panel speaker panel sub-assembly.
-
-
REMOVE FRONT NO. 2 SPEAKER ASSEMBLY
Note
Do not touch the cone of the speaker.
-
Remove the 2 bolts.
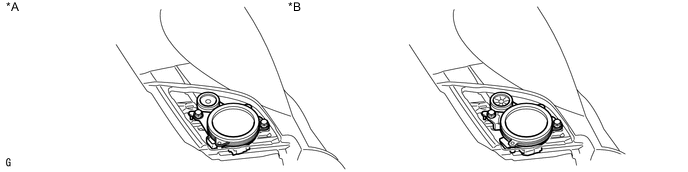
Text in Illustration *A for Standard *B for 19 Speaker -
Disconnect the connector and remove the front No. 2 speaker assembly.
-