FRONT PROPELLER SHAFT ASSEMBLY INSTALLATION
PROCEDURE
-
TEMPORARILY INSTALL FRONT PROPELLER SHAFT ASSEMBLY
-
Completely remove any oil or the like and clean the constant velocity universal joint washers and the contact surfaces of the front propeller shaft assembly, transfer and front differential.
-
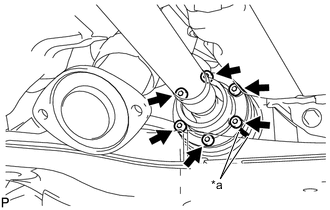
Text in Illustration *a Matchmark Align the matchmarks on the differential companion flange and front propeller shaft.
-
Temporarily install the front propeller shaft with 6 new bolts and the 2 universal joint washers.
-
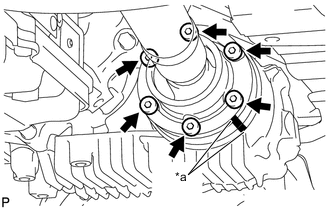
Text in Illustration *a Matchmark Align the matchmarks on the transfer companion flange and front propeller shaft.
-
Temporarily install the front propeller shaft with 6 new bolts and the 2 universal joint washers.
-
-
INSTALL REAR ENGINE MOUNTING MEMBER
-
Set the rear No. 3 engine mounting insulator to the rear engine mounting member.
-
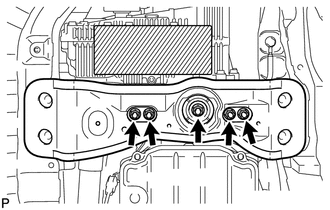
Temporarily install the rear engine mounting member to the hybrid vehicle transmission assembly with the 5 nuts.
-
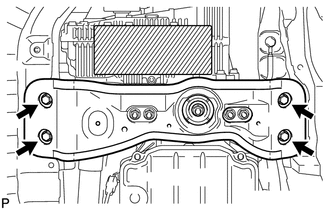
Install the rear engine mounting member with the 4 bolts.
- Torque:
- 35 N*m { 354 kgf*cm, 26 ft.*lbf }
-
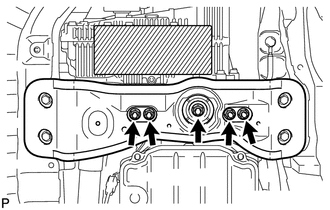
Tighten the 5 nuts.
- Torque:
- 38 N*m { 387 kgf*cm, 29 ft.*lbf }
-
-
TIGHTEN FRONT PROPELLER SHAFT ASSEMBLY
-
Using a 6 mm socket hexagon wrench, tighten the front propeller shaft with the 6 bolts.
- Torque:
- 25 N*m { 255 kgf*cm, 18 ft.*lbf }
Note
Be careful not to damage the front propeller shaft.
-
Using a 6 mm socket hexagon wrench, tighten the front propeller shaft with the 6 bolts.
- Torque:
- 25 N*m { 255 kgf*cm, 18 ft.*lbf }
Note
Be careful not to damage the front propeller shaft.
-
-
INSTALL FRONT EXHAUST PIPE ASSEMBLY
-
INSPECT FOR EXHAUST GAS LEAK