CAMSHAFT OIL CONTROL VALVE REMOVAL
CAUTION / NOTICE / HINT
Tech Tips
When viewed from the rear of the engine assembly, Bank 1 is on the left side and Bank 2 is on the right side.
PROCEDURE
-
REMOVE V-BANK COVER SUB-ASSEMBLY
-
REMOVE AIR CLEANER INLET COVER SUB-ASSEMBLY
-
REMOVE NO. 1 AIR CLEANER INLET
-
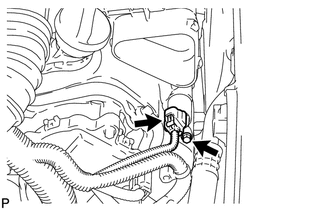
REMOVE CAMSHAFT TIMING OIL CONTROL VALVE ASSEMBLY (for Bank 1)
-
Disconnect the camshaft timing oil control valve assembly connector.
-
Remove the bolt and camshaft timing oil control valve assembly.
-
Remove the O-ring from the camshaft timing oil control valve assembly.
-
-
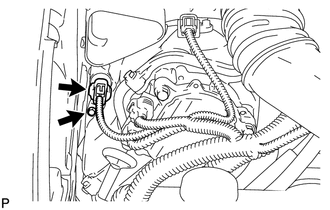
REMOVE CAMSHAFT TIMING OIL CONTROL VALVE ASSEMBLY (for Bank 2)
-
Disconnect the camshaft timing oil control valve assembly connector.
-
Remove the bolt and camshaft timing oil control valve assembly.
-
Remove the O-ring from the camshaft timing oil control valve assembly.
-