REAR COOLING UNIT(w/o Rear Air Conditioning System) INSTALLATION
PROCEDURE
-
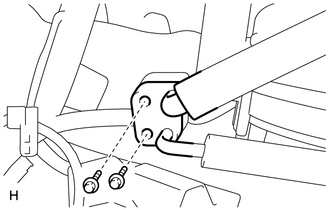
INSTALL REAR COOLING UNIT ASSEMBLY

-
Install the rear cooling unit assembly and connect the drain cooler hose as shown in the illustration.
Text in Illustration *1 EPS DC/DC Converter *2 Rear Cooling Unit Assembly *3 Overturn Prevention Bracket *4 HV Battery *5 No. 1 Hybrid Battery Intake Duct - - *a Fitting *b Front Side *c Upper *d White Paint -
Install the 2 bolts and 2 nuts.
- Torque:
- 9.8 N*m { 100 kgf*cm, 87 in.*lbf }
-
Connect the connectors and attach the clamps.
-
-
CONNECT AIR CONDITIONING TUBE AND ACCESSORY ASSEMBLY
-
Sufficiently apply compressor oil to 2 new O-rings and the fitting surface of the tube.
Compressor oil ND-OIL 11 or equivalent -
Install the 2 O-rings to the air conditioning tube and accessory assembly.
-
Install the air conditioning tube and accessory assembly with the 2 bolts.
- Torque:
- 9.8 N*m { 100 kgf*cm, 87 in.*lbf }
-
Install the No. 4 cooling unit packing as shown in the illustration.
-
Remove peeling paper A and attach the packing starting from the marking on the block joint.
-
Pull peeling paper B through the space between the duct and block joint and install the packing.
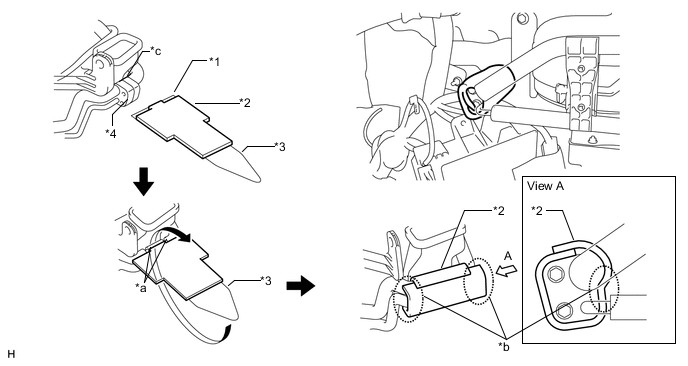
Text in Illustration *1 Peeling Paper A *2 No. 4 cooling unit packing *3 Peeling Paper B *4 Block Joint *a Align the 2 edges of the packing with the edges of the block joint *b Be sure to securely attach the packing in these areas *c Marking - -
-
-
-
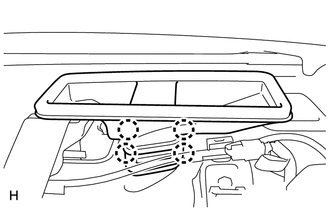
INSTALL REAR NO. 4 AIR DUCT
-

Attach the 6 claws to install the rear No. 4 air duct.
-
-
INSTALL REAR NO. 5 AIR DUCT
-
Attach the 4 claws to install the rear No. 5 air duct.
-
-
INSTALL LUGGAGE COMPARTMENT TRIM COVER ASSEMBLY RH
-
INSTALL LUGGAGE COMPARTMENT TRIM COVER ASSEMBLY LH
-
INSTALL REAR FLOOR FINISH PLATE
-
INSTALL FRONT LUGGAGE COMPARTMENT TRIM COVER
-
INSTALL NO. 1 LUGGAGE COMPARTMENT LIGHT ASSEMBLY
-
INSTALL DECK TRIM SIDE BOARD RH
-
INSTALL ROPE HOOK ASSEMBLY
-
INSTALL ROPE HOOK
-
INSTALL PACKAGE TRAY TRIM PANEL ASSEMBLY
-
INSTALL INNER ROOF SIDE GARNISH LH
-
INSTALL INNER ROOF SIDE GARNISH RH
-
INSTALL REAR SEAT SIDE GARNISH LH
-
INSTALL REAR SEAT SIDE GARNISH RH
-
INSTALL REAR DOOR SCUFF PLATE LH
-
INSTALL REAR DOOR SCUFF PLATE RH
-
INSTALL REAR SEAT ASSEMBLY
-
CONNECT CABLE TO NEGATIVE AUXILIARY BATTERY TERMINAL
Note
When disconnecting the cable, some systems need to be initialized after the cable is reconnected Click here.
-
INSTALL BATTERY SERVICE HOLE COVER LH
-
INSTALL DECK TRIM SIDE BOARD LH (w/o Spare Tire)
-
INSTALL DECK BOARD ASSEMBLY (w/o Spare Tire)
-
INSTALL LUGGAGE COMPARTMENT MAT SUB-ASSEMBLY (w/ Spare Tire)
-
ADD COMPRESSOR OIL
-
for HFC-134a (R134a):
-
for HFO-1234yf (R1234yf):
-
-
CHARGE AIR CONDITIONING SYSTEM WITH REFRIGERANT
-
for HFC-134a (R134a):
-
for HFO-1234yf (R1234yf):
-
-
WARM UP COMPRESSOR
-
for HFC-134a (R134a):
-
for HFO-1234yf (R1234yf):
-
-
INSPECT FOR REFRIGERANT LEAK
-
for HFC-134a (R134a):
-
for HFO-1234yf (R1234yf):
-
-
CHECK SRS WARNING LIGHT