BACK DOOR OUTSIDE GARNISH(w/o Tire Carrier) REMOVAL
PROCEDURE
-
REMOVE BACK DOOR CENTER GARNISH
-
REMOVE BACK DOOR SIDE GARNISH LH
-
REMOVE BACK DOOR SIDE GARNISH RH
-
REMOVE BACK DOOR TRIM COVER
-
REMOVE UPPER TOOL BOX PANEL SUB-ASSEMBLY
-
REMOVE TOOL CASE
-
REMOVE BACK DOOR LOCK COVER
-
REMOVE BACK DOOR TRIM PANEL ASSEMBLY
-
REMOVE BACK DOOR SERVICE HOLE COVER
-
REMOVE BACK DOOR OUTSIDE HANDLE LH
-
REMOVE NO. 2 BACK DOOR GARNISH RETAINER (w/o Rear View Monitor System)
-
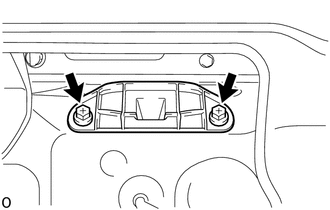
Remove the 2 bolts and No. 2 back door garnish retainer.
-
-
REMOVE REAR TELEVISION CAMERA ASSEMBLY (w/ Rear View Monitor System)
-
REMOVE BACK DOOR OUTSIDE GARNISH ASSEMBLY
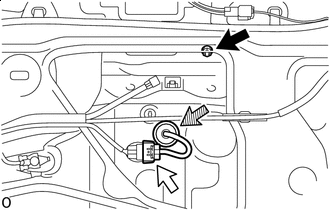

Nut 
Connector 
Grommet
-
Remove the nut.
-
Disconnect the connector.
-
Detach the grommet and disconnect the back door electrical key switch wire harness from the back door panel.
-
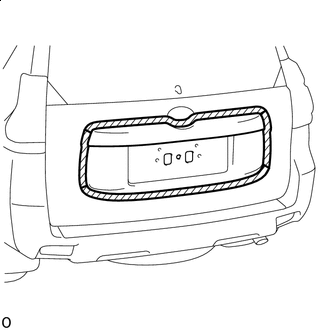

Protective Tape Put protective tape around the back door outside garnish assembly.
-
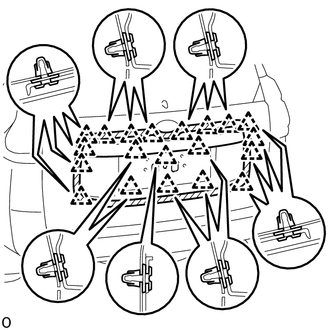
Detach the 20 clips and remove the back door garnish assembly.
-
-
REMOVE NO. 2 BACK DOOR OUTSIDE GARNISH
-
Detach the 3 claws and 2 guides and remove the No. 2 back door outside garnish from the back door outside garnish sub-assembly.
-