SIDE STEP DISASSEMBLY
CAUTION / NOTICE / HINT
Tech Tips
-
Use the same procedure for the RH and LH sides.
-
The procedure listed below is for the LH side.
PROCEDURE
-
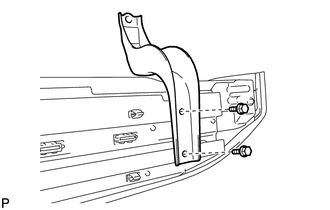
REMOVE SIDE STEP BRACKET LH
-
Remove the 2 bolts and side step bracket.
-
-
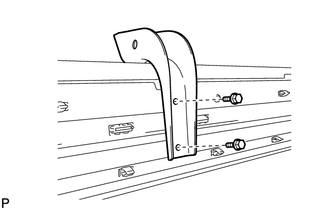
REMOVE NO. 2 SIDE STEP BRACKET LH
-
Remove the 2 bolts and No. 2 side step bracket.
-
-
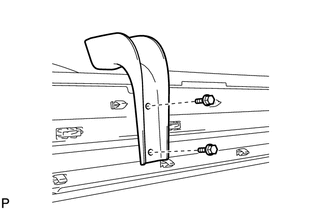
REMOVE NO. 3 SIDE STEP BRACKET LH
-
Remove the 2 bolts and No. 3 side step bracket.
-
-
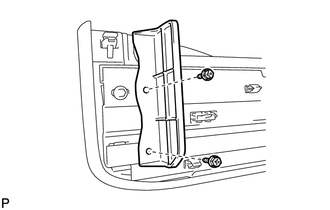
REMOVE NO. 2 ROCKER PANEL MOULDING PROTECTOR
-
Remove the 2 bolts and No. 2 rocker panel moulding protector.
-
-
REMOVE STEP PLATE LH (for 5 Door)
-
Remove the clip and 3 bolts.
-
Detach the 17 claws and remove the step plate.
-
-
REMOVE STEP PLATE LH (for 3 Door)
-
Remove the clip and 3 bolts.
-
Detach the 14 claws and remove the step plate.
-
-
REMOVE STEP PLATE COVER LH
-
Remove the step plate cover.
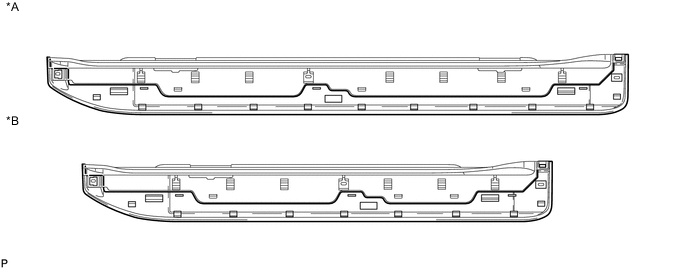
Text in Illustration *A for 5 Door *B for 3 Door
-
-
REMOVE NO. 2 SIDE STEP PLATE COVER
-
Remove the No. 2 step plate cover.
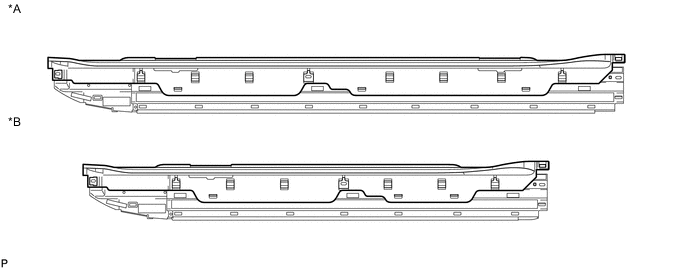
Text in Illustration *A for 5 Door *B for 3 Door
-
-
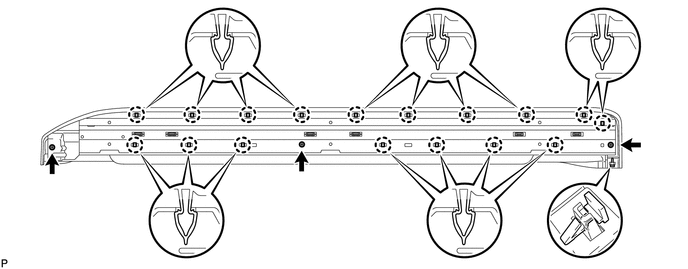
REMOVE SIDE STEP BRACKET SUB-ASSEMBLY LH
-
Put a 4 mm (0.157 in.) drill bit into a drill.
-
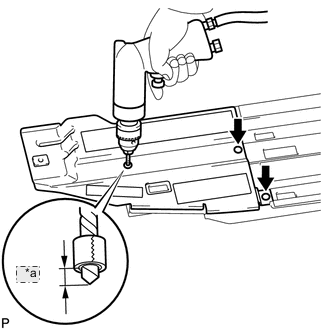
*a 5 mm Wind tape around the drill bit approximately 5 mm (0.197 in.) from the tip of the drill as shown in the illustration.
Tech Tips
Tape the 4 mm (0.157 in.) drill bit to prevent the drill bit from going too deep.
-
Lightly press the drill against the 3 rivets, drill off the flanges of the 3 rivets and remove the side step bracket.
CAUTION:
Be careful of the drilled rivet as it may become hot.
Note
-
Pressing the drill too firmly will cause the rivet to turn and result in the rivet not being drilled through.
-
Do not pry the rivet with the drill because this may cause damage to the installation holes of the rivet or the drill bit.
-
-
Using a vacuum cleaner, remove the rivet fragments and shavings from the drilled area.
-
-
REMOVE STEP PANEL WIRE LH (w/ Illumination)
-
REMOVE STEP LIGHT ASSEMBLY (w/ Illumination)
-
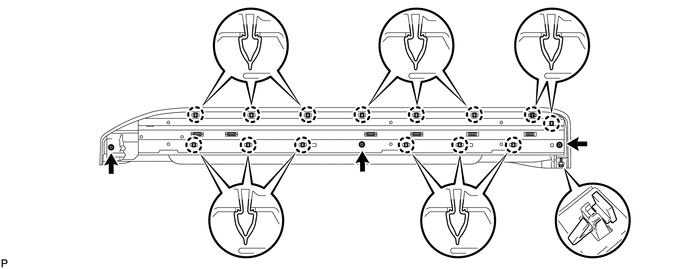
REMOVE STEP LIGHT BRACKET (w/ Illumination)
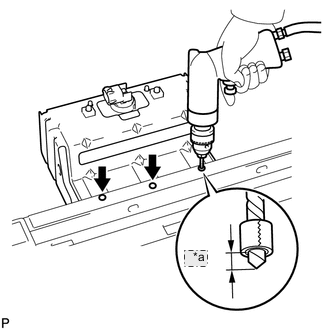
*a 5 mm
-
Put a 4 mm (0.157 in.) drill bit into a drill.
-
Wind tape around the drill bit approximately 5 mm (0.197 in.) from the tip of the drill as shown in the illustration.
Tech Tips
Tape the 4 mm (0.157 in.) drill bit to prevent the drill bit from going too deep.
-
Lightly press the drill against the 3 rivets, drill off the flanges of the 3 rivets and remove the step light bracket.
CAUTION:
Be careful of the drilled rivet as it may become hot.
Note
-
Pressing the drill too firmly will cause the rivet to turn and result in the rivet not being drilled through.
-
Do not pry the rivet with the drill because this may cause damage to the installation holes of the rivet or the drill bit.
-
-
Using a vacuum cleaner, remove the rivet fragments and shavings from the drilled area.
-
-
REMOVE STEP LIGHT ASSEMBLY (w/ Illumination)