FRONT CONSOLE BOX(w/ Refrigerated Cool Box) DISASSEMBLY
PROCEDURE
-
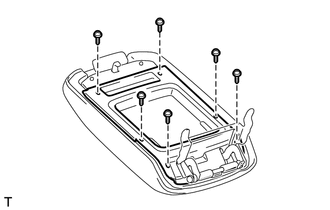
REMOVE COOL BOX CONSOLE COMPARTMENT DOOR SUB-ASSEMBLY
-
Remove the 6 screws and console compartment door sub-assembly.
-
-
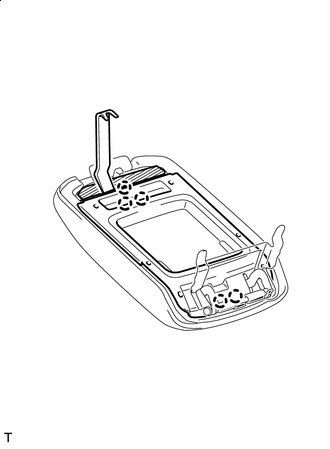
REMOVE COOLING BOX DOOR HINGE SUB-ASSEMBLY
-
Remove the 6 screws.
-

Protective Tape Put protective tape around the instrument side panel.
-
Using a moulding remover, detach the 5 claws.
-
Remove the 4 screws the console compartment door hinge sub-assembly.
-
-
REMOVE CONSOLE BOX REGISTER ASSEMBLY
-
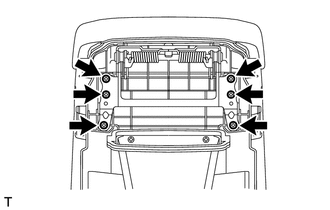
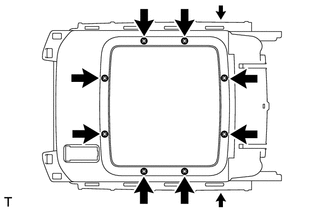
REMOVE COOLING BOX ASSEMBLY
-
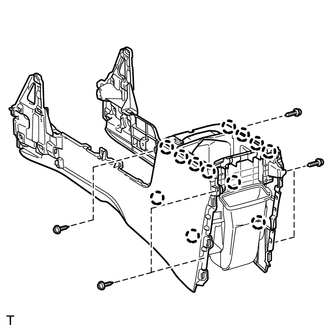
Remove the 6 screws.
-
Detach the 12 claws and remove the cooling box assembly.
-
-
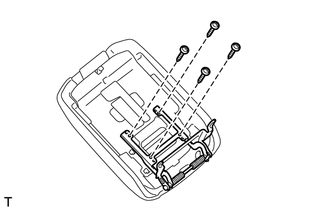
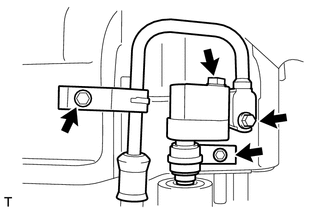
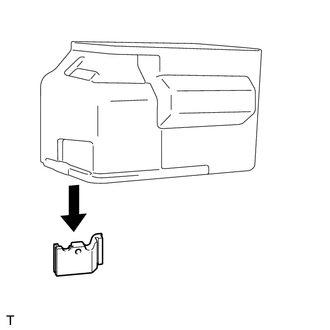
REMOVE COOLING BOX AMPLIFIER ASSEMBLY
-
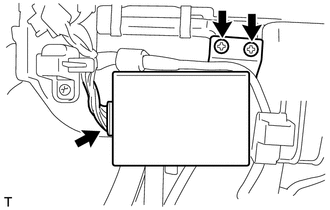
Remove the 2 screws.
-
Disconnect the connector and remove the cooling box amplifier assembly.
-
-
REMOVE NO. 3 COOLER UNIT DRAIN HOSE
-
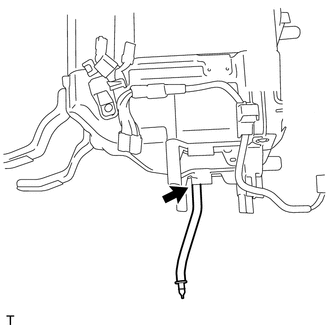
Remove the No. 3 cooler unit drain hose.
-
-
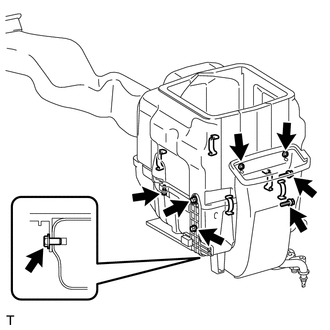
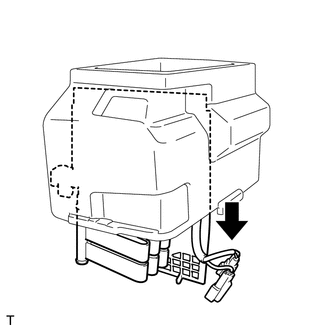
REMOVE NO. 1 COOLER WIRING HARNESS SUB-ASSEMBLY
-
Remove the packing.
-
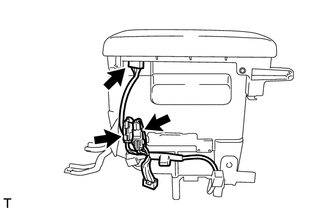
Disconnect the 3 connectors and remove the No. 1 cooler wiring harness sub-assembly.
-
-
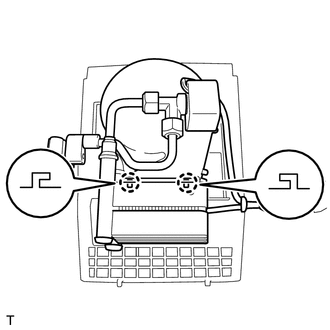
REMOVE COOLER CONTROL SWITCH SUB-ASSEMBLY
-
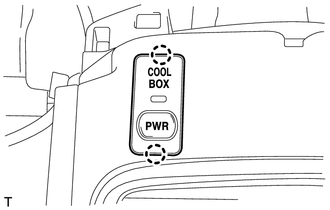
Detach the 2 claws and remove the cooler control switch sub-assembly.
-
-
REMOVE COOLING UNIT DOOR
-
Remove the packing.
-
Remove the 8 screws, 2 bolts and cooling unit door.
-
-
REMOVE NO. 2 COOLER EVAPORATOR SUB-ASSEMBLY
-
Remove the 3 screws, 5 bolts and air duct.
-
Remove the 5 holding springs.
-
Remove the 4 bolts.
-
Remove the cooling unit case.
-
Remove the cooler evaporator assembly.
-
Detach the 2 claws.
-
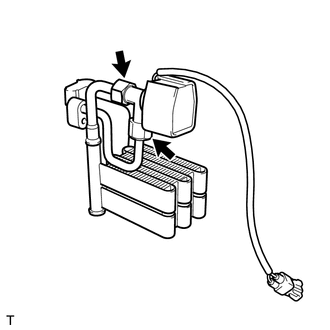
Loosen the 2 nuts and remove the No. 1 liquid tube, cooler magnet valve assembly and No. 2 cooler evaporator sub-assembly.
-
-
REMOVE COOL BOX BLOWER WITH FAN MOTOR SUB-ASSEMBLY