POWER OUTLET SOCKET(for Bench Seat Type) REMOVAL
CAUTION / NOTICE / HINT
Tech Tips
-
Use the same procedure for RHD and LHD vehicles.
-
The procedure listed below is for LHD vehicles.
PROCEDURE
-
REMOVE INTEGRATION CONTROL AND PANEL ASSEMBLY
-
REMOVE INSTRUMENT PANEL FINISH PANEL END LH
-
REMOVE INSTRUMENT PANEL FINISH PANEL END RH
-
REMOVE LOWER CONSOLE PANEL SUB-ASSEMBLY
-
REMOVE UPPER CONSOLE PANEL
-
REMOVE POWER OUTLET SOCKET ASSEMBLY
-
Using a screwdriver, depress the claw labeled A from the front of the upper console panel.
Tech Tips
Tape the screwdriver tip before use.
-
While depressing the claw labeled A, detach the claw labeled B from the back of the upper console panel, and then push out the power outlet socket assembly in the direction of the arrow in the illustration to remove it.
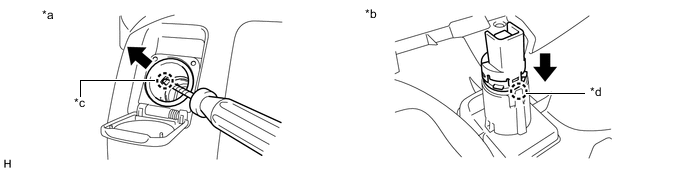
*a Front of Upper Console Panel *b Back of Upper Console Panel *c Claw A *d Claw B 
Protective Tape - -
-
-
REMOVE NO. 2 POWER OUTLET SOCKET COVER
-
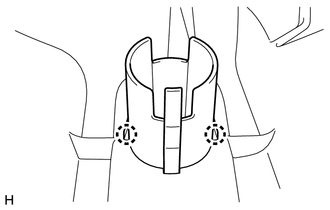
Detach the 2 claws and remove the No.2 power outlet socket cover.
-