REAR NO. 1 SEAT ASSEMBLY(for 60/40 Split Tumble Seat Type LH Side) DISASSEMBLY
CAUTION / NOTICE / HINT
CAUTION:
Wear protective gloves. Sharp areas on the parts may injure your hands.
PROCEDURE
-
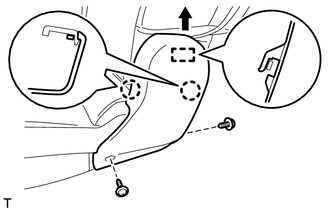
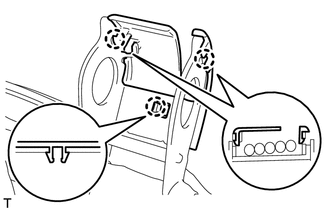
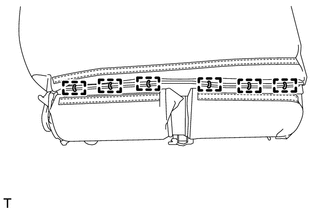
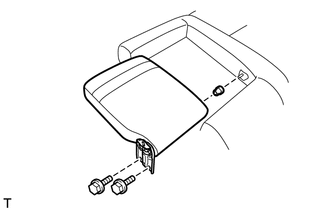
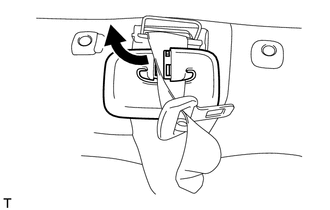
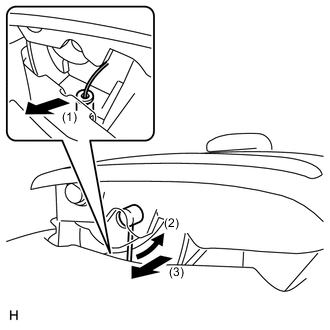
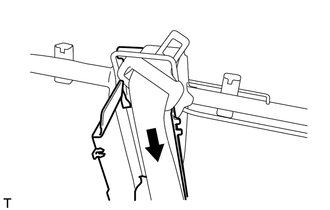
REMOVE REAR SEAT RECLINING COVER LH
-
Remove the 2 screws.
-
Using a moulding remover, detach the 2 claws.
-
Move the cover in the direction of the arrow to detach the guide and remove the cover.
-
-
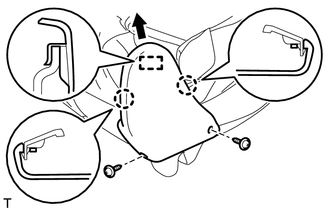
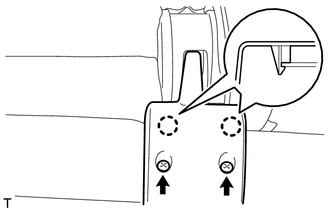
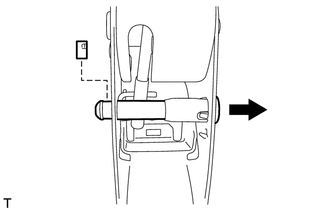
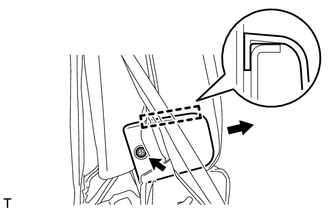
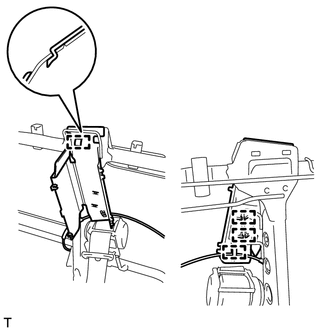
REMOVE REAR NO. 1 SEAT RECLINING COVER RH
-
Remove the 2 screws.
-
Using a moulding remover, detach the 2 claws.
-
Move the cover in the direction of the arrow to detach the guide.
-
Detach the 2 hooks and remove the cover.
-
-
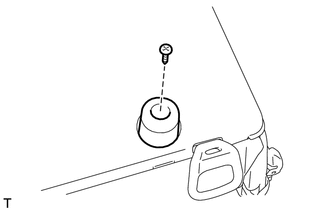
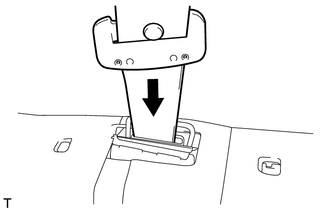
REMOVE REAR NO. 2 SEAT CUSHION
-
Remove the screw and cushion.
-
-
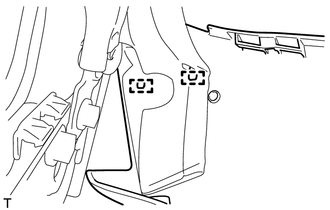
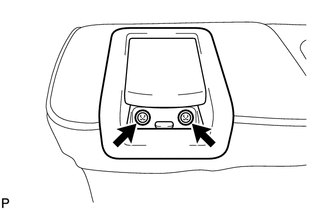
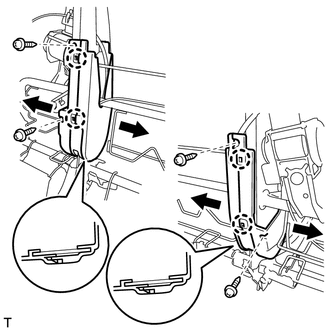
REMOVE REAR RECLINING ADJUSTER INSIDE COVER LH
-
Remove the 2 screws.
-
Detach the 2 claws and remove the cover.
-
-
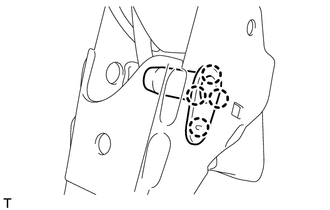
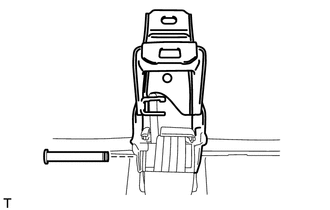
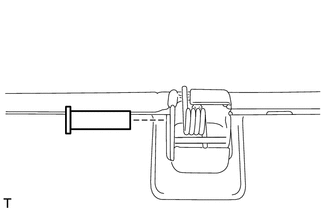
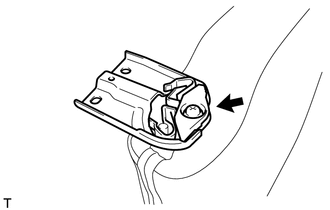
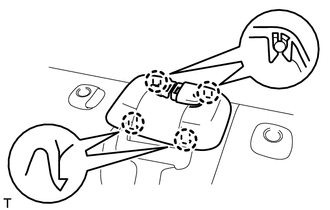
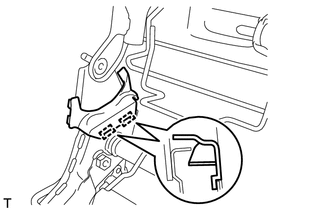
REMOVE SEAT TRACK OPEN LEVER PIN SUB-ASSEMBLY
-
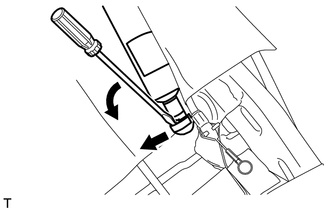
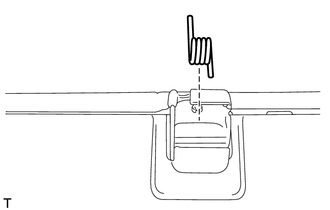
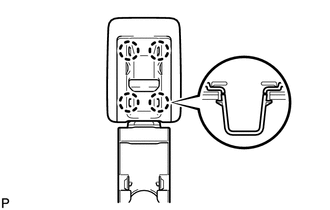
Using a screwdriver, remove the stopper.
-
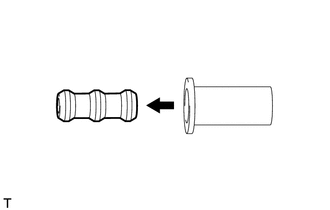
Remove the pin as shown in the illustration.
Tech Tips
Use the same procedure for both pins.
-
-
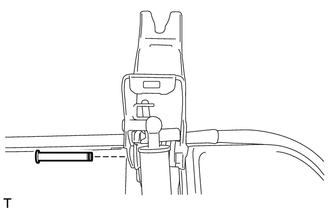
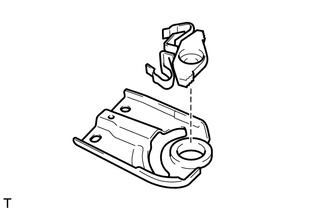
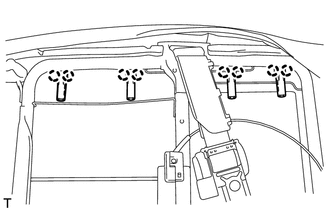
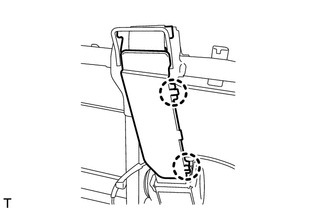
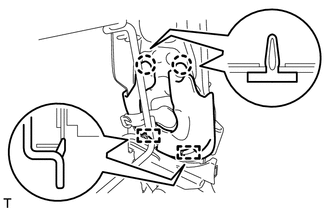
REMOVE REAR SEAT HINGE PAWL GUIDE
-
Detach the 4 claws and remove the pawl guide.
Tech Tips
Use the same procedure for both pawl guides.
-
-
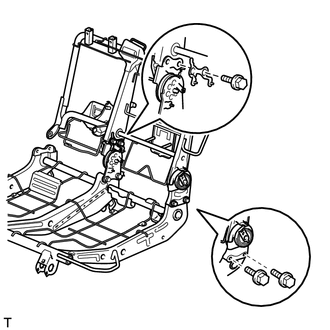
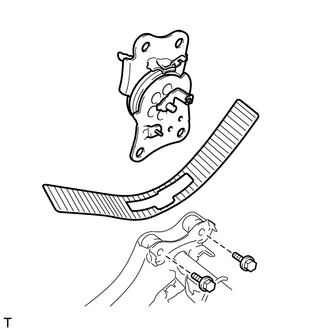
REMOVE REAR SEAT HINGE SUB-ASSEMBLY LH
-

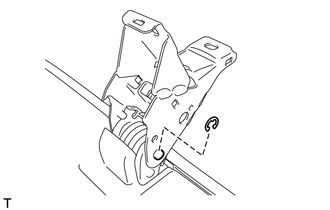
Using a screwdriver, remove the E-ring.
-
Remove the pin.
-
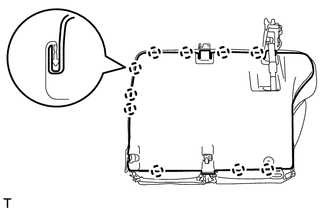
Using a screwdriver, detach the 10 claws.
Tech Tips
Tape the screwdriver tip before use.
-
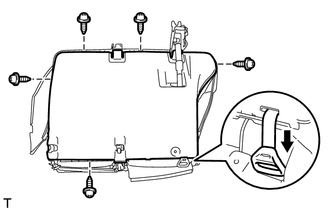
Remove the 5 screws.
-
Disconnect the reclining release handle from the under cover.
-
Raise the under cover.
-
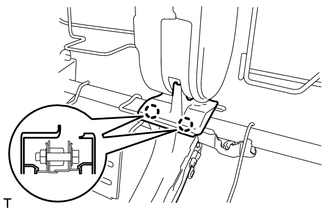
Using a screwdriver, remove the spring of the seat stay ball-joint.
-
Disconnect the seat stay from the seat cushion frame.
-
Remove the seat hinge and seat stay as a unit.
Note
The seat stay cannot be disconnected from the seat hinge. If the stay is disconnected from the hinge, replacement of both parts is necessary.
Tech Tips
If it is necessary to replace the seat hinge, replace it together with the seat stay as the stay cannot be disconnected from the hinge.
-
-
REMOVE REAR SEAT STAY SUB-ASSEMBLY
Tech Tips
-
As the seat stay cannot be disconnected from the seat hinge, it is removed in the previous step.
-
If it is necessary to replace the seat stay, replace it together with the seat hinge as the stay cannot be disconnected from the hinge.
-
-
REMOVE REAR SEAT HINGE SUB-ASSEMBLY RH
-
Using a screwdriver, remove the E-ring.
-
Remove the pin and hinge.
-
-
REMOVE REAR SEAT CUSHION EDGE PROTECTOR
-
Remove the protector from the cushion frame.
Tech Tips
Use the same procedure for both protectors.
-
-
REMOVE FOLD SEAT LEG LOCK CUSHION
-
Remove the cushion from the protector.
Tech Tips
Use the same procedure for both cushions.
-
-
REMOVE REAR SEAT CUSHION SUPPORT SPRING
-
Remove the spring from the seat cushion frame.
Tech Tips
Use the same procedure for both springs.
-
-
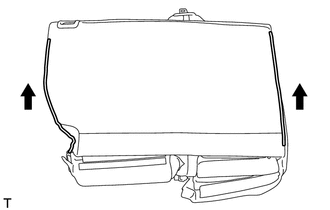
REMOVE REAR SEAT CUSHION UNDER COVER SUB-ASSEMBLY LH
-
Remove the under cover.
-
-
REMOVE REAR NO. 2 SEAT HINGE COVER LH
-
Detach the 3 claws and remove the cover.
-
-
REMOVE REAR NO. 2 SEAT HINGE COVER RH
-
Detach the 3 claws and remove the cover.
-
-
REMOVE REAR SEAT INNER BELT ASSEMBLY
-
REMOVE REAR NO. 1 SEAT INNER BELT ASSEMBLY RH
-
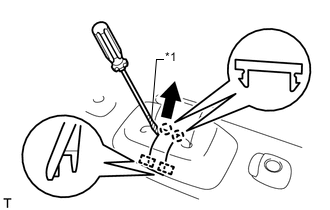
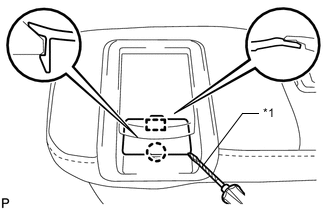
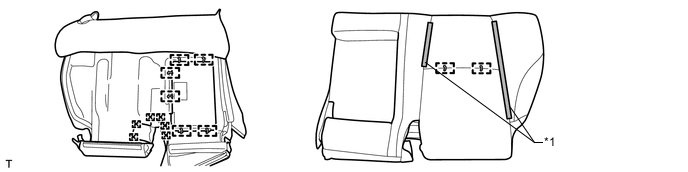
REMOVE SEAT CUSHION COVER WITH PAD
-
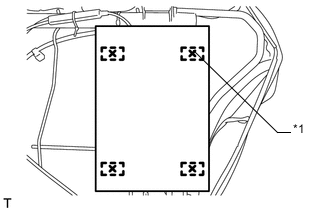
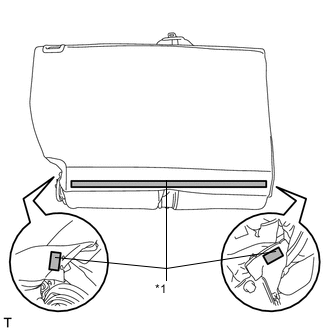
Text in Illustration *1 Tack Pin Cut off the tack pins and remove the carpet from the cushion pad.
-
Remove the hog rings and seat cushion cover with pad.
-
-
REMOVE REAR SEAT INNER CUSHION EDGE PROTECTOR LH
-
Text in Illustration *1 Tack Pin Cut off the tack pins and remove the carpet from the cushion pad.
-
-
REMOVE SEPARATE TYPE REAR SEAT CUSHION COVER
-
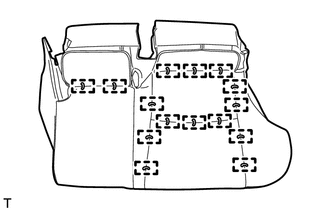
Remove the hog rings and seat cushion cover from the seat cushion pad.
-
-
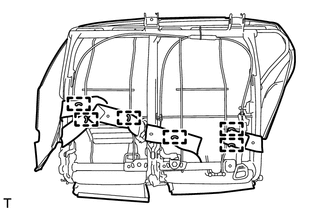
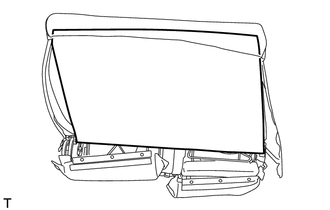
REMOVE REAR SEATBACK COVER
-
Using a screwdriver, detach the 8 claws and remove the 2 covers.
Tech Tips
Tape the screwdriver tip before use.
-
-
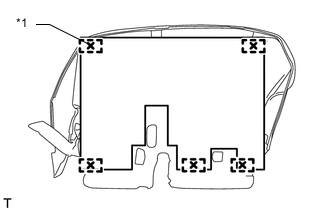
REMOVE NO. 1 SEATBACK PAD LH
-
Remove the bolt and disconnect the outer belt.
-
Text in Illustration *1 Fastening Tape Detach the fastening tape and open the cover.
-
Remove the 6 hog rings.
-
Open the 2 fasteners, and then open the seatback cover.
-
Remove the seatback pad.
-
-
REMOVE REAR SEAT INNER RECLINING COVER RH
-
Remove the screw.
-
Detach the guide and remove the cover.
-
-
REMOVE REAR SEAT CENTER ARMREST ASSEMBLY
-
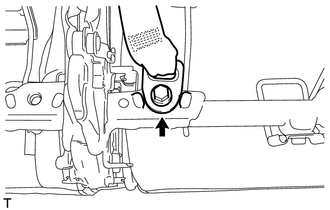
Remove the 2 bolts, center armrest and bush.
-
-
REMOVE REAR SEAT CENTER ARMREST HINGE
-
Remove the screw and armrest hinge.
-
-
REMOVE REAR SEAT ARMREST SUPPORT
-
Remove the armrest support.
-
-
REMOVE SHOULDER BELT ANCHOR COVER
Text in Illustration *1 Protective Tape
-
Using a screwdriver, detach the 2 claws and 2 guides, and then remove the cover.
Tech Tips
Tape the screwdriver tip before use.
-
-
REMOVE REAR SEAT SHOULDER BELT HOLE COVER LH
-
Detach the 4 claws and remove the cover.
-
Disconnect the outer belt.
-
-
REMOVE REAR SEATBACK LOCK STRIKER COVER
Text in Illustration *1 Protective Tape
-
Using a screwdriver, detach the claw and guide, and then remove the cover.
Tech Tips
Tape the screwdriver tip before use.
-
-
REMOVE REAR SEAT LOCK CONTROL LEVER SUB-ASSEMBLY LH
-
Remove the 2 screws.
-
Disconnect the cable in the order shown in the illustration and remove the lever.
-
-
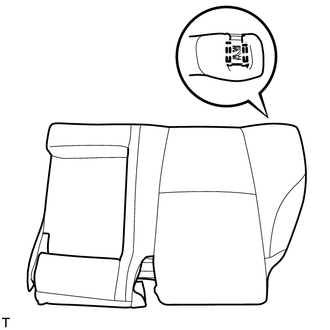
REMOVE REAR NO. 1 SEAT HEADREST SUPPORT ASSEMBLY
-
Detach the 8 claws and remove the 4 supports.
-
-
REMOVE SEATBACK COVER WITH PAD
-
Detach the 2 hooks and remove the seatback cover with pad.
-
Disconnect the outer belt from the seatback cover with pad.
-
-
REMOVE SEPARATE TYPE REAR SEATBACK COVER
-
Remove the hog rings and detach the fastening tape, and then remove the seatback cover from the seatback pad.
Text in Illustration *1 Fastening Tape - -
-
-
REMOVE REAR NO. 1 SEAT RECLINING COVER LH
-
Detach the 2 claws and remove the cover.
-
-
REMOVE RECLINING ADJUSTER COVER LH
-
Remove the 4 screws.
-
Detach the 4 claws and remove the cover.
-
-
REMOVE REAR SEAT SHOULDER BELT GUIDE
-
Detach the 2 claws and open the cover.
-
Disconnect the seat belt from the belt guide.
-
Detach the 4 guides and remove the belt guide.
-
-
REMOVE NO. 1 SEAT 3 POINT TYPE BELT ASSEMBLY LH
-
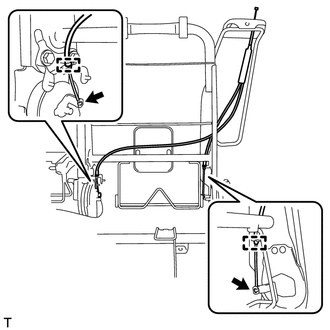
REMOVE REAR NO. 1 SEAT LOCK CABLE ASSEMBLY
-
Detach the 2 cable clamps, and then disconnect the cable and remove it.
-
-
REMOVE REAR SEAT INNER RECLINING COVER LH
-
Detach the 2 claws and 2 guides, and then remove the cover.
-
-
REMOVE REAR SEAT RECLINING COVER INNER LH

-
Detach the 2 guides and remove the cover.
-
-
REMOVE REAR SEAT RECLINING COVER INNER RH
-
Detach the 2 guides and remove the cover.
-
-
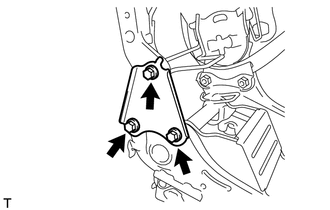
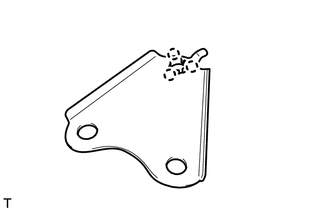
REMOVE SEATBACK STOPPER PLATE
-
Remove the 3 bolts and plate.
-
-
REMOVE REAR CENTER SEAT ARMREST BUSH
-
Detach the 3 claws and remove the bush.
-
-
REMOVE REAR SEATBACK FRAME SUB-ASSEMBLY LH
-
Remove the 4 bolts, bracket and seatback frame.
-
-
REMOVE REAR SEATBACK INNER ADJUSTER ASSEMBLY LH
-
Remove the 2 bolts, adjuster and cover.
-
-
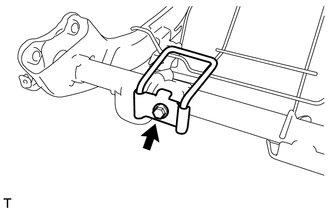
REMOVE TETHER ANCHOR BRACKET SUB-ASSEMBLY
-
Remove the bolt and bracket.
-
-
REMOVE NO. 1 FOLD SEAT LOCK CONTROL CABLE ASSEMBLY LH
-
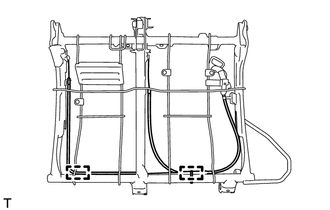
Cut off the 2 cable ties.
-
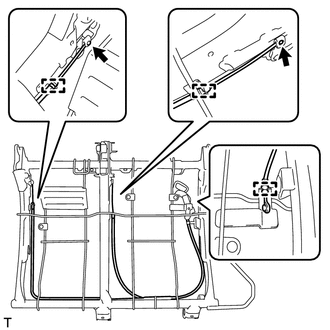
Detach the 3 cable clamps, and then disconnect the cable and remove it.
-