REAR NO. 2 SEAT ASSEMBLY(for Power Seat Type LH Side) INSPECTION
CAUTION / NOTICE / HINT
Note
After performing this inspection, be sure to perform initialization (initial position reset and initial position memorization) of the fold seat control ECU Click here.
PROCEDURE
-
INSPECT NO. 3 SEATBACK FRAME SUB-ASSEMBLY LH
-
Check the operation of the seatback frame.
-
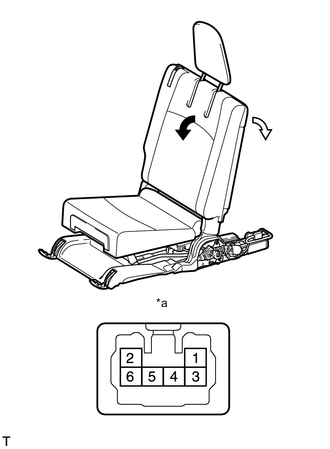
Text in Illustration *a Component without harness connected
(No. 3 Seatback Frame LH)

Front 
Rear Apply battery voltage to the power seat motor, and check that the seatback moves smoothly as follows.
OK Measurement Condition Specified Condition Battery positive (+) → 3
Battery negative (-) → 4
Front Battery positive (+) → 4
Battery negative (-) → 3
Rear If the result is not as specified, replace the No. 3 seatback frame LH.
-
-
-
INSPECT NO. 3 SEATBACK FRAME SUB-ASSEMBLY RH
-
Check the operation of the seatback frame.
-
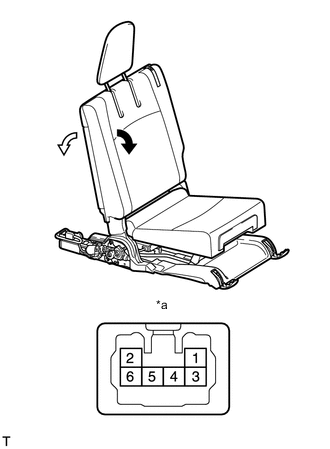
Text in Illustration *a Component without harness connected
(No. 3 Seatback Frame RH)
Front Rear Apply battery voltage to the power seat motor, and check that the seatback moves smoothly as follows.
OK Measurement Condition Specified Condition Battery positive (+) → 3
Battery negative (-) → 4
Front Battery positive (+) → 4
Battery negative (-) → 3
Rear If the result is not as specified, replace the No. 3 seatback frame RH.
-
-
-
INSPECT NO. 3 SEAT LEG ASSEMBLY LH
-
Check the operation of the seat leg.
-
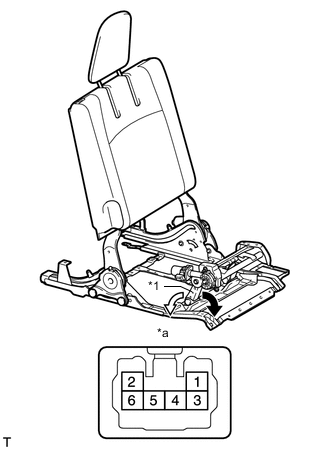
Text in Illustration *1 Seat Leg Arm *a Component without harness connected
(No. 3 Seat Leg Assembly LH)
Front Rear Apply battery voltage to the power seat motor, and check that the seat leg arm moves smoothly as follows.
OK Measurement Condition Specified Condition Battery positive (+) → 3
Battery negative (-) → 4
Front Battery positive (+) → 4
Battery negative (-) → 3
Rear If the result is not as specified, replace the No. 3 seat leg assembly.
-
-
-
INSPECT NO. 2 SEAT LEG ASSEMBLY (for RH Side)
-
Check the operation of the seat leg.
-
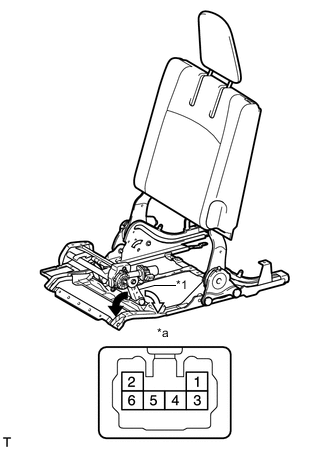
Text in Illustration *1 Seat Leg Arm *a Component without harness connected
(No. 2 Seat Leg Assembly)
Front Rear Apply battery voltage to the power seat motor, and check that the seat leg arm moves smoothly as follows.
OK Measurement Condition Specified Condition Battery positive (+) → 3
Battery negative (-) → 4
Front Battery positive (+) → 4
Battery negative (-) → 3
Rear If the result is not as specified, replace the No. 2 seat leg assembly.
-
-