INTEGRATION RELAY REMOVAL
CAUTION / NOTICE / HINT
Tech Tips
-
Use the same procedure for RHD and LHD vehicles.
-
The procedure listed below is for LHD vehicles.
PROCEDURE
-
DISCONNECT CABLE FROM NEGATIVE BATTERY TERMINAL
Note
-
After turning the ignition switch off, waiting time may be required before disconnecting the cable from the battery terminal. Therefore, make sure to read the disconnecting the cable from the battery terminal notice before proceeding with work.
-
When disconnecting the cable, some systems need to be initialized after the cable is reconnected.
-
-
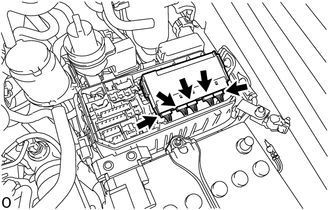
REMOVE NO. 1 RELAY BLOCK COVER
-
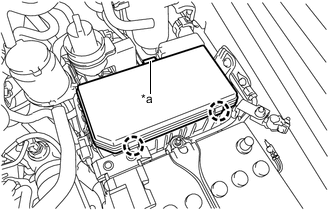
*a Lock Push the lock to detach the No. 1 relay block cover.
-
Detach the 2 claws while lifting up the No. 1 relay block cover to remove it.
-
-
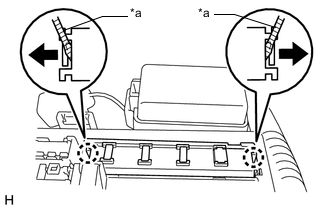
REMOVE NO. 1 INTEGRATION RELAY
-
except 5L-E:
-

*a No. 1 Integration Relay Fixing Lock While pushing the No. 1 integration relay fixing lock shown in the right illustration toward the center, pull the No. 1 integration relay upwards.
-
Disconnect the 5 connectors from the No. 1 integration relay and remove it.
Note
Do not drop the No. 1 integration relay or subject it to any strong impacts. Additionally, do not use a No. 1 integration relay that has been dropped.
-
-
for 5L-E:
-
*a Protective Tape Using a screwdriver, detach the 2 claws and disconnect the No. 1 integration relay from the engine room junction block.
Tech Tips
Tape the screwdriver tip before use.
-
-