FRONT STABILIZER BAR(w/ KDSS) REMOVAL
PROCEDURE
-
REMOVE FRONT WHEEL
-
REMOVE SIDE STEP ASSEMBLY LH (for 5 Door)
-
REMOVE STABILIZER CONTROL VALVE PROTECTOR
-
DRAIN SUSPENSION FLUID
-
REMOVE LOWER FRONT BUMPER COVER
-
REMOVE NO. 1 ENGINE UNDER COVER SUB-ASSEMBLY
-
REMOVE FRONT SUSPENSION MEMBER BRACE SUB-ASSEMBLY
-
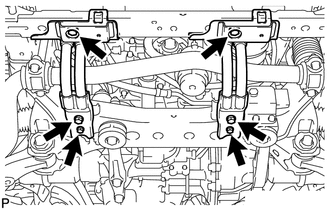
Remove the 6 bolts and 2 member braces from the front frame assembly.
-
-
REMOVE FRONT STABILIZER END BRACKET
-
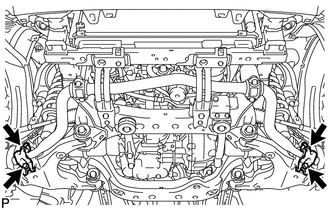
Remove the 4 bolts and 2 brackets from the lower arm.
-
-
REMOVE FRONT STABILIZER BAR
-
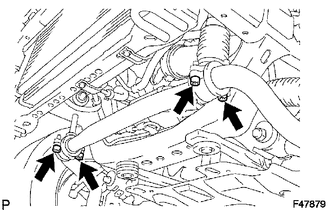
Remove the 4 bolts, 2 front stabilizer lower brackets and front stabilizer bar.
-
Remove the 2 front stabilizer link bushes and front stabilizer lower bracket bushes from the stabilizer bar front.
-
-
REMOVE FRONT FENDER APRON SEAL LH
-
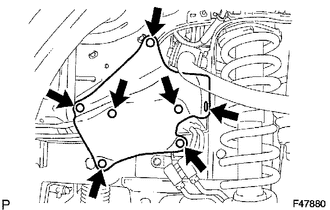
Remove the 7 clips and front apron seal LH.
-
-
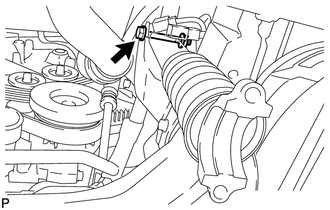
REMOVE FRAME APRON SEAL BRACKET
-
Remove the bolt and bracket.
-
-
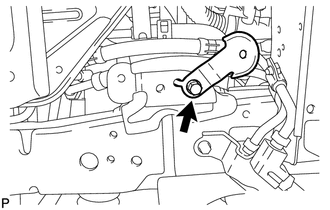
DISCONNECT NO. 1 FRONT STABILIZER CONTROL TUBE ASSEMBLY
-
Using a union nut wrench, disconnect the front stabilizer control tubes.
-
Remove the bolt.
-
-
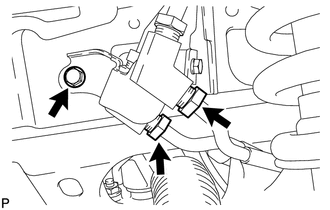
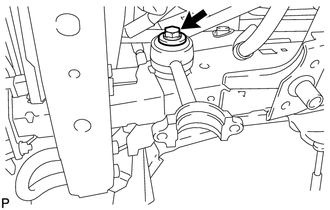
REMOVE FRONT STABILIZER WITH TUBE CYLINDER ASSEMBLY
-
Remove the bolt, nut and front stabilizer with tube cylinder assembly.
Note
-
Turn the bolt while holding the nut.
-
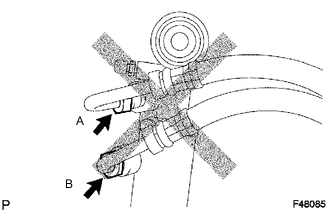
Do not loosen or remove the flare nuts labeled A and B in the illustration.
-
Do not hold the front stabilizer with tube cylinder assembly by the cylinder boot.
-
-
Remove the 2 bleeder plug caps and bleeder plugs from the front stabilizer with tube cylinder assembly.
-
-
REMOVE FRONT STABILIZER LINK ASSEMBLY RH
-
Remove the bolt, spacer and front stabilizer link assembly.
-