REAR DIFFERENTIAL CARRIER OIL SEAL REPLACEMENT

PROCEDURE
-
REMOVE REAR PROPELLER SHAFT ASSEMBLY
-
Remove the rear propeller shaft assembly Click here.
-
-
REMOVE REAR DRIVE PINION NUT
-
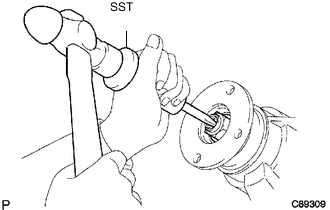
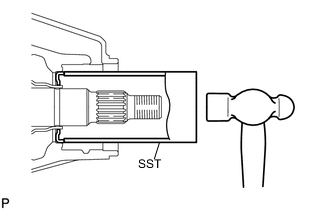
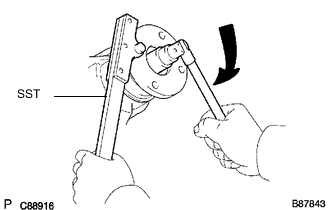
Using SST and a hammer, loosen the staked part of the rear drive pinion nut.
- SST
- 09930-00010
-
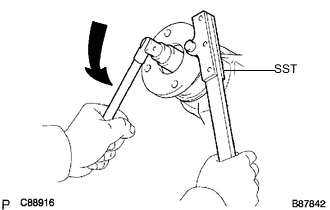
Use SST to hold the companion flange.
- SST
- 09330-00021 ( 09330-00030 )
-
Using a 30 mm socket wrench, remove the rear drive pinion nut.
-
-
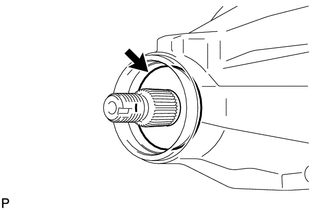
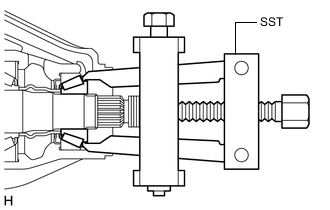
REMOVE REAR DRIVE PINION COMPANION FLANGE SUB-ASSEMBLY
-
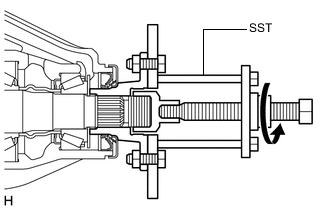
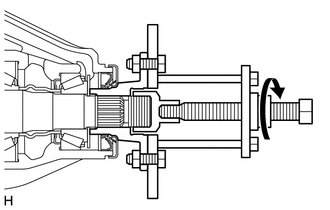
Using SST, remove the rear drive pinion companion flange sub-assembly.
- SST
- 09950-30012 ( 09951-03010, 09953-03010, 09954-03010, 09955-03030, 09956-03040 )
Note
Before using SST (center bolt), apply hypoid gear oil to its threads and tip.
-
-
REMOVE REAR DIFFERENTIAL CARRIER OIL SEAL
-
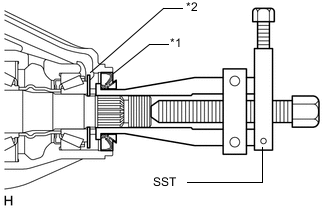
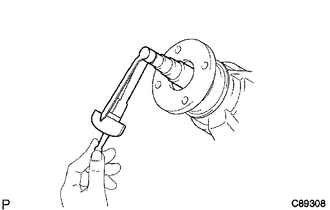
Text in Illustration *1 Oil Seal *2 Oil Slinger Using SST, remove the rear differential carrier oil seal.
- SST
- 09308-10010
-
-
REMOVE REAR DIFFERENTIAL DRIVE PINION OIL SLINGER
-
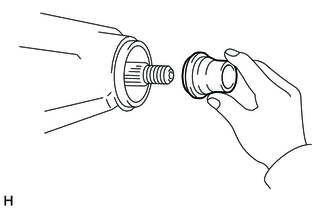
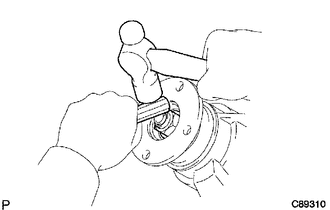
Remove the rear differential drive pinion oil slinger.
-
-
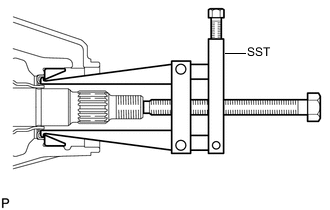
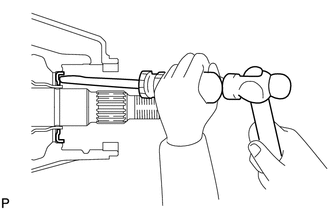
REMOVE REAR DRIVE PINION FRONT BEARING
-
Using SST, remove the rear drive pinion tapered roller bearing (inner).
- SST
- 09556-22010
-
Using SST, tap out the rear drive pinion tapered roller bearing (outer).
- SST
- 09308-55010
-
-
REMOVE DIFFERENTIAL OIL STORAGE RING
-
Using a screwdriver and hammer, tap out the differential oil storage ring.
-
-
REMOVE REAR DIFFERENTIAL DRIVE PINION BEARING SPACER
-
INSTALL REAR DIFFERENTIAL DRIVE PINION BEARING SPACER
-
Install a new rear differential drive pinion bearing spacer.
Note
Install the spacer so that it is facing in the correct direction.
-
-
INSTALL DIFFERENTIAL OIL STORAGE RING
-
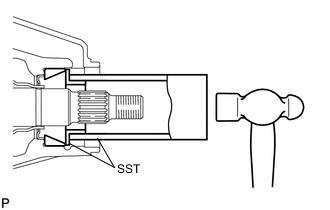
Using SST and a hammer, tap in a new differential oil storage ring.
- SST
- 09308-14010
Note
Be careful not to damage the oil storage ring.
-
-
INSTALL REAR DRIVE PINION FRONT BEARING
-
Using SST and a hammer, tap in the rear drive pinion front roller bearing (outer).
- SST
- 09308-14010
-
Install the rear drive pinion front roller bearing (inner).
-
-
INSTALL REAR DIFFERENTIAL DRIVE PINION OIL SLINGER
-
Install the rear differential drive pinion oil slinger.
-
-
INSTALL REAR DIFFERENTIAL CARRIER OIL SEAL
-
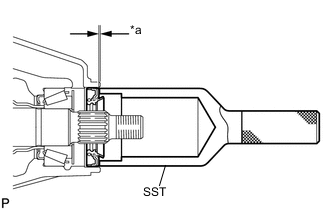
Text in Illustration *a Oil Seal Depth Apply MP grease to the lip of a new oil seal.
-
Using SST and a hammer, tap in the rear differential carrier oil seal.
- SST
- 09214-76011
Standard oil seal depth -0.30 to 0.30 mm (-0.0118 to 0.0118 in.)
-
-
INSTALL REAR DRIVE PINION COMPANION FLANGE SUB-ASSEMBLY
-
Using SST, install the rear drive pinion companion flange sub-assembly.
- SST
- 09950-30012 ( 09951-03010, 09953-03010, 09954-03010, 09955-03030, 09956-03040 )
Note
Before using SST (center bolt), apply hypoid gear oil to its threads and tip.
-
Using SST to hold the companion flange in place, then slowly tighten a new nut within the drive pinion preload adjustment range so that it reaches the specified drive pinion preload (at Starting).
- SST
- 09330-00021 ( 09330-00030 )
Limit Torque Value 457 N*m (4660 kgf*cm, 337ft.*lbf) or less
-
-
INSPECT DIFFERENTIAL DRIVE PINION PRELOAD
-
Using a torque wrench, measure the preload.
Standard Preload (at Starting) Item Specified Condition New bearing 0.83 to 2.18 N*m (9 to 22 kgf*cm, 8 to 19 in.*lbf) Used bearing 0.88 to 1.98 N*m (9 to 20 kgf*cm, 8 to 17 in.*lbf) If the result is not as specified, adjust the preload.
-
-
INSPECT TOTAL PRELOAD
-
Using a torque wrench, measure the preload with the teeth of the drive pinion and ring gear in contact.
Standard Drive Pinion Preload (at Starting) Item Specified Condition New bearing 1.03 to 2.58 N*m (11 to 26 kgf*cm, 10 to 22 in.*lbf) Used bearing 1.08 to 2.38 N*m (12 to 24 kgf*cm, 10 to 21 in.*lbf)
-
-
STAKE REAR DRIVE PINION NUT
-
Using a chisel and hammer, stake the rear drive pinion nut.
-
-
INSTALL REAR PROPELLER SHAFT ASSEMBLY
-
Install the rear propeller shaft assembly Click here.
-
-
INSTALL DIFFERENTIAL OIL
-
CHECK FOR DIFFERENTIAL OIL LEAKAGE