SHIFT LEVER INSTALLATION
PROCEDURE
-
INSTALL SHIFT LEVER ASSEMBLY
-
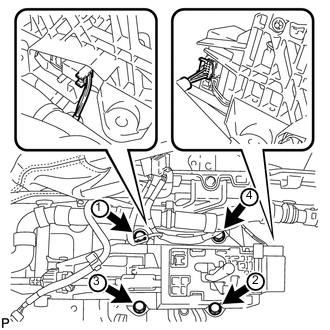
Install the transmission floor shift with the 4 bolts tighten the bolt in the order shown in the illustration.
- Torque:
- 14 N*m { 143 kgf*cm, 10 ft.*lbf }
-
Connect the 2 connectors.
-
-
CONNECT TRANSMISSION CONTROL CABLE ASSEMBLY
-
Turn the socket of the transmission control cable 180° counterclockwise. While holding the socket in place, push in the lock piece until the lock piece clicks twice.
Note
Do not over-rotate the socket as it will come off the internal spring and the transmission control cable will not be reusable.
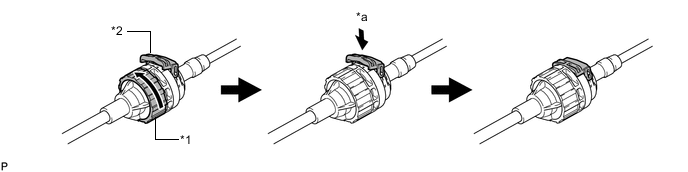
Text in Illustration *1 Socket *2 Lock Piece *a Push in - - Tech Tips
If the lock piece cannot be pushed in, slightly turn the socket clockwise and then push in the lock piece again.
-
Install the outer part of the transmission control cable to the shift lever retainer. Check that the socket and lock piece are positioned at original position.
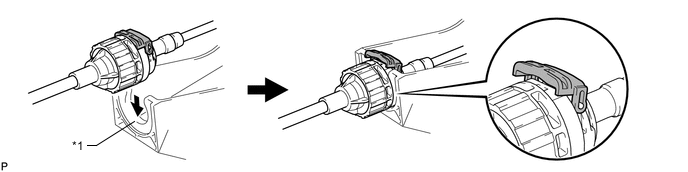
Text in Illustration *1 Shift Lever Retainer - - -
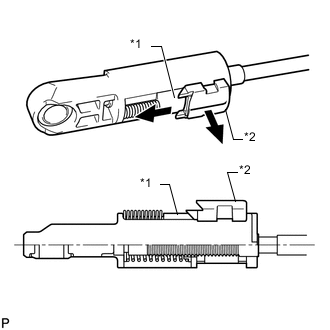
Text in Illustration *1 Slider *2 Lock Piece Slide the slider in the direction shown in the illustration and pull out the lock piece.
-
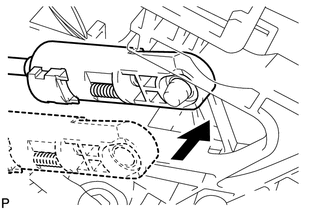
Connect the end of the cable to the shift lever.
Note
-
Make sure that the lock piece is pulled up.
-
Push on the end of the cable all the way to the base of the pin.
-
-
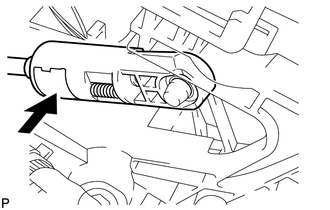
Push the lock piece into the adjuster case and lock it.
Note
Make sure that the lock piece is completely locked by the slider.
-
-
INSPECT SHIFT LEVER POSITION
-
INSTALL REAR CONSOLE BOX ASSEMBLY