FRONT CAMERA INSTALLATION

PROCEDURE
-
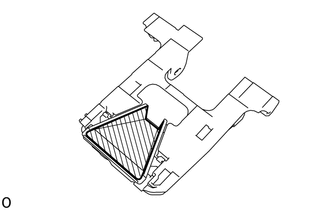
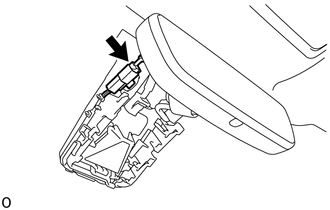
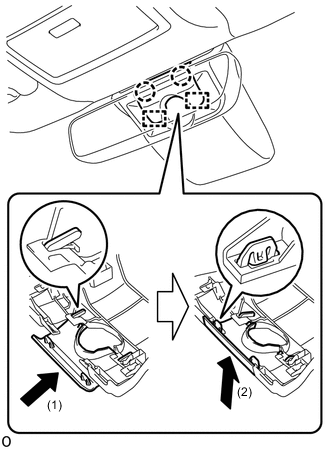
INSTALL FORWARD RECOGNITION WITH HEATER HOOD SUB-ASSEMBLY (w/ Camera Heater)
Note
Do not touch the internal components of the forward recognition with heater hood sub-assembly or press on the heater when working on the forward recognition with heater hood sub-assembly.
-
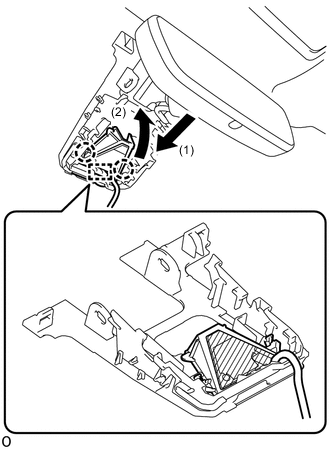

Heater Area Attach the guide in the direction indicated by the arrow (1) in the illustration.
-
Attach the 2 claws in the direction indicated by the arrow (2) in the illustration.
Note
Do not press the heater area.
-
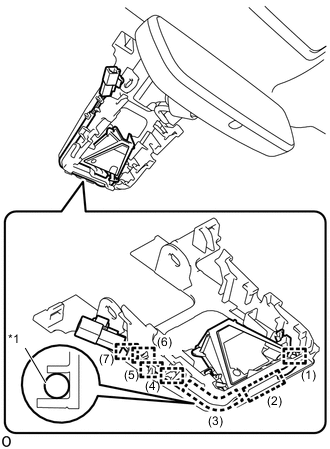
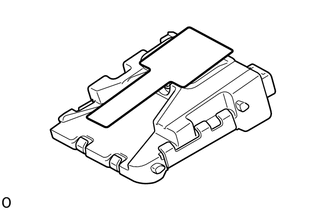
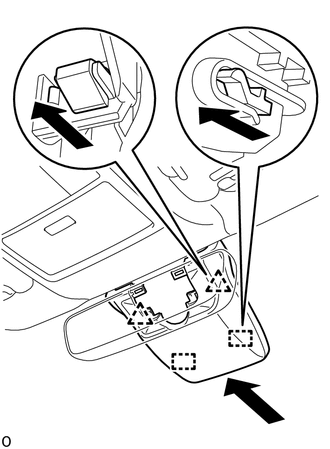
*1 Wire Harness Attach the 7 guides in the order shown in the illustration to install the wire harness to the forward recognition bracket.
-
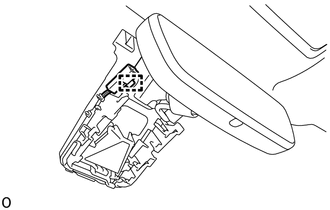
Attach the connector clamp to install the forward recognition with heater hood sub-assembly.
-
Connect the connector.
-
-
INSTALL FORWARD RECOGNITION CAMERA
Note
-
When replacing the forward recognition camera, replace it with a new one.
-
Do not touch the camera lens. If the camera lens has been touched, do not use the forward recognition camera.
-
If the forward recognition camera has been struck or dropped, replace it with a new one.
-
If the forward recognition camera is not properly installed, forward recognition camera optical axis learning cannot be performed properly. Make sure the forward recognition camera is installed securely.
-
Replace the forward recognition camera if there is any foreign matter on the camera lens.
-
When replacing the windshield glass of a vehicle equipped with a forward recognition camera, make sure to use a Toyota genuine part. If a non-Toyota genuine part is used, the forward recognition camera may not be able to be installed due to a missing bracket. Also, the dynamic radar cruise control system, forward recognition camera system, lane departure alert system, road sign assist system or pre-crash safety system may not operate properly due to a difference in the transmissivity or black ceramic border.
-
If the forward recognition camera bracket is deformed or damaged, replace it together with the windshield glass.
-
If there is any foreign matter on the area of the windshield glass in front of the forward recognition camera, clean the windshield glass before installing the forward recognition camera.
-
When using a new forward recognition camera:
-
Remove the protective film.
Note
Do not touch the camera lens after removing the protective film.
-
-
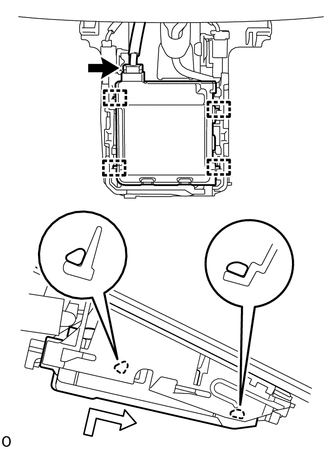
Attach the 4 guides to install the forward recognition camera as shown in the illustration.
Note
Do not touch the camera lens.
-
Connect the connector.
-
-
INSTALL FORWARD RECOGNITION LATCH
Note
Before installing the forward recognition latch, be sure to check that the forward recognition camera is securely installed.
-
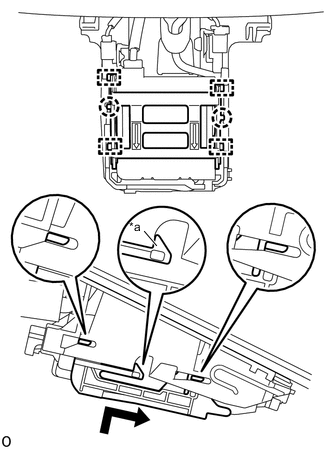
*a Make sure that the claw is securely attached. Attach the 4 guides and 2 claws to install the forward recognition camera as shown in the illustration.
Note
Check that the forward recognition latch is securely installed.
-
-
INSTALL NO. 1 FORWARD RECOGNITION COVER
-
Attach the 2 guides and 2 clips as shown in the illustration to install the No. 1 forward recognition cover.
Note
When installing, press the cover parallel to the windshield glass surface and install.
-
-
INSTALL NO. 2 FORWARD RECOGNITION COVER
-
Attach the 2 guides in direction indicated by arrow (1) shown in the illustration.
-
Attach the 2 claws in the direction of arrow (2) shown in the illustration to install the No. 2 forward recognition cover.
Note
If the 2 claws are attached separately they may become damaged. Therefore, attach them at the same time.
-
-
ADJUST FORWARD RECOGNITION CAMERA
-
If the forward recognition camera has been replaced or the windshield glass has been removed and installed, it is necessary to perform Forward Recognition Camera Learning.
-