FUEL TANK(for 3 Door) REMOVAL
PROCEDURE
-
DISCONNECT CABLE FROM NEGATIVE BATTERY TERMINAL
Note
-
After turning the ignition switch off, waiting time may be required before disconnecting the cable from the battery terminal. Therefore, make sure to read the disconnecting the cable from the battery terminal notice before proceeding with work Click here.
-
When disconnecting the cable, some systems need to be initialized after the cable is reconnected Click here.
-
-
REMOVE REAR FLOOR MAT SUPPORT PLATE
-
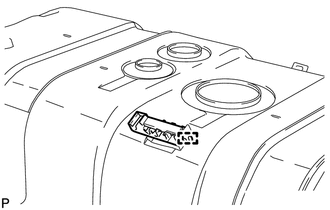
REMOVE REAR FLOOR SERVICE HOLE COVER
Tech Tips
Fold back the floor mat so that the rear floor service hole cover can be removed.
-
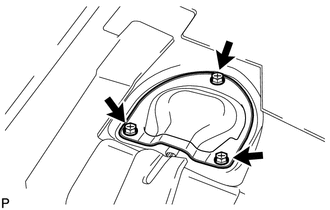
Remove the 3 screws and rear floor service hole cover.
-
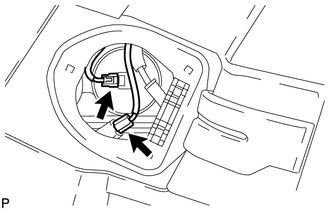
Disconnect the fuel sender gauge connector and fuel tank ground connector.
-
-
REMOVE NO. 1 FUEL TANK PROTECTOR SUB-ASSEMBLY
-
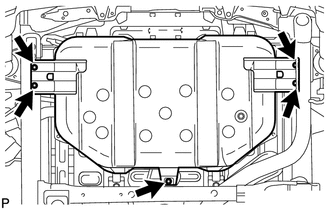
Remove the 5 bolts and No. 1 fuel tank protector sub-assembly.
-
-
DRAIN FUEL
-
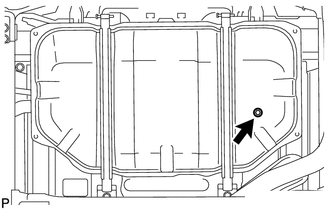
Remove the fuel tank drain plug and gasket and drain the fuel.
-
Install a new gasket and the fuel tank drain plug.
- Torque:
- 6.5 N*m { 66 kgf*cm, 58 in.*lbf }
-
-
DISCONNECT FUEL HOSE
-
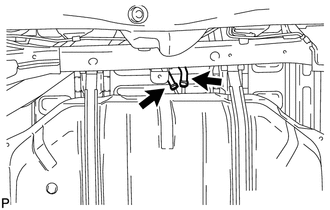
Slide the 2 clamps and disconnect the 2 fuel hoses from the fuel tank vent tube sub-assembly.
-
-
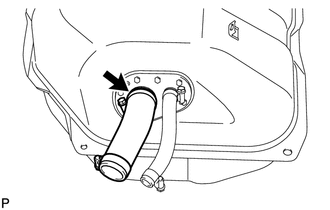
DISCONNECT FUEL TANK TO FILLER PIPE HOSE
-
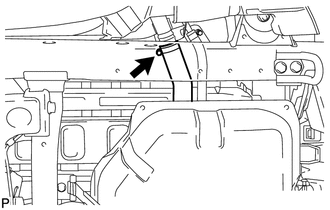
Loosen the clamp and fuel tank to filler pipe hose from the filler pipe.
-
-
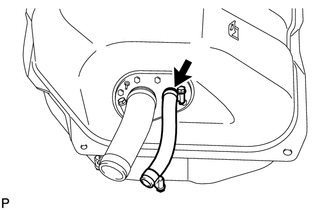
DISCONNECT FUEL TANK BREATHER HOSE
-

Loosen the clamp and disconnect the fuel tank breather hose from the filler pipe.
-
-
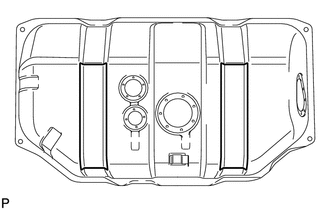
REMOVE FUEL TANK SUB-ASSEMBLY
-
Set a transmission jack underneath the fuel tank sub-assembly.
-
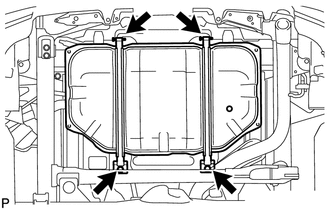
Remove the 2 bolts, 2 clips and 2 pins and disconnect the 2 fuel tank bands.
-
Remove the fuel tank sub-assembly.
-
-
REMOVE NO. 4 FUEL TUBE CLAMP
-
Detach the clamp and remove the No. 4 fuel tube clamp from the fuel tank check valve.
-
-
REMOVE FUEL TANK CHECK VALVE
-
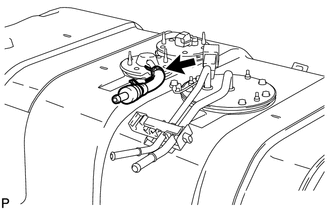
Disconnect the hose and remove the fuel tank check valve.
-
-
REMOVE FUEL TANK VENT TUBE SUB-ASSEMBLY
-
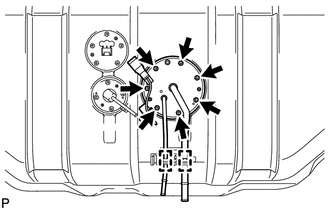
Remove the 7 screws, detach the 2 clamps and remove the fuel tank vent tube sub-assembly.
-
Remove the gasket from the fuel tank vent tube sub-assembly.
-
-
REMOVE NO. 1 FUEL EVAPORATION TUBE SUB-ASSEMBLY
-
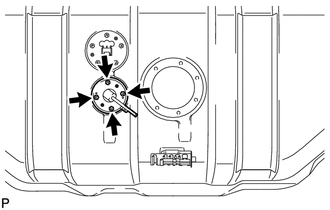
Remove the 4 screws and No. 1 fuel evaporation tube sub-assembly.
-
Remove the gasket from the No. 1 fuel evaporation tube sub-assembly.
-
-
REMOVE FUEL CUT OFF VALVE ASSEMBLY
-
Remove the fuel cut off valve assembly from the fuel tank sub-assembly.
-
-
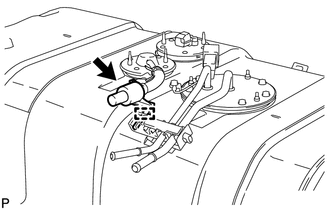
REMOVE FUEL SENDER GAUGE ASSEMBLY
-
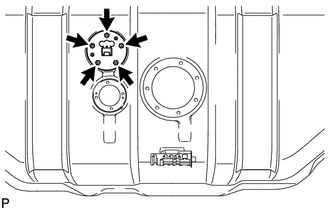
Remove the 5 screws and fuel sender gauge assembly.
Note
Be careful not to bend the arm of the fuel sender gauge assembly.
-
Remove the gasket from the fuel sender gauge assembly.
-
-
REMOVE FUEL TANK TO FILLER PIPE HOSE
-
Loosen the clamp and remove the fuel tank to filler pipe hose from the fuel tank sub-assembly.
-
-
REMOVE FUEL TANK BREATHER HOSE
-
Loosen the clamp and remove the fuel tank breather hose from the fuel tank sub-assembly.
-
-
REMOVE FUEL TANK FILLER PIPE LOWER SUB-ASSEMBLY
-
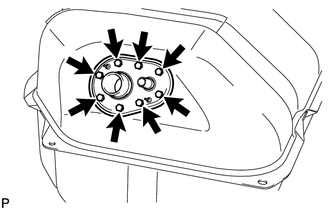
Remove the 8 screws and fuel tank filler pipe lower sub-assembly.
-
Remove the gasket from the fuel tank filler pipe lower sub-assembly.
-
-
REMOVE FUEL TUBE GROMMET
-
Detach the clamp and remove the fuel tube grommet.
-
-
REMOVE NO. 1 FUEL TANK CUSHION
-
Remove the 2 No. 1 fuel tank cushions from the fuel tank sub-assembly.
-