LANE RECOGNITION CAMERA SENSOR REMOVAL

Note
When replacing the windshield glass of a vehicle equipped with a lane departure warning camera, make sure to use a Toyota genuine part. If a non-Toyota genuine part is used, the lane departure warning camera may not be able to be installed due to a missing bracket or the lane departure alert system may not operate properly due to a difference in the transmissivity or black ceramic border.
-
REMOVE NO. 2 LANE DEPARTURE WARNING CAMERA COVER
-
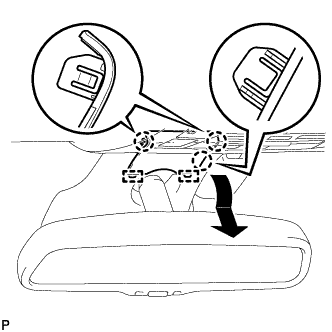
Disengage the 3 claws and 2 guides to remove the No. 2 lane departure warning camera cover as shown in the illustration.
Note
Detaching the claws one at a time may cause them to become damaged. Therefore, even if one of the claws is detached, make sure to reattach it before detaching both claws at the same time.
-
-
REMOVE NO. 1 LANE DEPARTURE WARNING CAMERA COVER
-
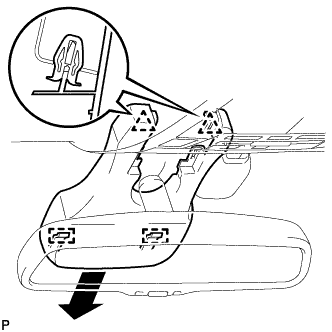
Pull the No. 1 lane departure warning camera cover as shown in the illustration to disengage the 2 clips and 2 guides, and remove the No. 1 lane departure warning camera cover.
-
-
REMOVE LANE DEPARTURE WARNING CAMERA
-
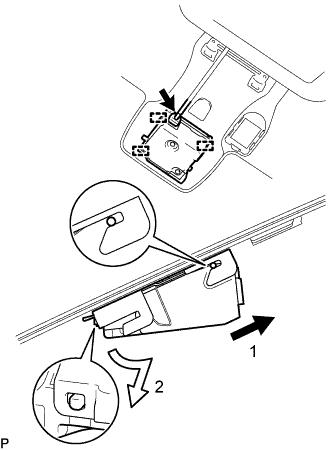
Disconnect the connector.
-
Disengage the 3 guides and remove the lane departure warning camera as indicated by the arrows, in the order shown in the illustration.
Note
-
Do not pull the harness forcibly when disconnecting the connector.
-
If the lane departure warning camera bracket is deformed or damaged, replace it together with the windshield glass.
-
If the lane departure warning camera is dropped, replace it with a new one.
-
-