CANISTER INSTALLATION

-
INSTALL CHARCOAL CANISTER LEAK DETECTION PUMP SUB-ASSEMBLY
-
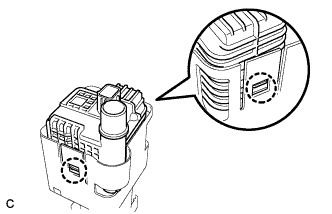
Engage the 2 claws to install a new charcoal canister leak detection pump sub-assembly to the canister.
Note
-
Do not allow foreign matter such as grease, oil or water to adhere to the O-rings.
-
Ensure that the claws are engaged properly.
-
-
-
INSTALL CHARCOAL CANISTER BASE BRACKET
-
Install the charcoal canister base bracket with the 2 bolts.
- Torque:
- 5.4 N*m { 55 kgf*cm, 48 in.*lbf }
-
-
INSTALL NO. 1 CHARCOAL CANISTER FILTER
-
Connect the vent hose.
Note
-
Check that there are no scratches or foreign matter around the connected part of the tube connector and pipe before performing this work.
-
After connecting the vent hose, check that the vent hose is securely connected by pulling on the tube connector and the charcoal canister.
-
-
Engage the 2 claws to install the cap.
-
-
INSTALL CHARCOAL CANISTER SUPPORT BRACKET
-
Install the charcoal canister support bracket with the 4 bolts.
- Torque:
- 5.4 N*m { 55 kgf*cm, 48 in.*lbf }
-
-
INSTALL CHARCOAL CANISTER ASSEMBLY
-
Connect the clip to install the charcoal canister assembly.
-
Install the 4 bolts and guide.
- Torque:
- 8.0 N*m { 82 kgf*cm, 71 in.*lbf }
-
Connect the purge line hose.
-
Connect the 2 tube clamps.
-
Connect the air line tube.
Note
-
Check that there are no scratches or foreign matter around the connected part of the tube connector and pipe before performing this work.
-
After connecting the air line tube, check that the air line tube is securely connected by pulling on the tube connector and the charcoal canister.
-
-
Connect the connector to the charcoal canister leak detection pump sub-assembly.
-
-
INSTALL FUEL TANK ASSEMBLY