ECM INSTALLATION

-
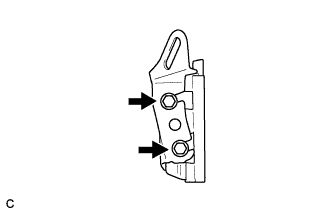
INSTALL NO. 1 ECM BRACKET
-
Install the No. 1 ECM bracket with the nut.
- Torque:
- 12 N*m { 122 kgf*cm, 9 ft.*lbf }
-
Connect the wire harness clamp.
-
Install the wire harness and 2 clamps.
-
Install the nut.
-
-
INSTALL NO. 1 RELAY BLOCK COVER
-
INSTALL ECM
-
Install the No. 2 ECM brackets to the ECM with the 2 screws.
- Torque:
- 3.0 N*m { 31 kgf*cm, 27 in.*lbf }
-
Temporarily install the screw (B).
-
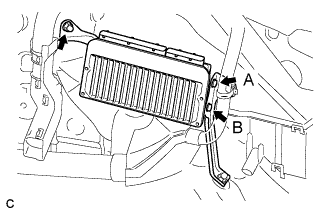
Install the ECM with the nut.
- Torque:
- 12 N*m { 122 kgf*cm, 9 ft.*lbf }
-
Install the screw (A).
- Torque:
- 3.0 N*m { 31 kgf*cm, 27 in.*lbf }
-
Tighten the screw (B).
- Torque:
- 3.0 N*m { 31 kgf*cm, 27 in.*lbf }
-
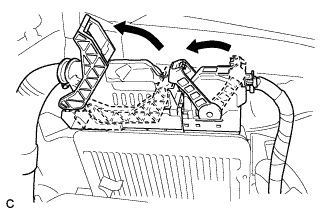
Connect the 2 ECM connectors and lower the 2 levers.
Note
-
When connecting the connectors, make sure that dirt, water or other foreign matter does not become stuck between the connectors and other part.
-
Make sure that the 2 levers are securely locked.
-
-
Connect the 2 wire harness clamps.
-
-
CONNECT CABLE TO NEGATIVE AUXILIARY BATTERY TERMINAL
Note
When disconnecting the cable, some systems need to be initialized after the cable is reconnected Click here.
-
INSTALL LUGGAGE TRIM SERVICE HOLE COVER
-
Engage the claw to connect the luggage trim service hole cover.
-
-
PERFORM INITIALIZATION