FRONT DOOR WINDOW FRAME MOULDING INSTALLATION

-
PRECAUTION
Note
After turning the ignition switch off, waiting time may be required before disconnecting the cable from the negative (-) battery terminal. Therefore, make sure to read the disconnecting the cable from the negative (-) battery terminal notices before proceeding with work Click here.
-
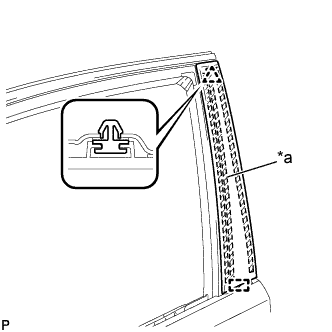
INSTALL FRONT DOOR UPPER WINDOW FRAME MOULDING
-
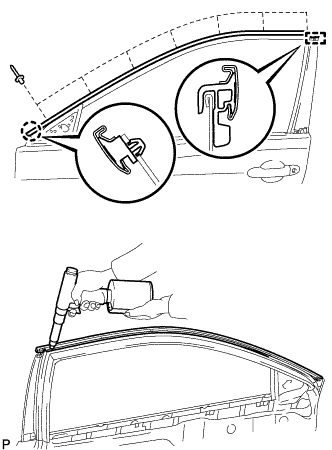
Engage the claw and guide of the front door upper window frame moulding to the door frame.
-
Using an air riveter or hand riveter with a nose piece, install the front door upper window frame moulding with 7 new rivets.
Tech Tips
If the mandrel of the rivet does not come off on the first operation of the rivet gun, slide the rivet gun forward on the mandrel and operate it again.
Note
-
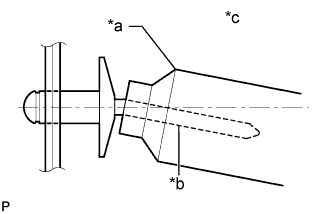
Do not pry the rivet with the riveter, as this will cause damage to the riveter and mandrel.
Text in Illustration *a Riveter *b Mandrel *c Incorrect -
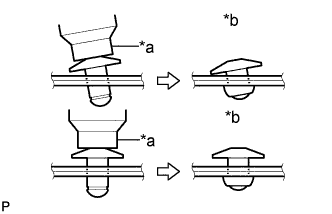
Confirm that the rivets are seated properly against the moulding.
Text in Illustration *a Riveter *b Incorrect -
Do not tilt the riveter when installing the rivet to the moulding.
-
Do not leave any space between the rivet head and moulding.
-
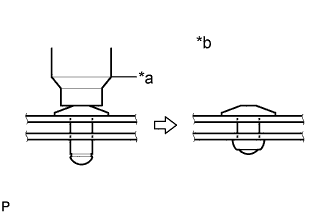
Do not leave any space between the moulding and door frame. Firmly hold the 2 items together while installing the rivet.
Text in Illustration *a Riveter *b Incorrect
-
-
-
INSTALL FRONT DOOR REAR WINDOW FRAME MOULDING
Tech Tips
When installing a new front door rear window frame moulding, heat the vehicle body and front door rear window frame moulding using a heat light.
Heating Temperature Item Temperature Vehicle Body 40 to 60°C (104 to 140°F) Front Door Rear Window Frame Moulding 20 to 30°C (68 to 86°F) Note
Do not heat the vehicle body or front door rear window frame moulding excessively.
-
Clean the vehicle body surface.
-
Using a heat light, heat the vehicle body surface.
-
Remove any remaining double-sided tape from the vehicle body.
-
Wipe off any tape adhesive residue with cleaner.
-
-
Using a heat light, heat the vehicle body and a new front door rear window frame moulding.
-
Remove the release paper from the front door rear window frame moulding.
Tech Tips
After removing the release paper, keep the exposed adhesive free from foreign matter.
-
Text in Illustration *a Caulking Sponge 
Double-sided Tape Engage the clip and guide, and attach the double-sided tape to install the front door rear window frame moulding.
-
-
INSTALL FRONT DOOR WEATHERSTRIP
-
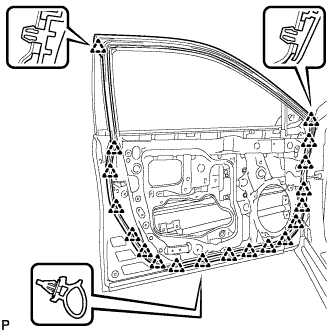
Engage the 19 clips and install the front door weatherstrip.
-
-
INSTALL FRONT DOOR CHECK ASSEMBLY
-
Apply MP grease to the sliding parts of the front door check assembly.
-
Clean the bolt hole on the vehicle body.
-
Clean the bolt threads of the bolt.
-
Apply adhesive to the threads of the bolt.
Adhesive Toyota Genuine Adhesive 1324, Three Bond 1324 or equivalent -
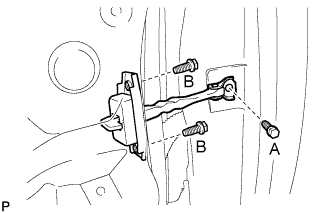
Install the front door check assembly with the 3 bolts.
- Torque:
- Bolt (A)
- 29 N*m { 296 kgf*cm, 21 ft.*lbf }
- Bolt (B)
- 5.5 N*m { 56 kgf*cm, 49 in.*lbf }
-
-
INSTALL FRONT DOOR GLASS RUN
-
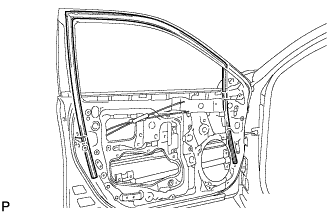
Install the front door glass run.
-
-
INSTALL FRONT DOOR BELT MOULDING ASSEMBLY