REAR BODY SIDE PANEL PROTECTOR REMOVAL

Tech Tips
-
Use the same procedure for the RH side and LH side.
-
The following procedure is for the LH side.
-
REMOVE REAR SEAT CUSHION ASSEMBLY
-
Disengage the hook of the seat cushion from the vehicle body as shown in the illustration.
Note
Follow the instructions below carefully as the cushion frame can be deformed easily.
-
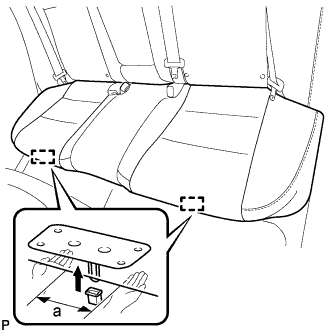
Choose a hook to disengage first. Place your hands near the hook as shown in the illustration. Then lift the seat cushion to disengage the hook.
Standard Measurement a 100 mm (3.94 in.) or less -
Repeat the step above for the other hook.
-
-
Remove the rear seat cushion assembly.
-
-
REMOVE REAR SEAT CUSHION LOCK HOOK
-
Disengage the claw and remove the rear seat cushion lock hook.
Note
Rear seat cushion lock hooks must not be reused.
Tech Tips
Use the same procedure for the RH side and the LH side.
-
-
REMOVE REAR SIDE SEATBACK ASSEMBLY
-
Disconnect the rear seat outer belt from the rear seat shoulder belt guide.
-
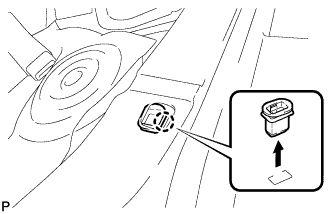
Disconnect the connector.
-
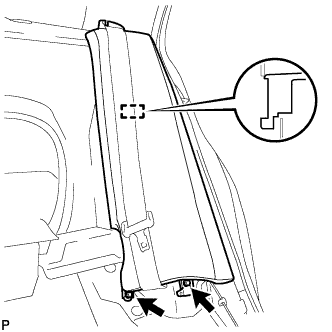
Remove the 2 bolts.
-
Disengage the hook and remove the rear side seatback assembly LH.
-
-
REMOVE ROOF SIDE INNER GARNISH
-
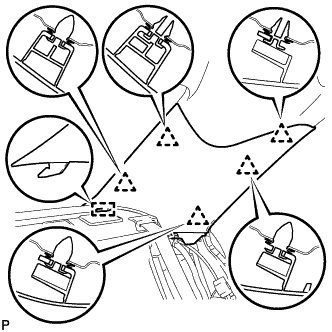
Disengage the 5 clips.
-
Disengage the guide and remove the roof side inner garnish LH.
-
-
REMOVE REAR OUTER PILLAR GARNISH SUB-ASSEMBLY
Tech Tips
When removing the rear outer pillar garnish sub-assembly, heat the vehicle body and rear outer pillar garnish sub-assembly using a heat light.
Heating Temperature Item Temperature Vehicle Body 40 to 60°C (104 to 140°F) Rear Outer Pillar Garnish Sub-assembly 20 to 30°C (68 to 86°F) Note
Do not heat the vehicle body, rear outer pillar garnish sub-assembly excessively.
-
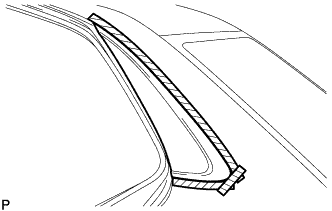
Apply protective tape around the rear outer pillar garnish sub-assembly as shown in the illustration.
Text in Illustration 
Protective Tape -
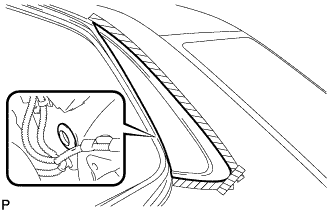
Remove the grommet.
-
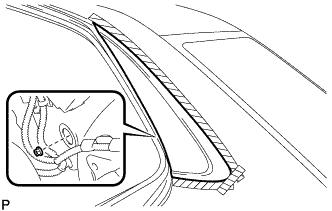
Remove the nut.
-
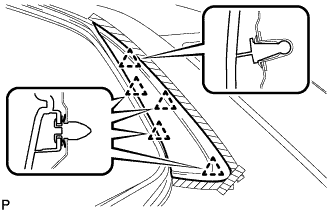
Disengage the 5 clips and remove the rear outer pillar garnish sub-assembly.
-