LUGGAGE COMPARTMENT DOOR DISASSEMBLY

-
REMOVE LUGGAGE COMPARTMENT DOOR COVER
-
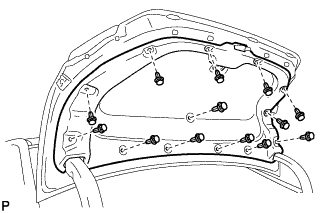
Remove the 13 clips and luggage compartment door cover.
-
-
REMOVE LUGGAGE COMPARTMENT DOOR CUSHION
-
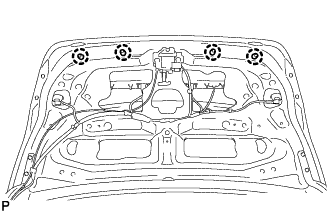
Disengage the 4 claws and remove the 4 luggage compartment door cushions.
-
-
REMOVE LUGGAGE COMPARTMENT DOOR HINGE COVER LH
-
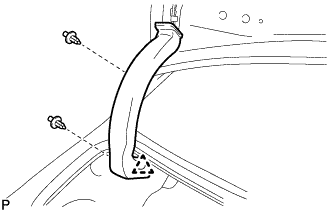
Remove the 2 clips.
-
Disengage the clip and remove the luggage compartment door hinge cover LH.
-
-
REMOVE LUGGAGE COMPARTMENT DOOR HINGE COVER RH
Tech Tips
Use the same procedure as for the LH side.
-
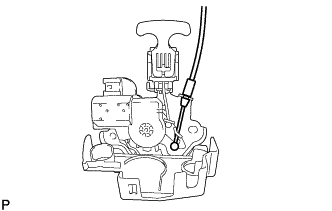
REMOVE LUGGAGE COMPARTMENT DOOR LOCK ASSEMBLY
-
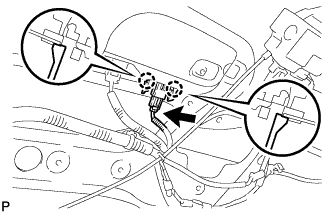
Disconnect the connector.
-
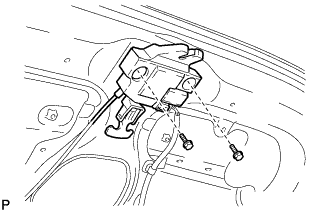
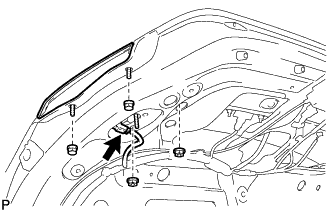
Remove the 2 bolts and disengage the luggage compartment door lock assembly.
-
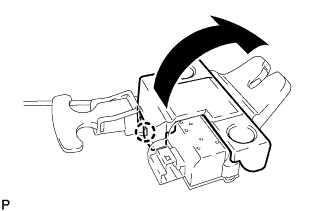
Disengage the claw as shown in the illustration.
-
Disengage the luggage door lock control cable sub-assembly and remove the luggage compartment door lock assembly.
-
-
REMOVE REAR SPOILER SUB-ASSEMBLY (w/ Rear Spoiler)
Tech Tips
When removing the rear spoiler sub-assembly, heat the vehicle body and rear spoiler sub-assembly using a heat light.
Heating Temperature Item Temperature Vehicle Body 40 to 60°C (104 to 140°F) Rear Spoiler 20 to 30°C (68 to 86°F) Note
Do not heat the vehicle body, rear spoiler sub-assembly excessively.
-

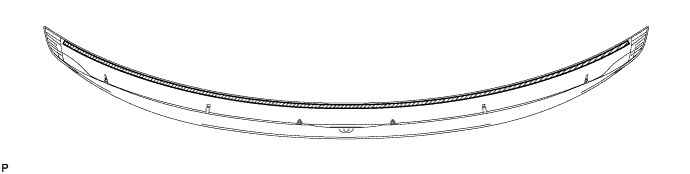
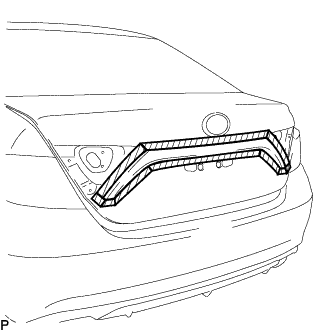
Apply protective tape around the rear spoiler sub-assembly as shown in the illustration.
Text in Illustration 
Protective Tape -
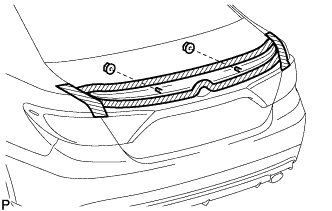
Remove the 2 nuts.
-
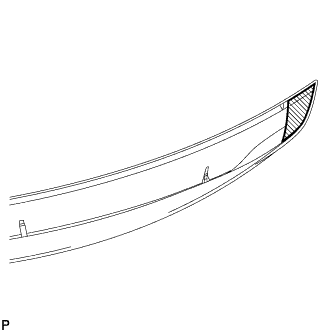
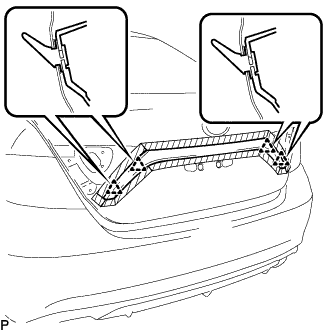
Insert a piano wire between the vehicle body and rear spoiler sub-assembly.
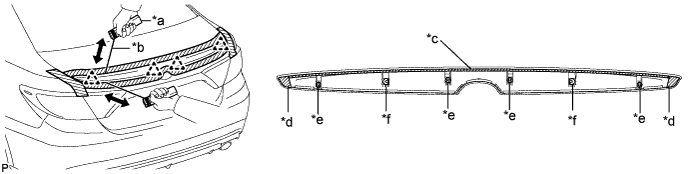
Text in Illustration *a Wooden Block *b Piano Wire *c No. 1 Rear Spoiler Protector *d No. 2 Rear Spoiler Protector *e Clip *f Stud Bolt -
Tie objects that can serve as handles (for example, wooden blocks) to both wire ends.
-
Pull the piano wire and scrape off the No. 1 rear spoiler protector and 2 No. 2 rear spoiler protectors that holds the rear spoiler sub-assembly to the vehicle body.
Note
Be careful not to damage the vehicle body.
-
Disengage the 4 clips and remove the rear spoiler sub-assembly.
-
Remove the No. 1 rear spoiler protector.
-
Remove the No. 2 rear spoiler protector.
Tech Tips
Use the same procedure for the RH side and LH side.
-
Remove the 4 clips from the rear spoiler.
-
Remove the 2 gaskets from the rear spoiler.
-
When replacing the rear spoiler with a new one:
-
Remove the 2 stud bolts from the rear spoiler.
-
-
-
REMOVE REAR LIGHT ASSEMBLY LH
-
Disconnect the connector.
-
Remove the 4 nuts and rear light assembly.
-
-
REMOVE REAR LIGHT ASSEMBLY RH
Tech Tips
Use the same procedure as for the LH side.
-
REMOVE LUGGAGE COMPARTMENT DOOR OUTSIDE GARNISH SUB-ASSEMBLY
-
w/ Smart Key System:
-
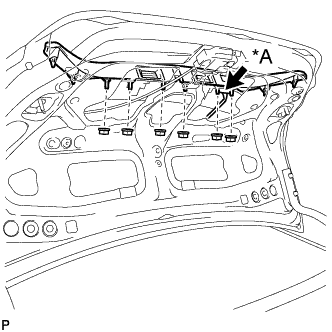
Text in Illustration *A w/ Smart Key System Disconnect the connector.
-
-
Remove the 6 nuts.
-
Apply protective tape around the luggage compartment door outside garnish sub-assembly as shown in the illustration.
Text in Illustration Protective Tape -
Disengage the 4 clips to remove the luggage compartment door outside garnish sub-assembly.
-
Remove the 4 clips from the luggage compartment door outside garnish sub-assembly.
-
Remove the 6 gaskets from the luggage compartment door outside garnish sub-assembly.
-
-
REMOVE LICENSE PLATE LIGHT ASSEMBLY LH
-
Disconnect the connector.
-
Disengage the 2 claws and remove the license plate light assembly.
-
-
REMOVE LICENSE PLATE LIGHT ASSEMBLY RH
Tech Tips
Use the same procedure for the RH side and LH side.