ROOM LIGHT REMOVAL

-
REMOVE NO. 1 ROOM LIGHT ASSEMBLY (w/o Sliding Roof)
-
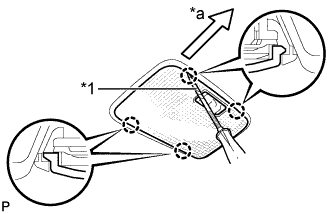
Text in Illustration *1 Protective Tape *a Front Using a screwdriver with its tip wrapped with protective tape, disengage the 4 claws and remove the No. 1 room light lens.
-
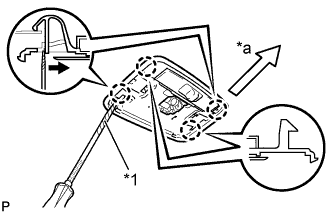
Text in Illustration *1 Protective Tape *a Front Using a screwdriver with its tip wrapped with protective tape, disengage the 4 claws as shown in the illustration and remove the No. 1 room light housing.
-
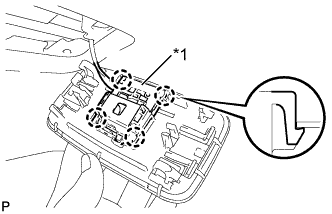
Text in Illustration *1 Room Light Switch Base Using a screwdriver, disengage the 4 claws and disconnect the room light switch base from the No. 1 room light housing.
-
-
REMOVE SPOT LIGHT ASSEMBLY (w/ Sliding Roof)
-
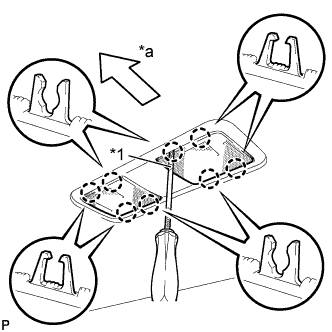
Text in Illustration *1 Protective Tape *a Front Using a screwdriver with its tip wrapped with protective tape, disengage the 8 claws and remove the 2 spot light lenses.
-
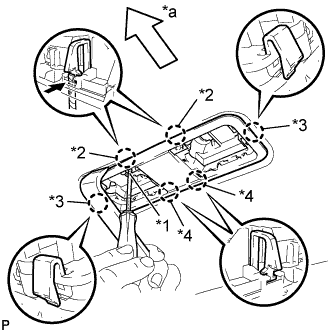
Text in Illustration *1 Protective Tape *2 Claw <A> *3 Claw <B> *4 Claw <C> *a Front Using a screwdriver with its tip wrapped with protective tape and moulding remover, disengage the 2 claws <A>.
-
Disengage the 2 claws <B> and 2 claws <C>, and disconnect the spot light housing.
-

Text in Illustration *1 Map Light Sub-assembly Using a screwdriver, disengage the 8 claws and disconnect the 2 map light sub-assemblies from the spot light housing.
-