INSTRUMENT PANEL SPEAKER REMOVAL

Note
-
Use the same procedure for the RH side and LH side.
-
The following procedure is for the LH side.
for Side:
-
DISCONNECT FRONT DOOR OPENING TRIM WEATHERSTRIP
-
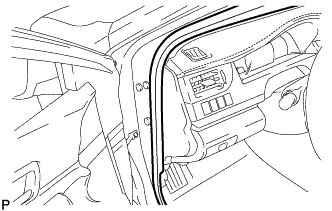
Disconnect the front door opening trim weatherstrip LH.
-
-
REMOVE FRONT PILLAR GARNISH
-
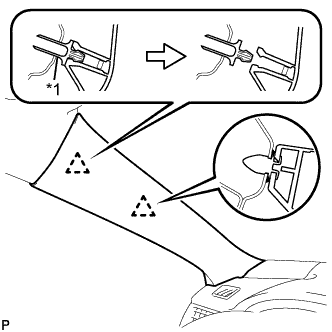
Text in Illustration *1 Front Pillar Garnish Clip Pull the upper part of the garnish toward the inside of the cabin and disengage the garnish from the base of the 2 clips.
Tech Tips
Make the front pillar garnish LH hang down from the front pillar garnish clip.
-
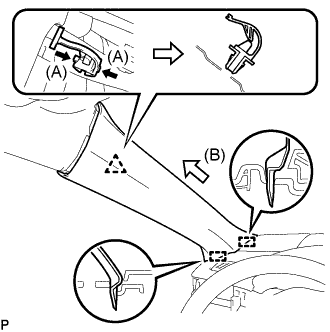
While pushing the tabs on the front pillar garnish clip in the direction indicated by the arrow (A) shown in the illustration, disengage the front pillar garnish clip.
Note
Do not apply excessive force using a tool.
-
Pull the garnish in the direction indicated by the arrow (B) shown in the illustration to disengage the 2 guides and remove the front pillar garnish LH.
-
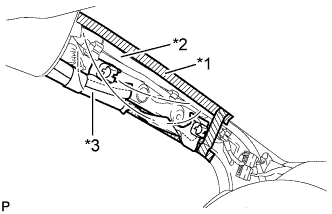
Text in Illustration *1 Adhesive Tape *2 Protective Cover *3 Curtain Shield Airbag Assembly Protect the curtain shield airbag assembly.
-
Cover the airbag with a piece of cloth or nylon and secure the edges of the cover with tape as shown in the illustration.
Note
Cover the curtain shield airbag with a protective cover as soon as the front pillar garnish is removed.
-
-
-
REMOVE INSTRUMENT PANEL SPEAKER PANEL SUB-ASSEMBLY
-
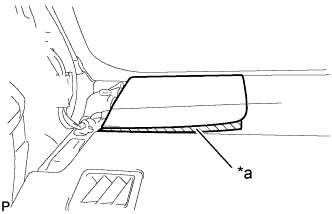
Text in Illustration *a Protective Tape Apply protective tape to the area shown in the illustration.
-
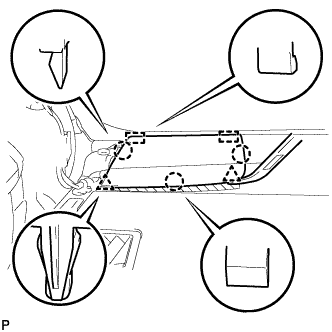
Using a moulding remover, disengage the 2 clips and 3 claws.
-
Disengage the 2 guides to remove the No. 1 instrument panel speaker panel sub-assembly.
-
-
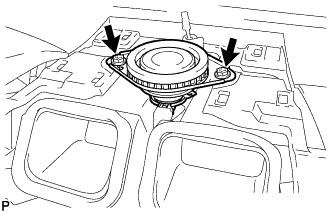
REMOVE FRONT NO. 2 SPEAKER ASSEMBLY
Note
Do not touch the speaker cone.
-
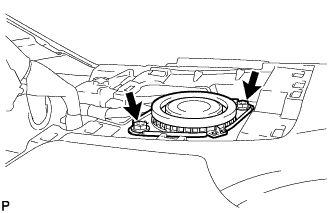
Remove the 2 screws.
-
Lift the front No. 2 speaker assembly and disconnect the connector to remove the speaker.
-
-
REMOVE NO. 1 SPEAKER OPENING COVER ASSEMBLY (for 10 Speakers)
-
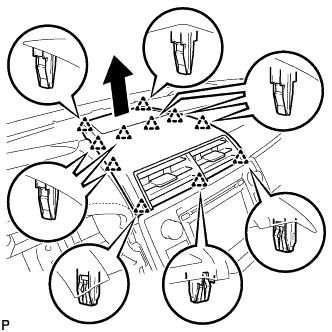
Using a moulding remover, disengage the 11 clips as shown in the illustration.
-
Disconnect the connector to remove the No. 1 speaker opening cover assembly.
-
-
REMOVE FRONT NO. 3 SPEAKER ASSEMBLY (for 10 Speakers)
Note
Do not touch the speaker cone.
-
Remove the 2 screws.
-
Lift the front No. 3 speaker assembly and disconnect the connector to remove the speaker.
-